
Tutorial
Starter guide on Amazon Web Services
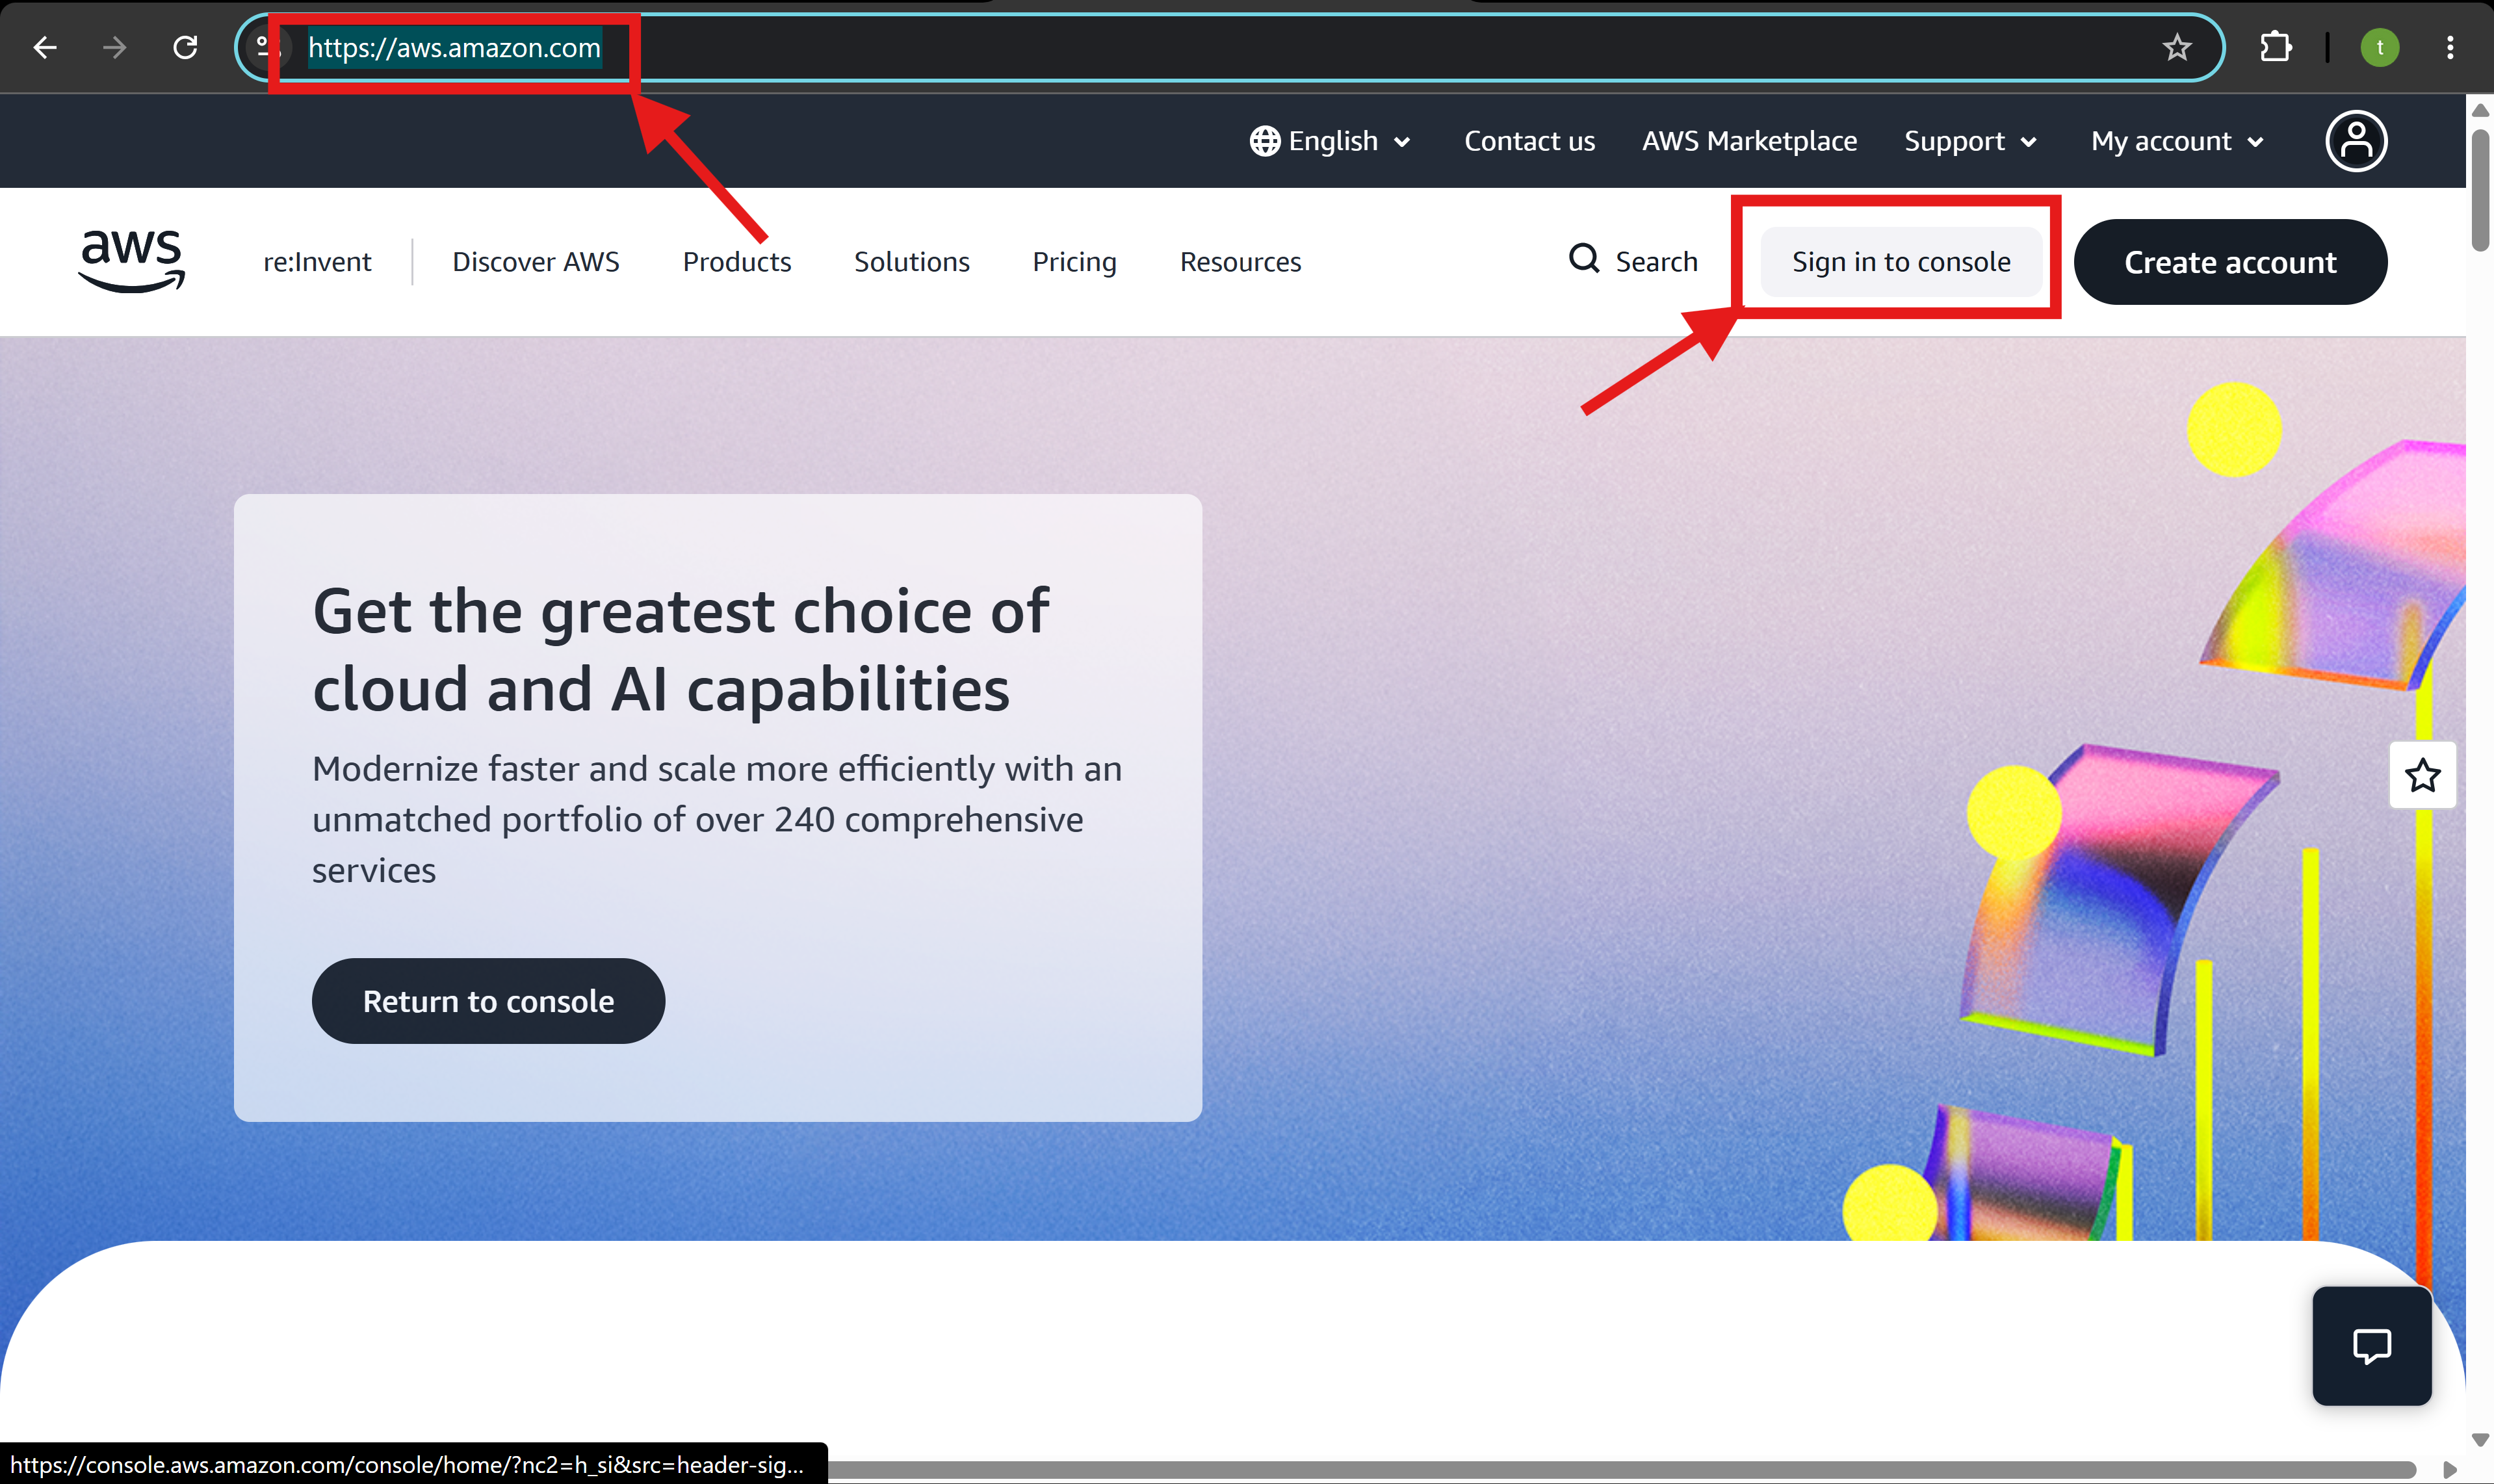
1. First go to https://aws.amazon.com/ and click on "Sign In to the Console" on the top right corner. Login or create an account if you don't already have one.
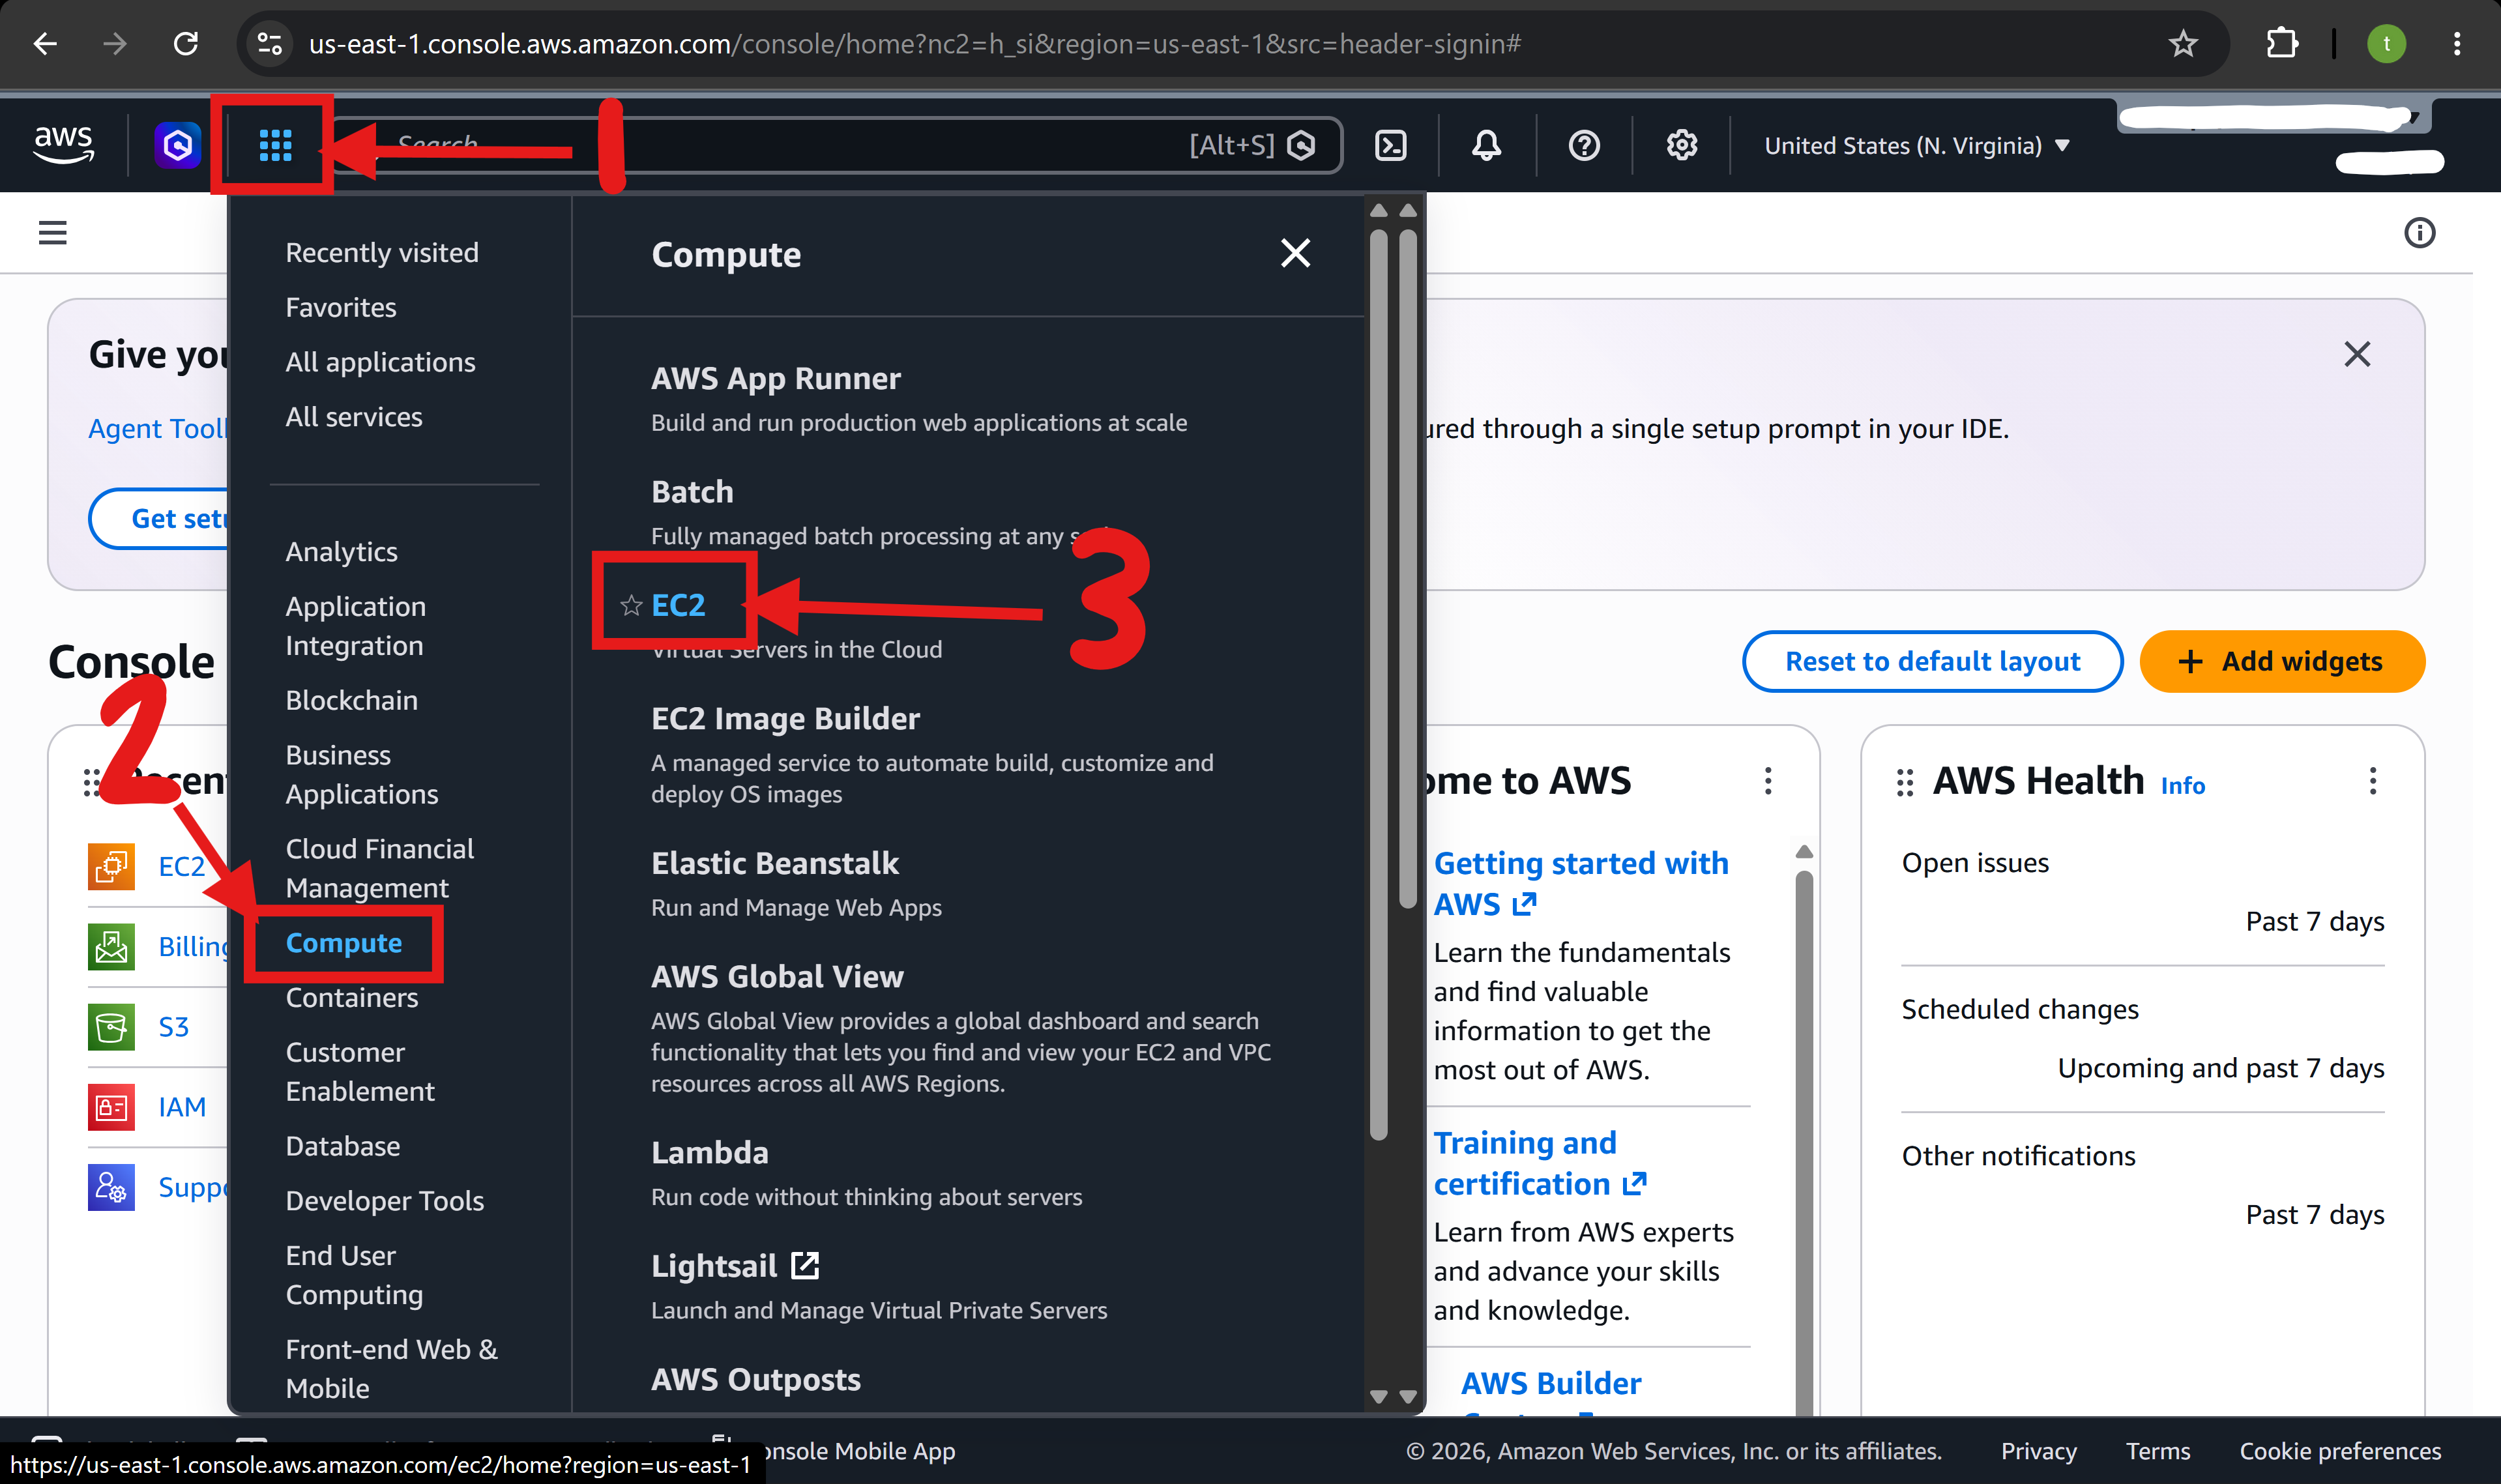
2. After login, select "EC2" from the service dropdown menu. (Press the waffle icon->press comupte on the left side->press EC2)
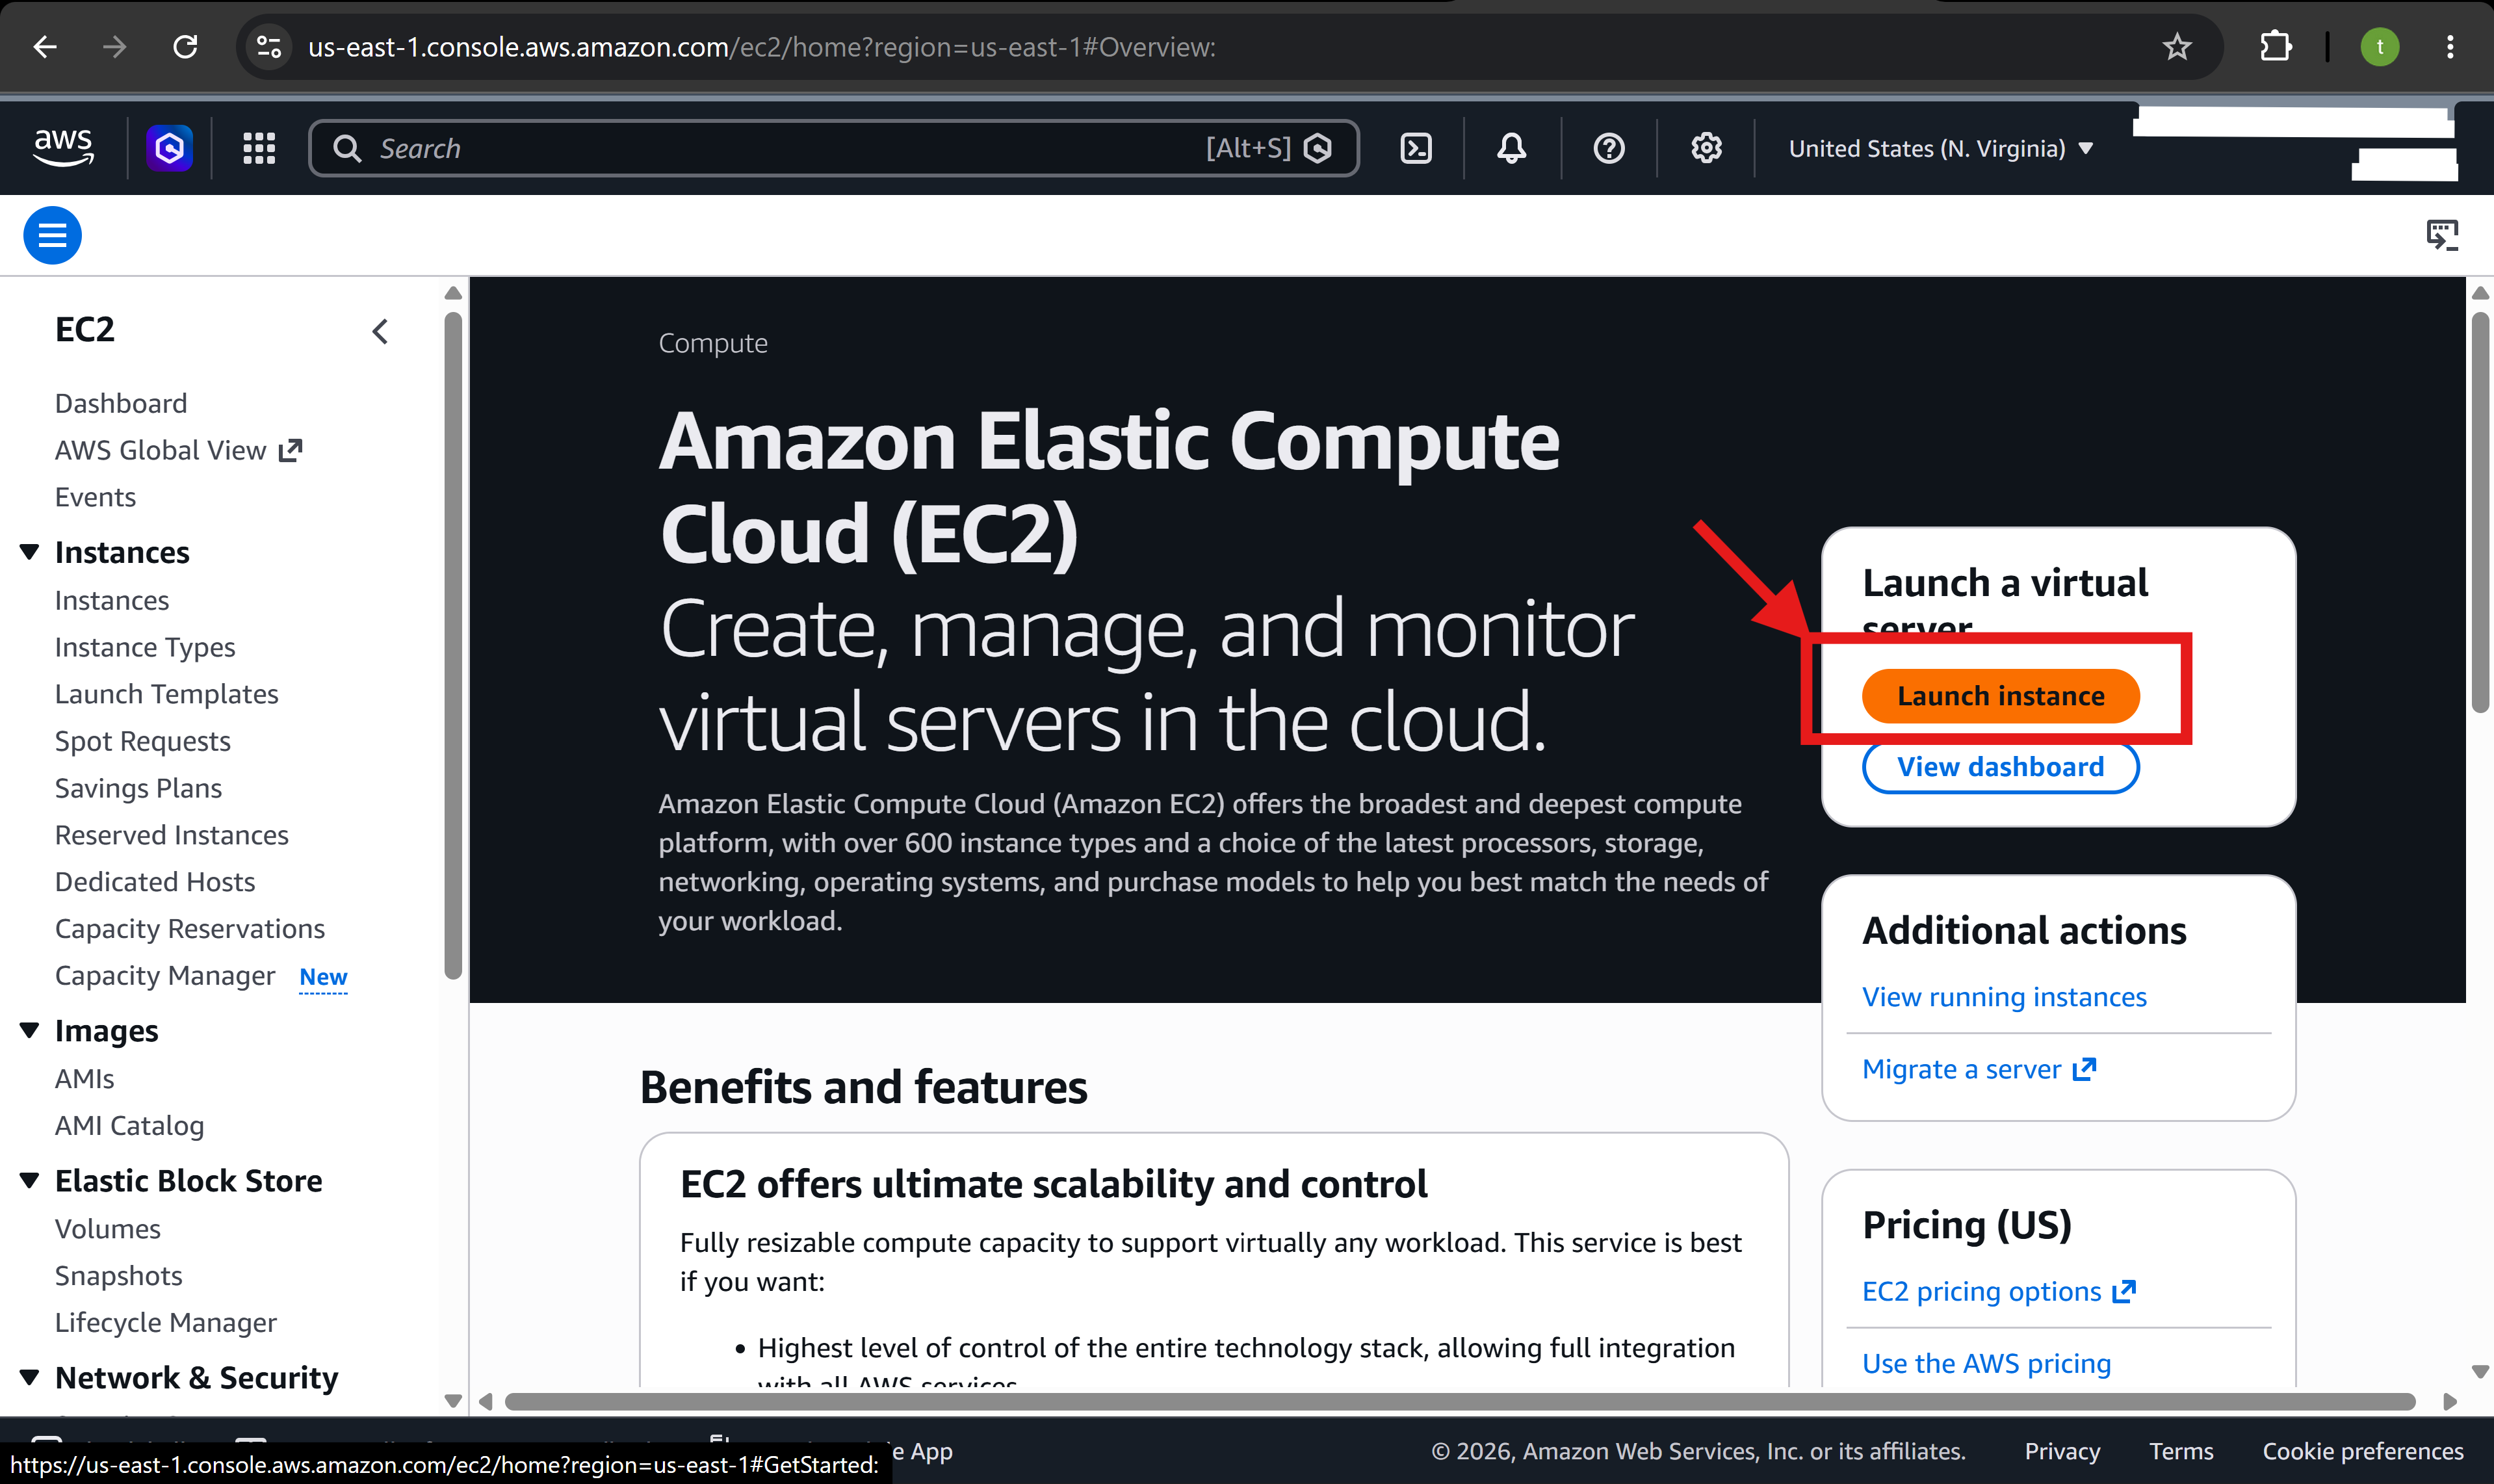
3. Scroll down and select "launch instance".
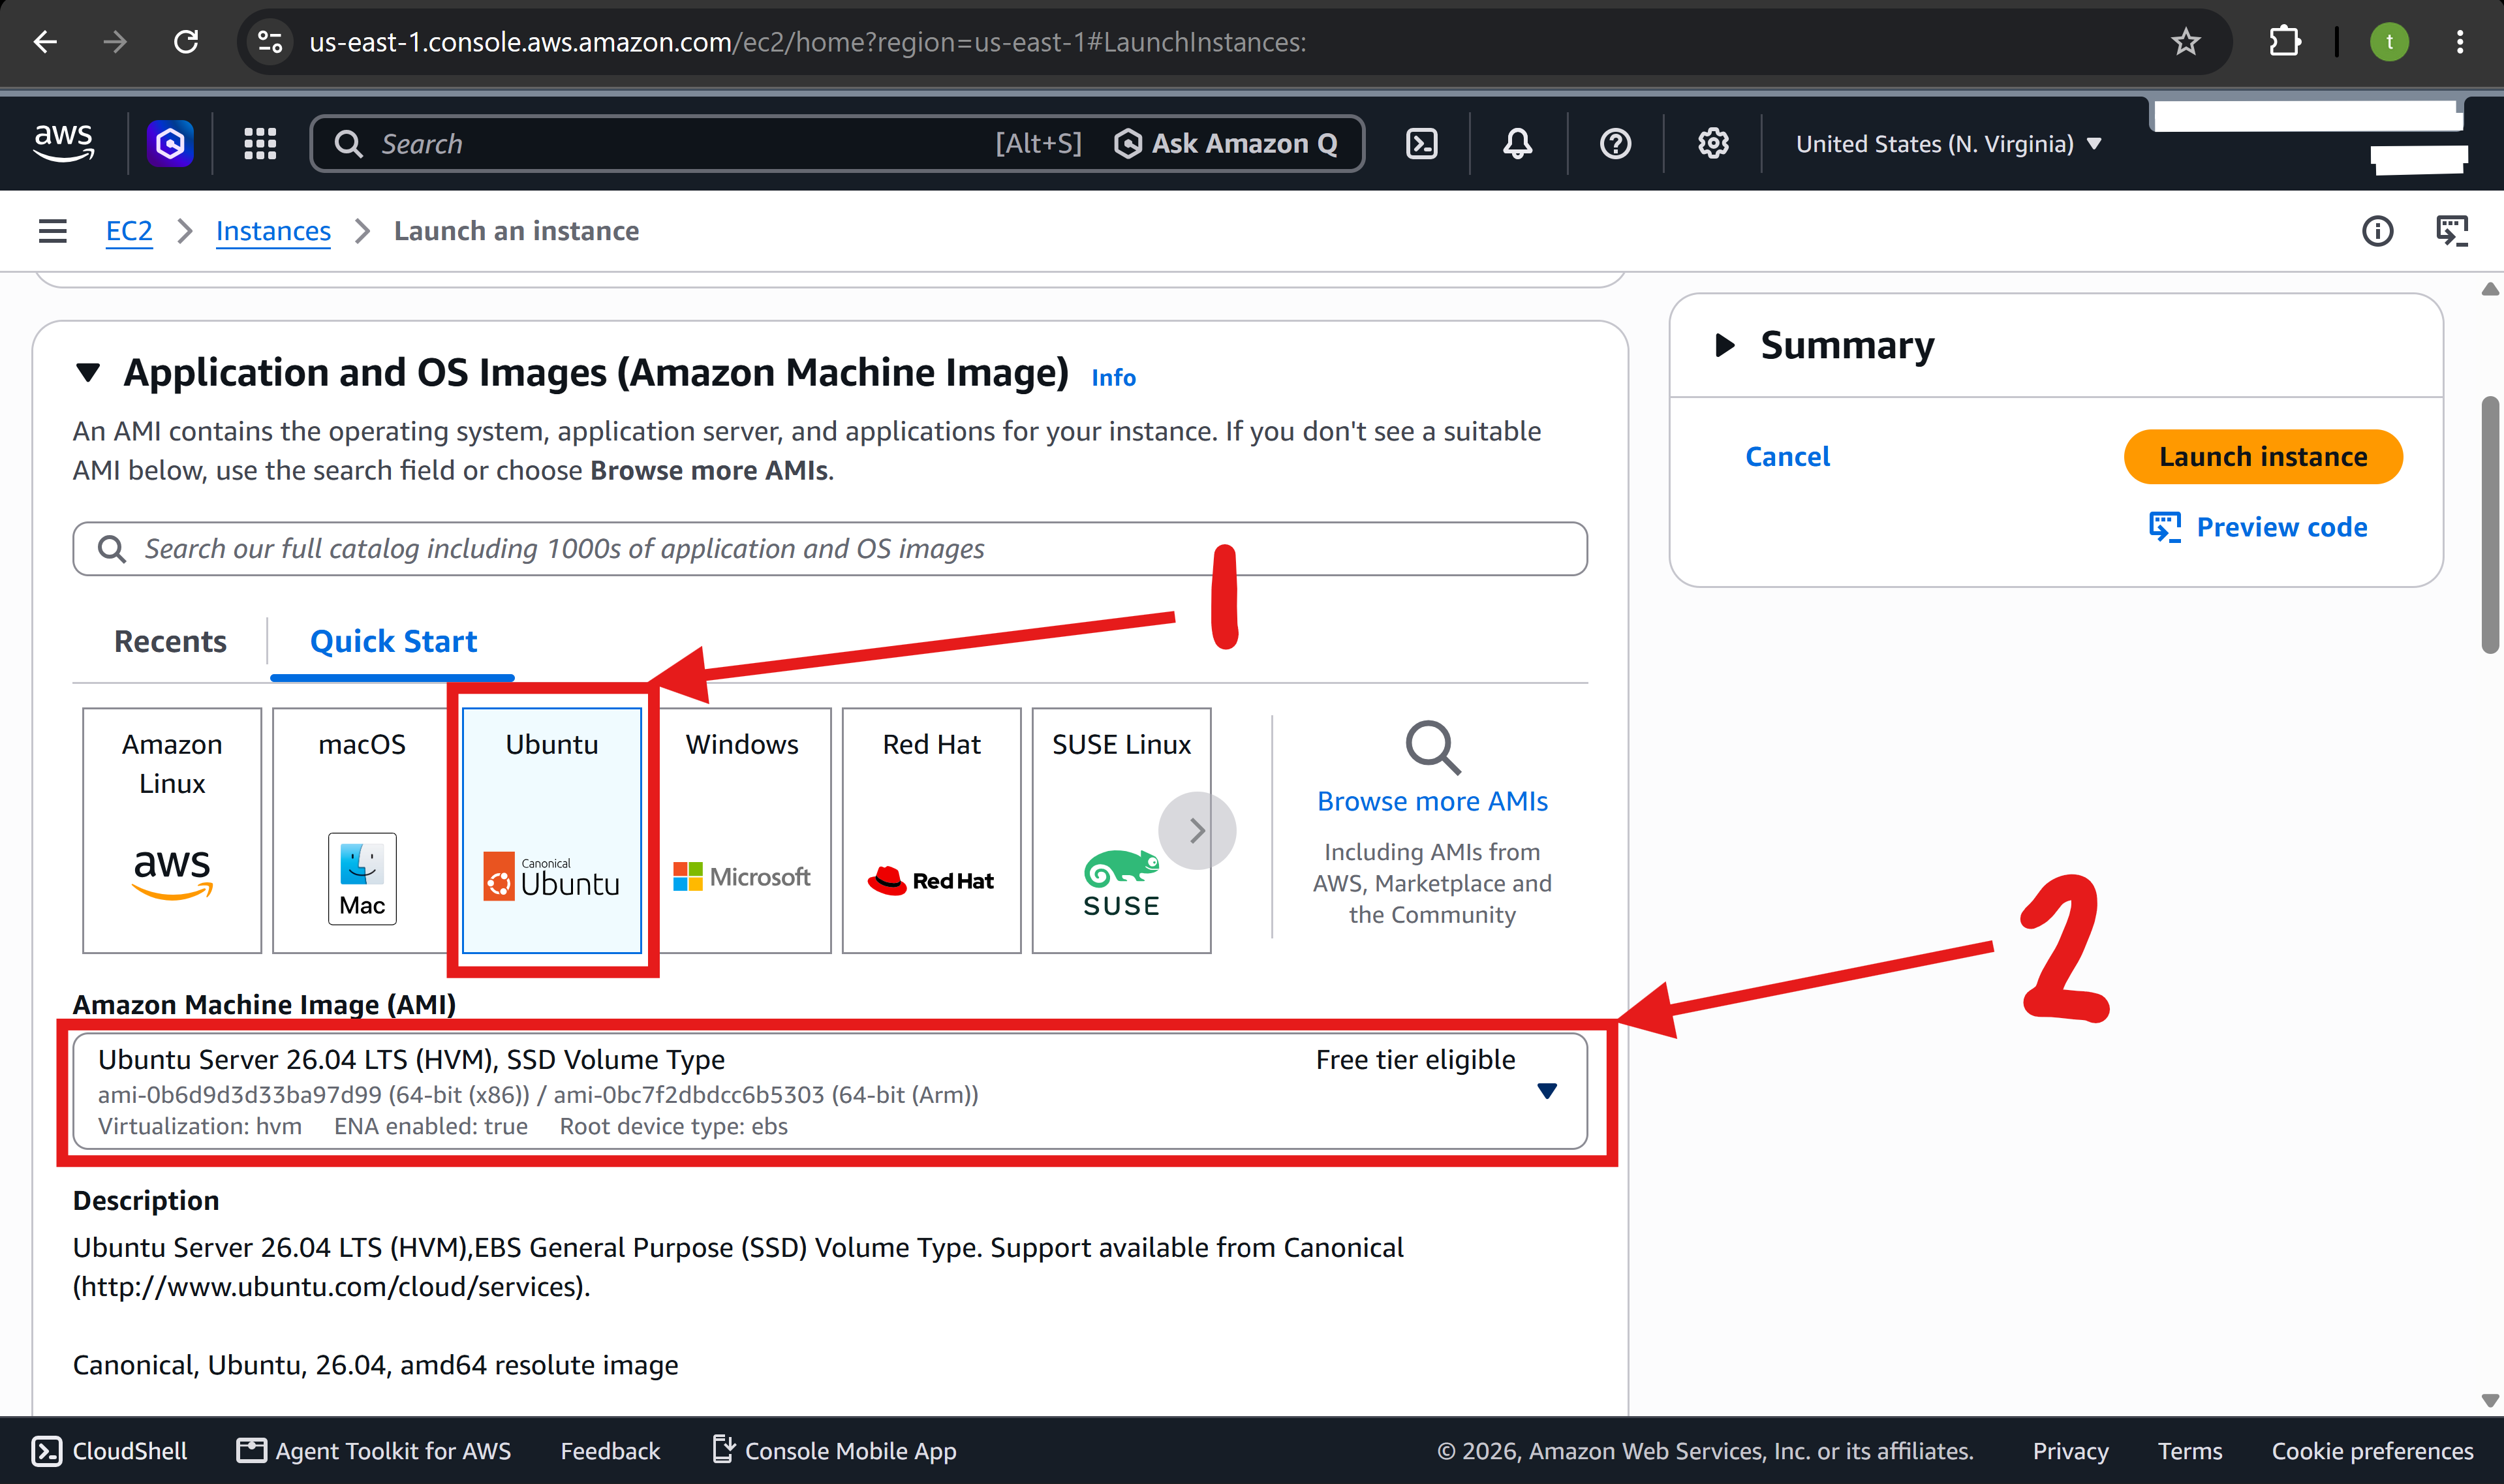
4.1. You will land on this page.
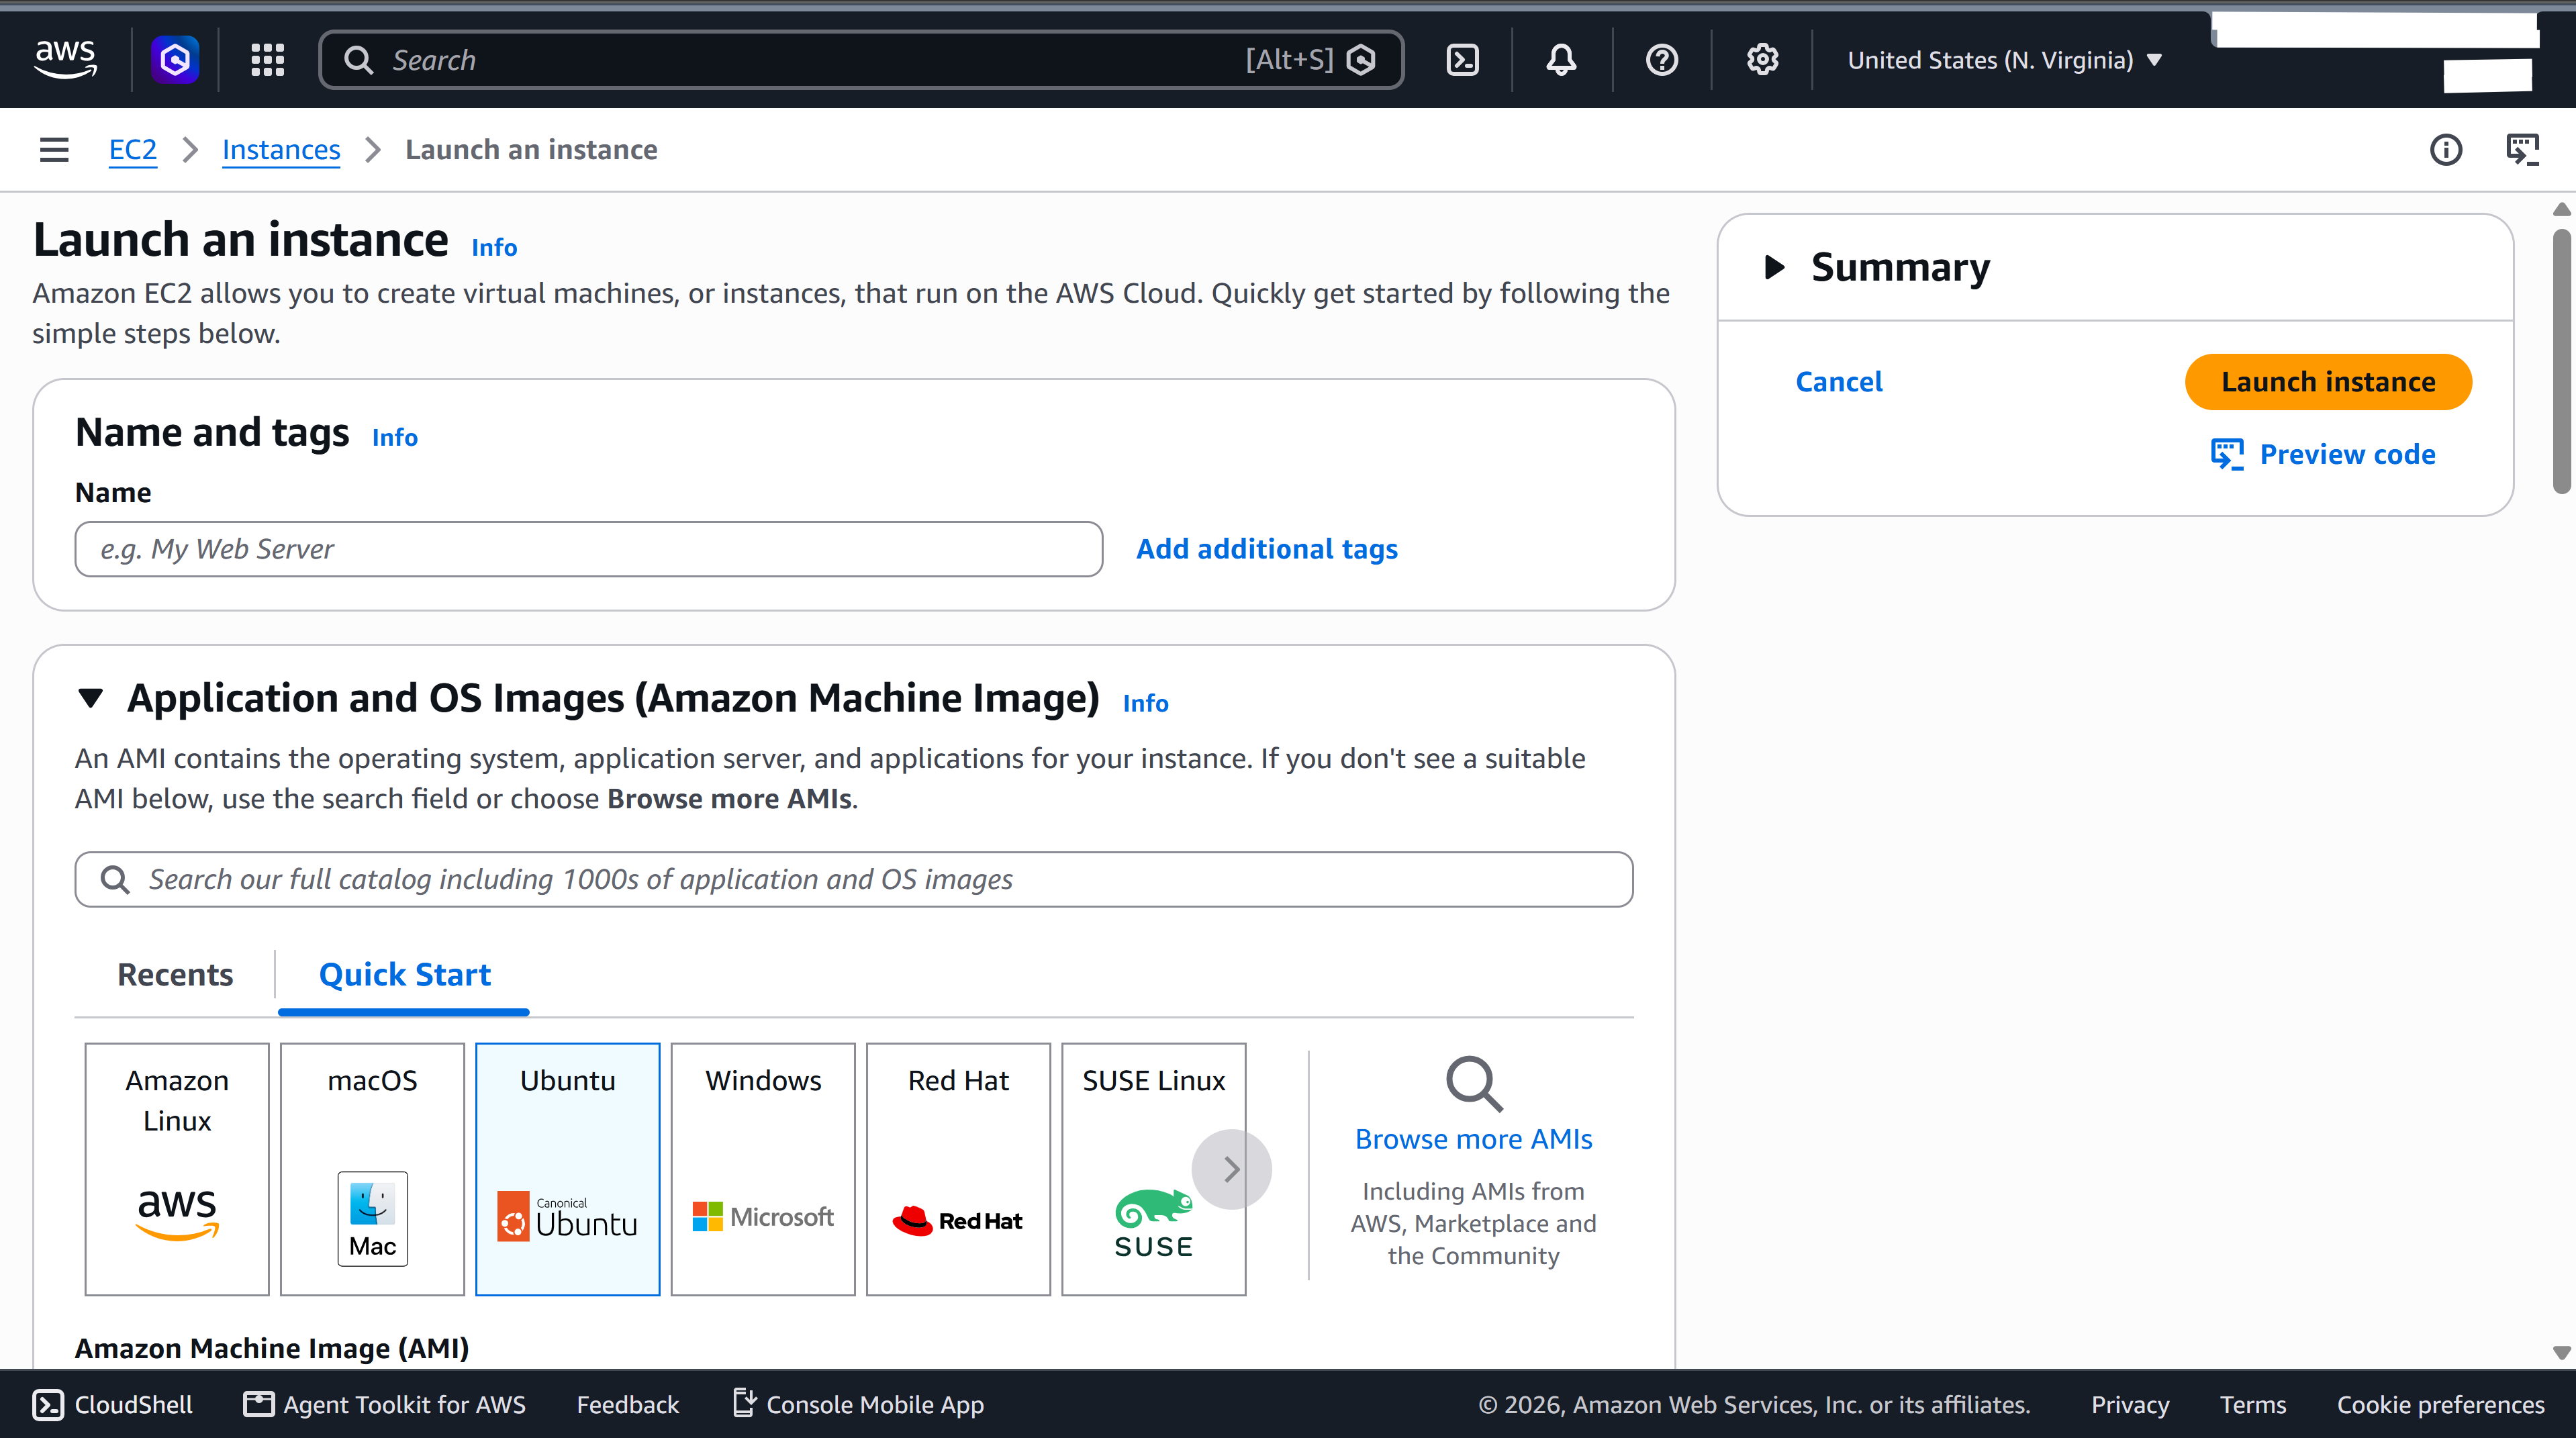
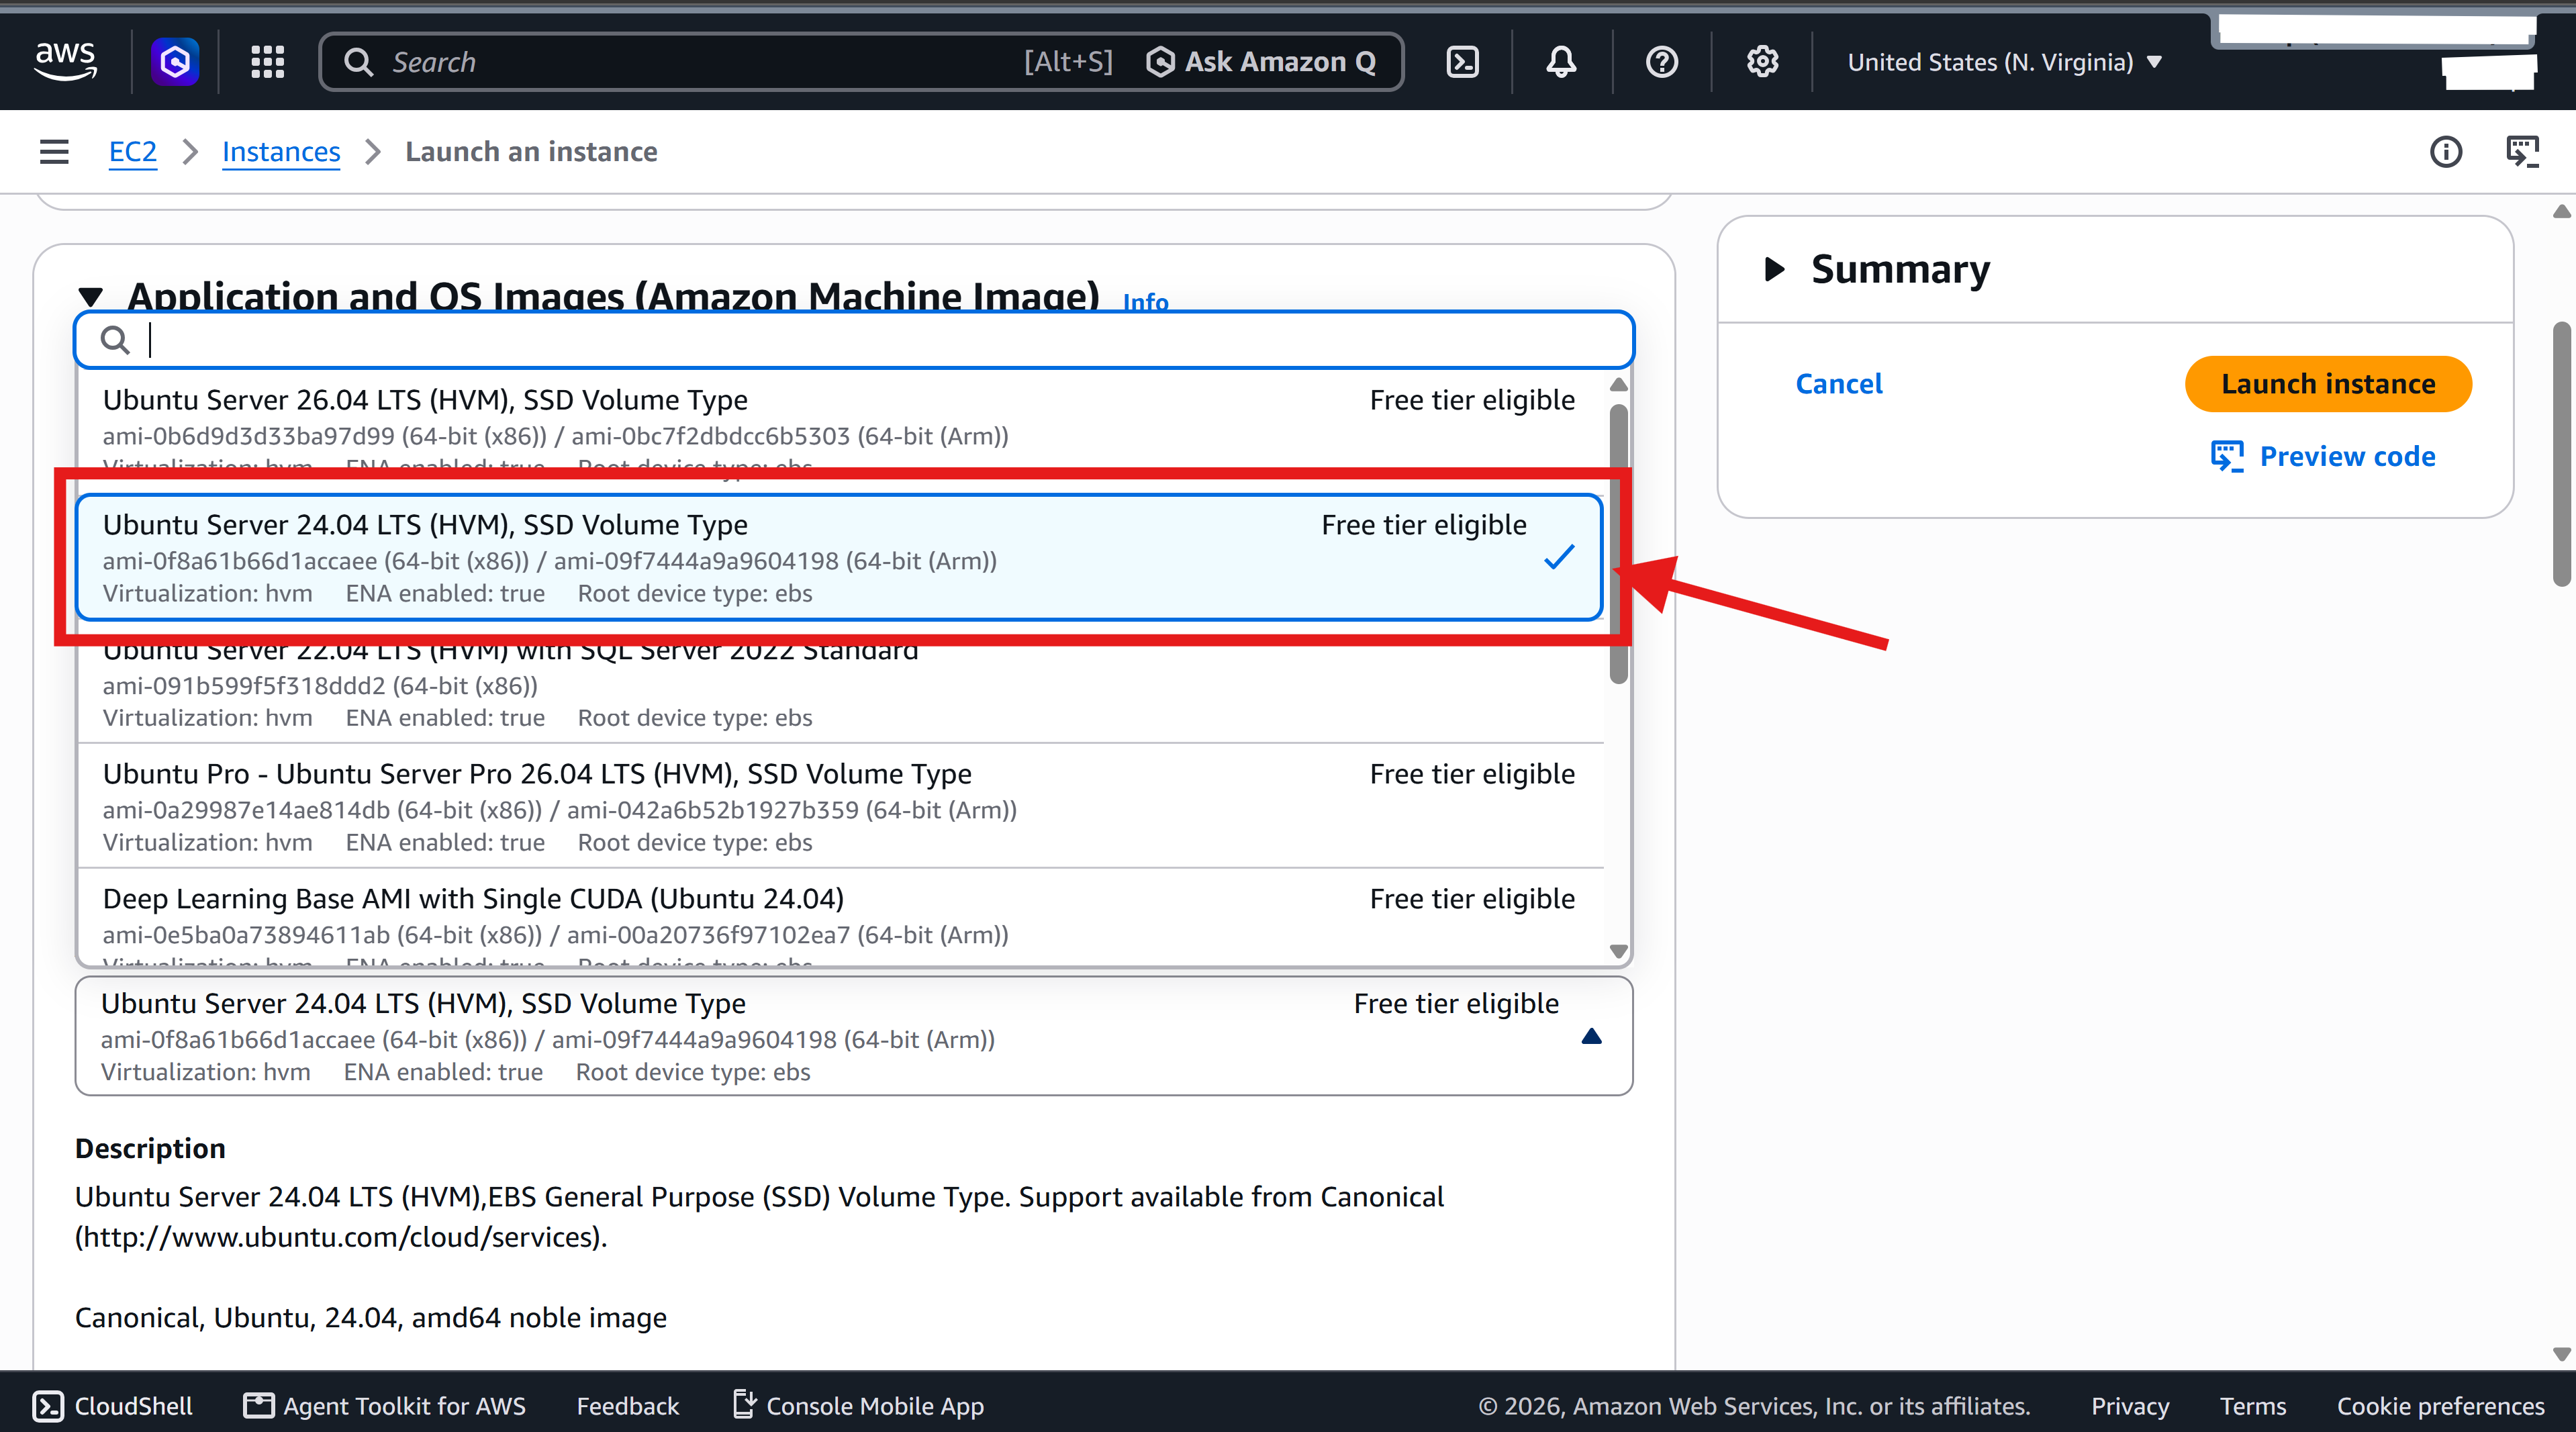
4.2. Scroll down and select "Ubuntu Server 24.04"
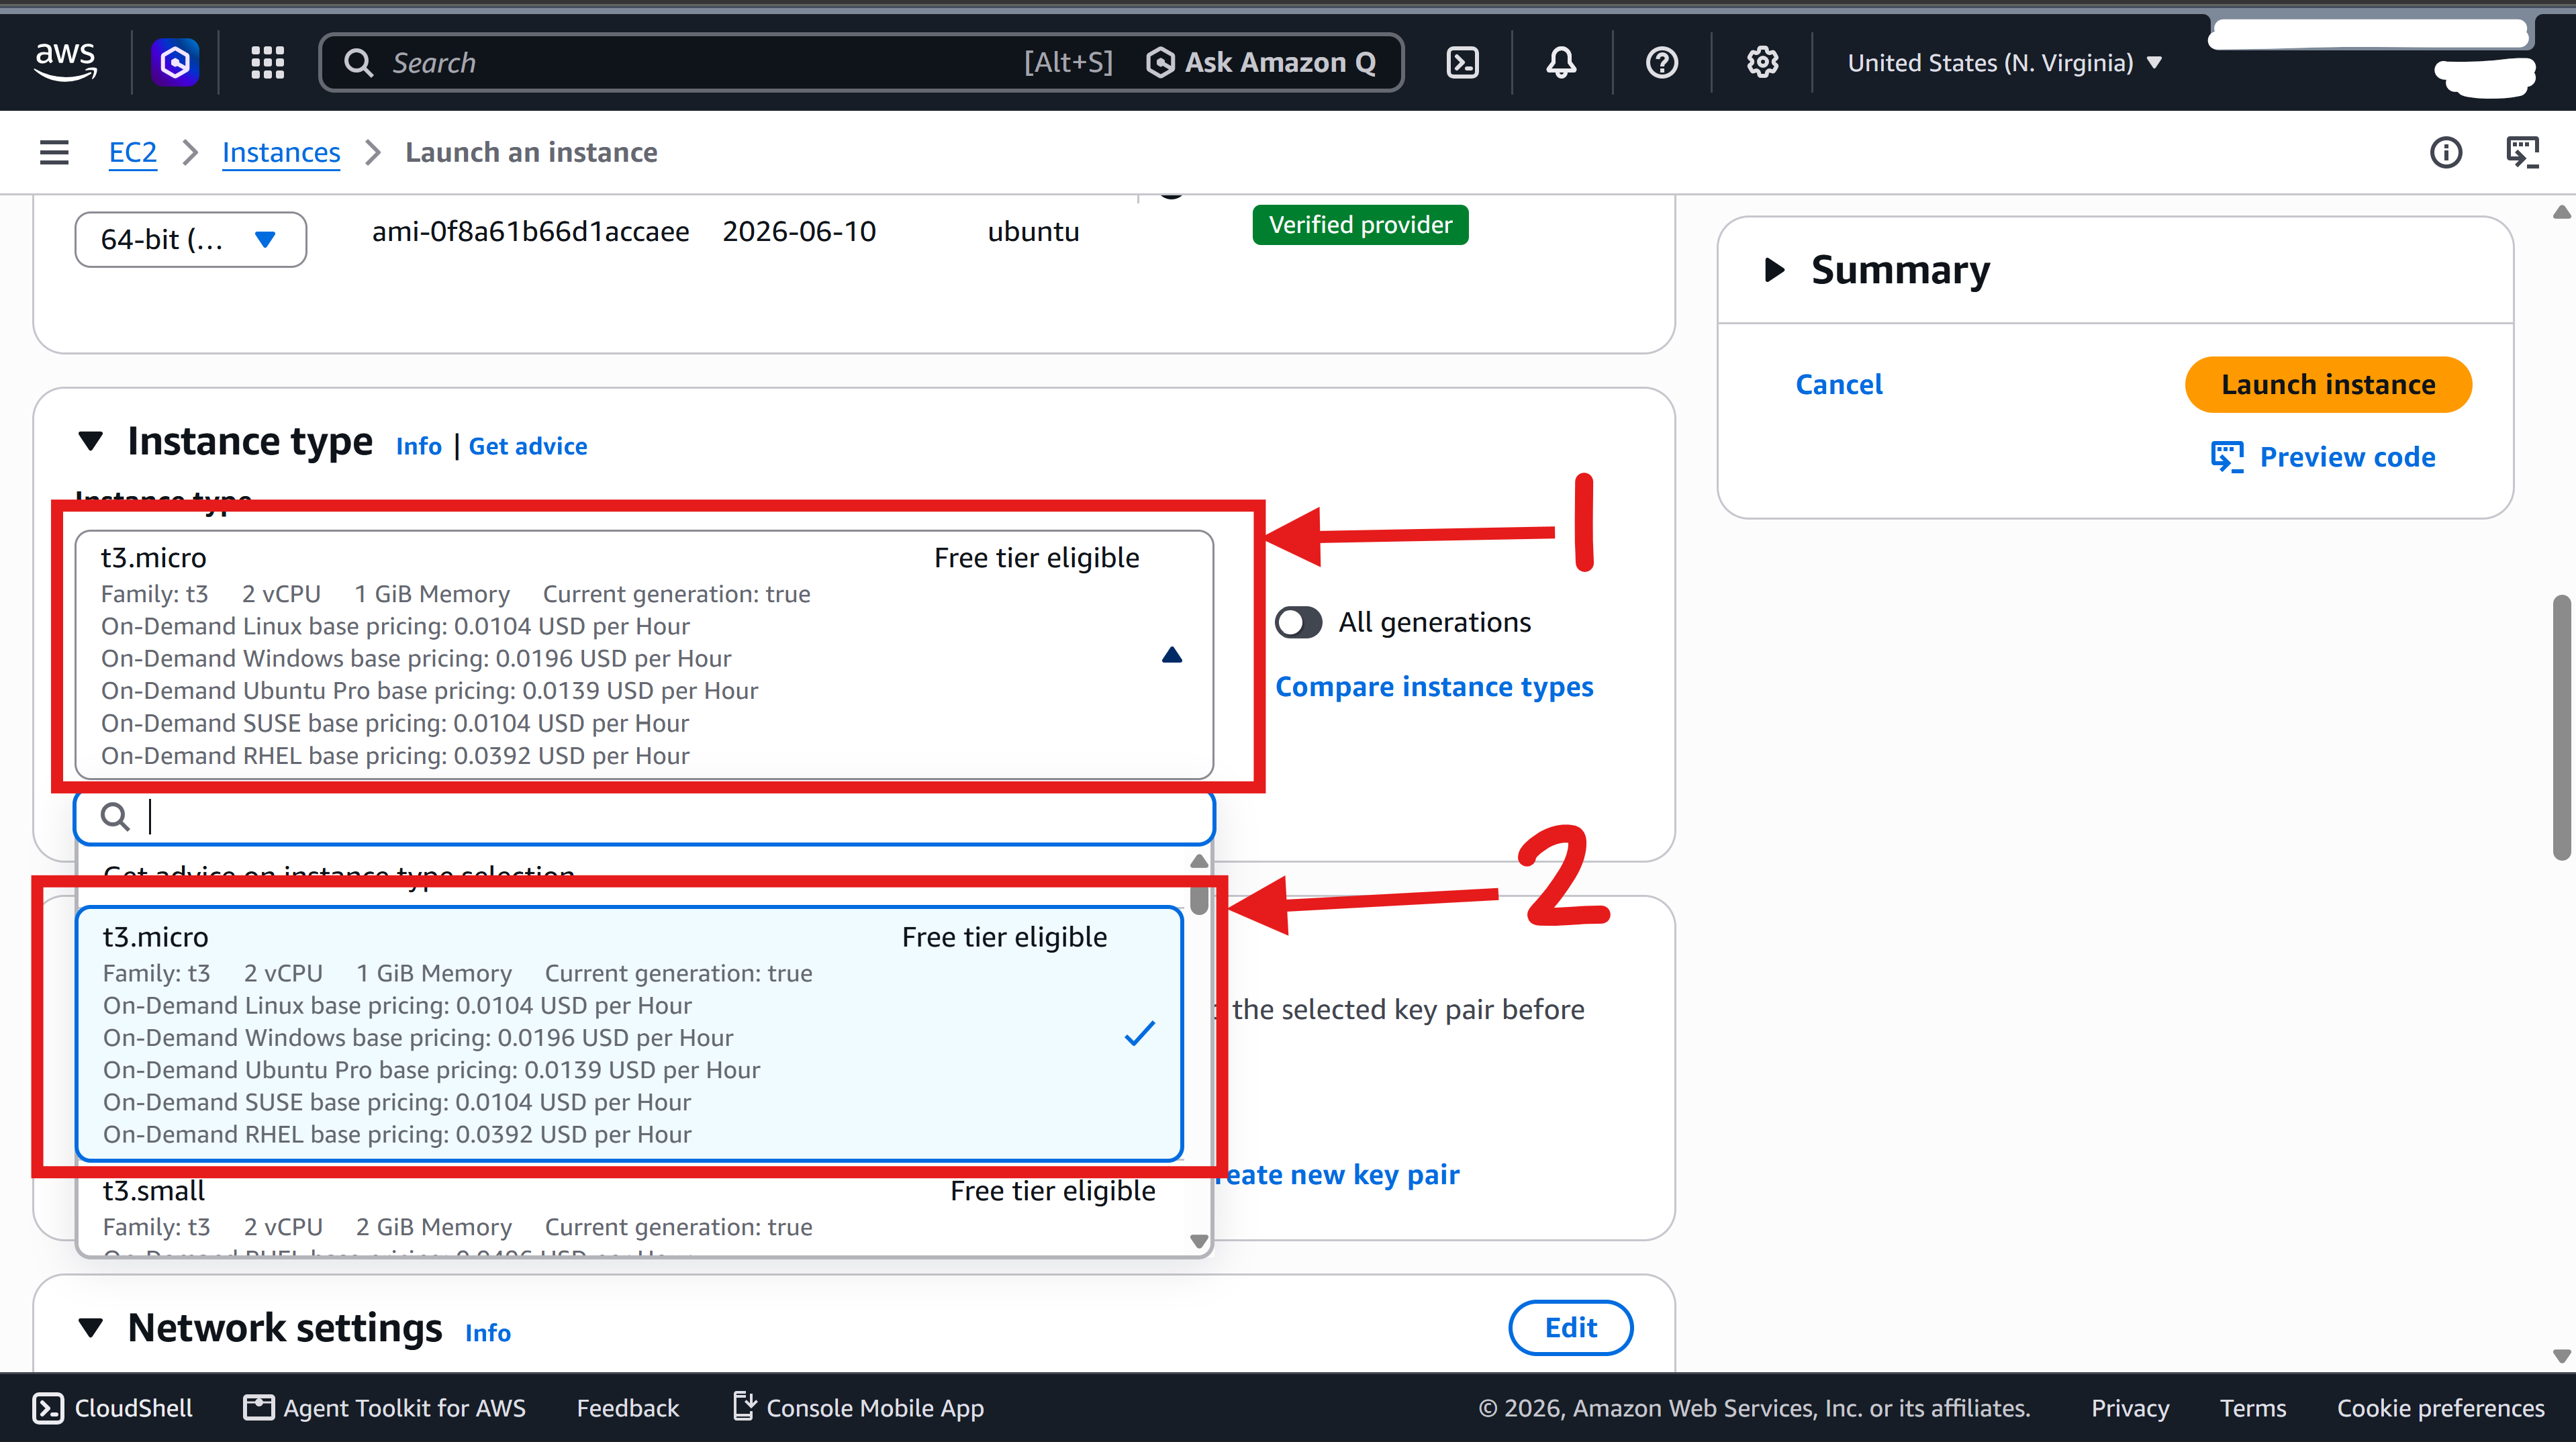
5. Select the appropriate CPU size that is suitable for your simulation in step 2.
For exploring the functionalities of the website, we recommend the instance type of "t3.micro", which contains 1 CPU core and is free-tier eligible.
To reduce the runtime of simulations and optimizations of large meshes, we recommend the instance type of "t3.xlarge" or "t3.2xlarge", which contain 4 CPU cores and 8 CPU cores respectively.
For even shorter turnaround time, we recommend the instance type of "g4dn.xlarge" for hardware acceleration, which contains one Nvidia Tesla T4 GPU.
More information regarding instance types and pricing can be found on https://aws.amazon.com/ec2/pricing/on-demand/.
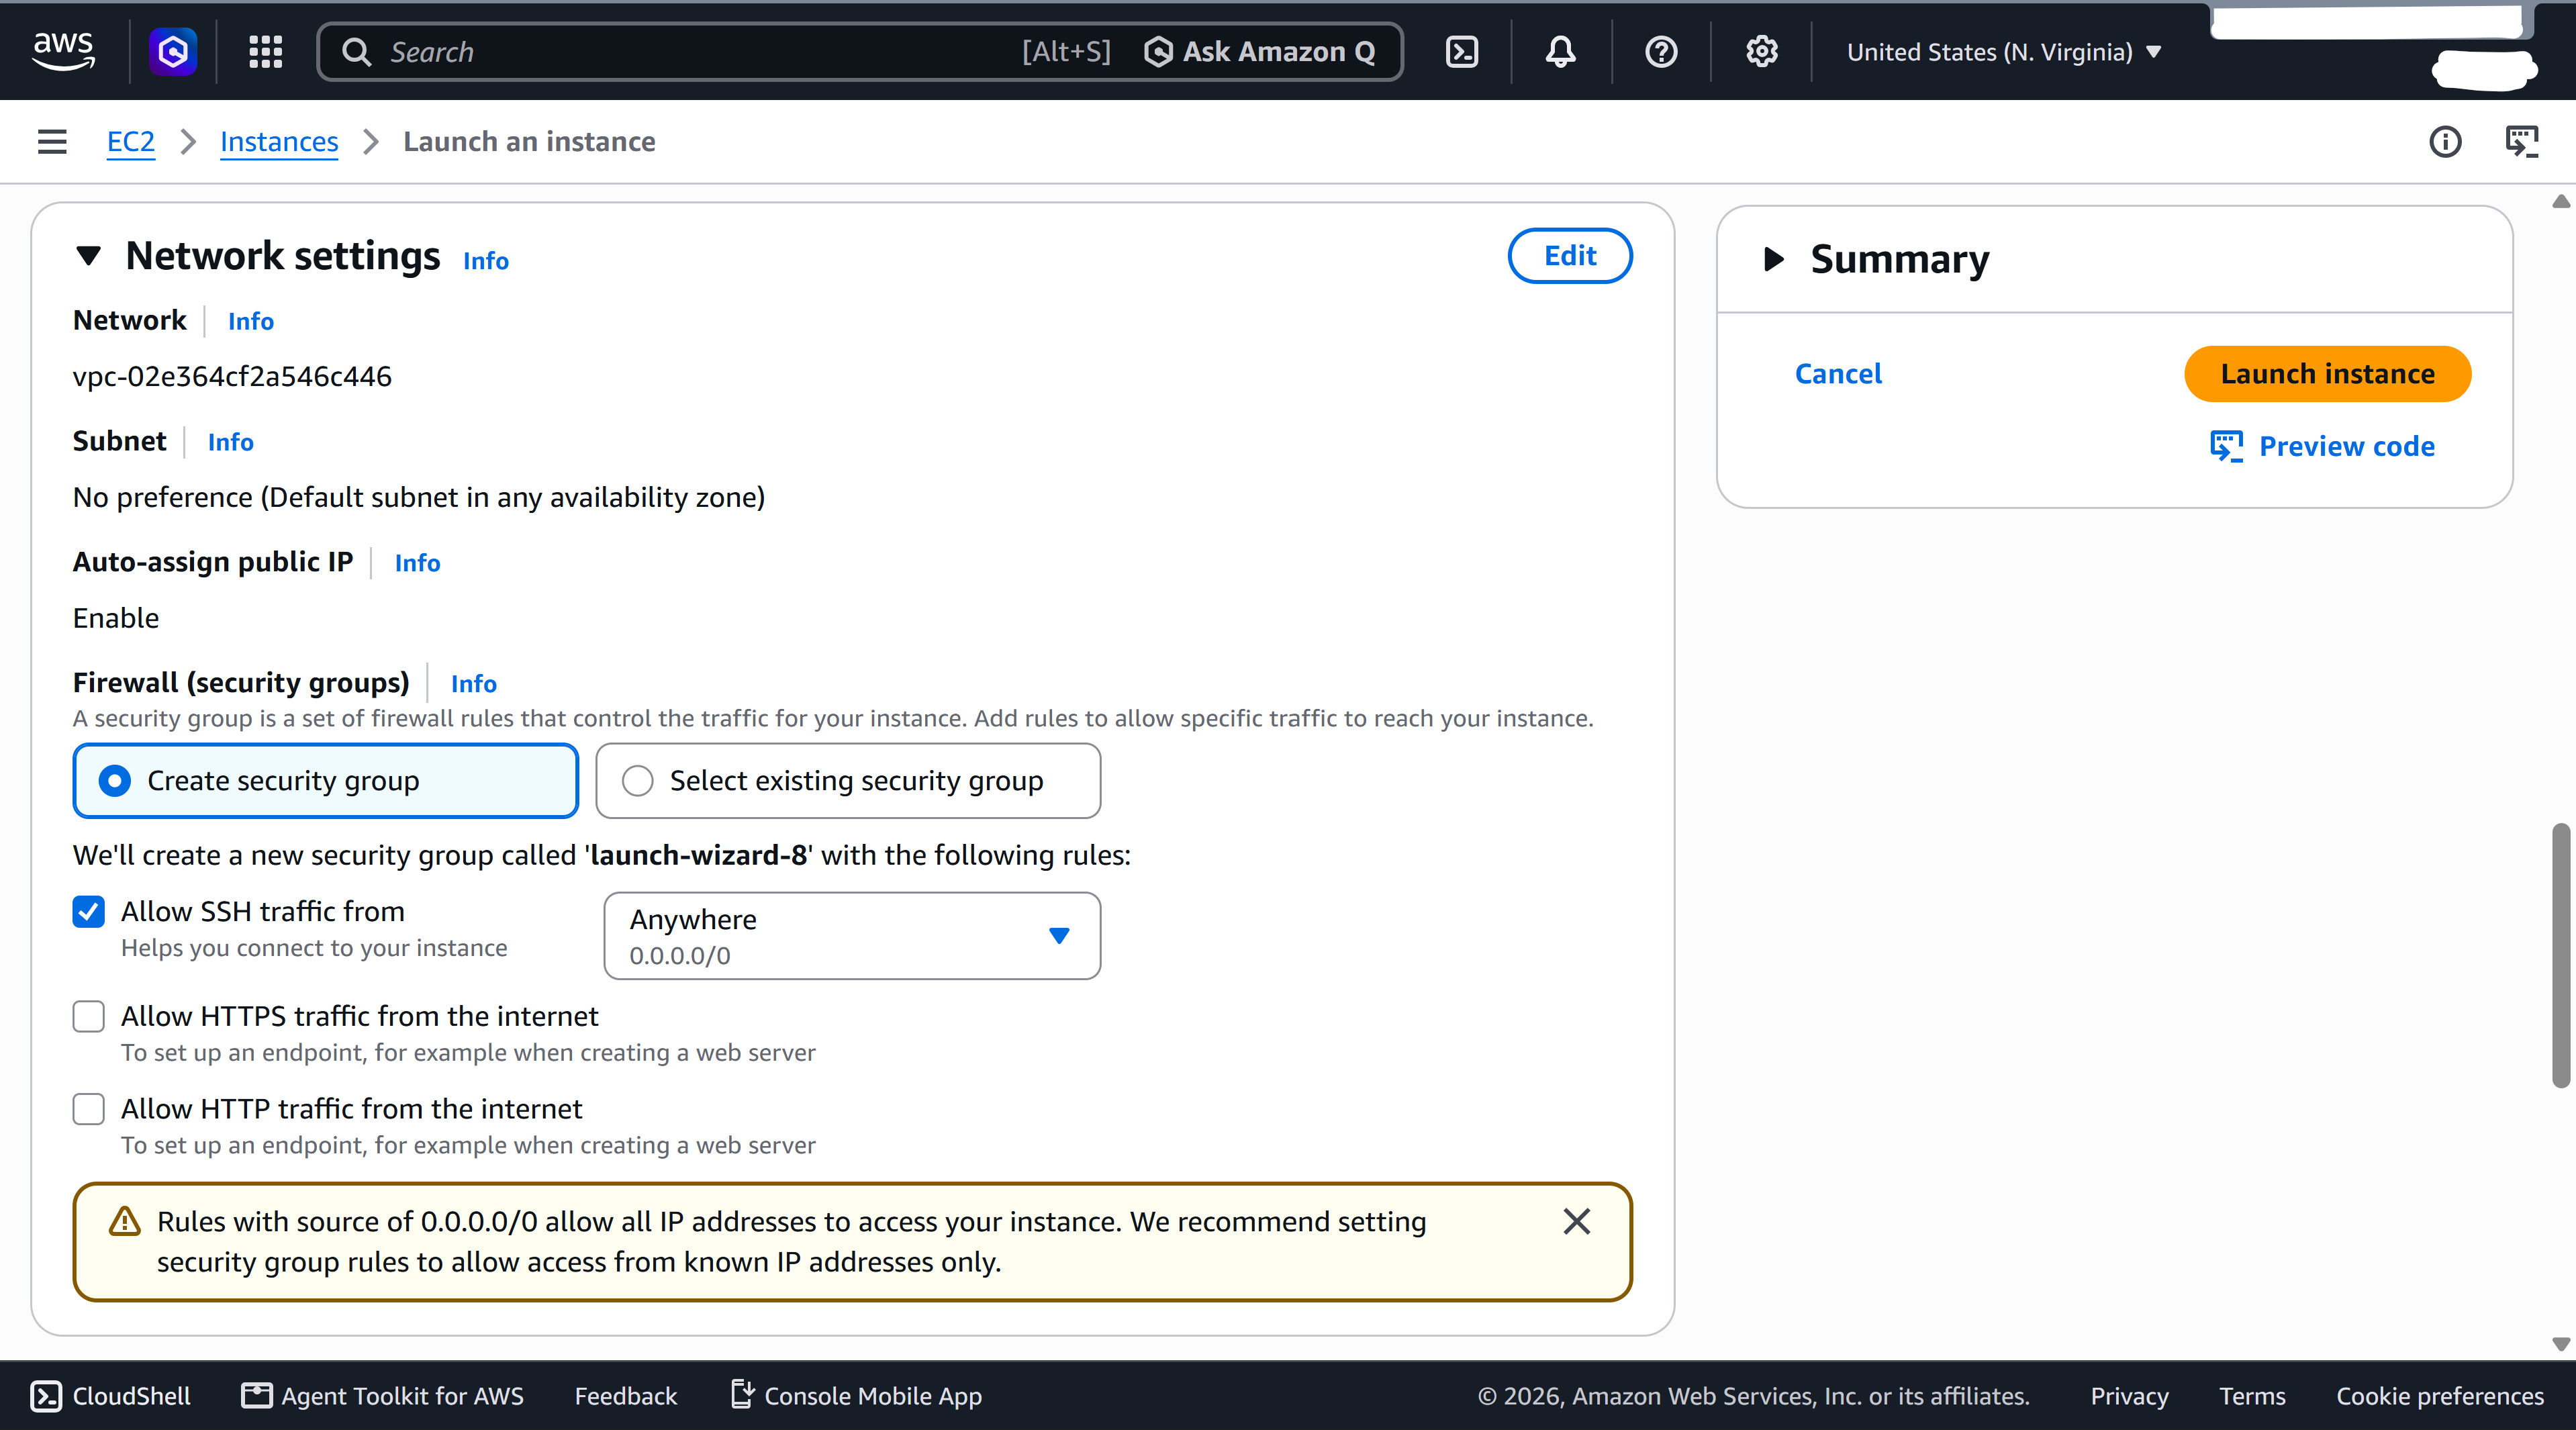
6. Skip the network settings (leave it as it is).
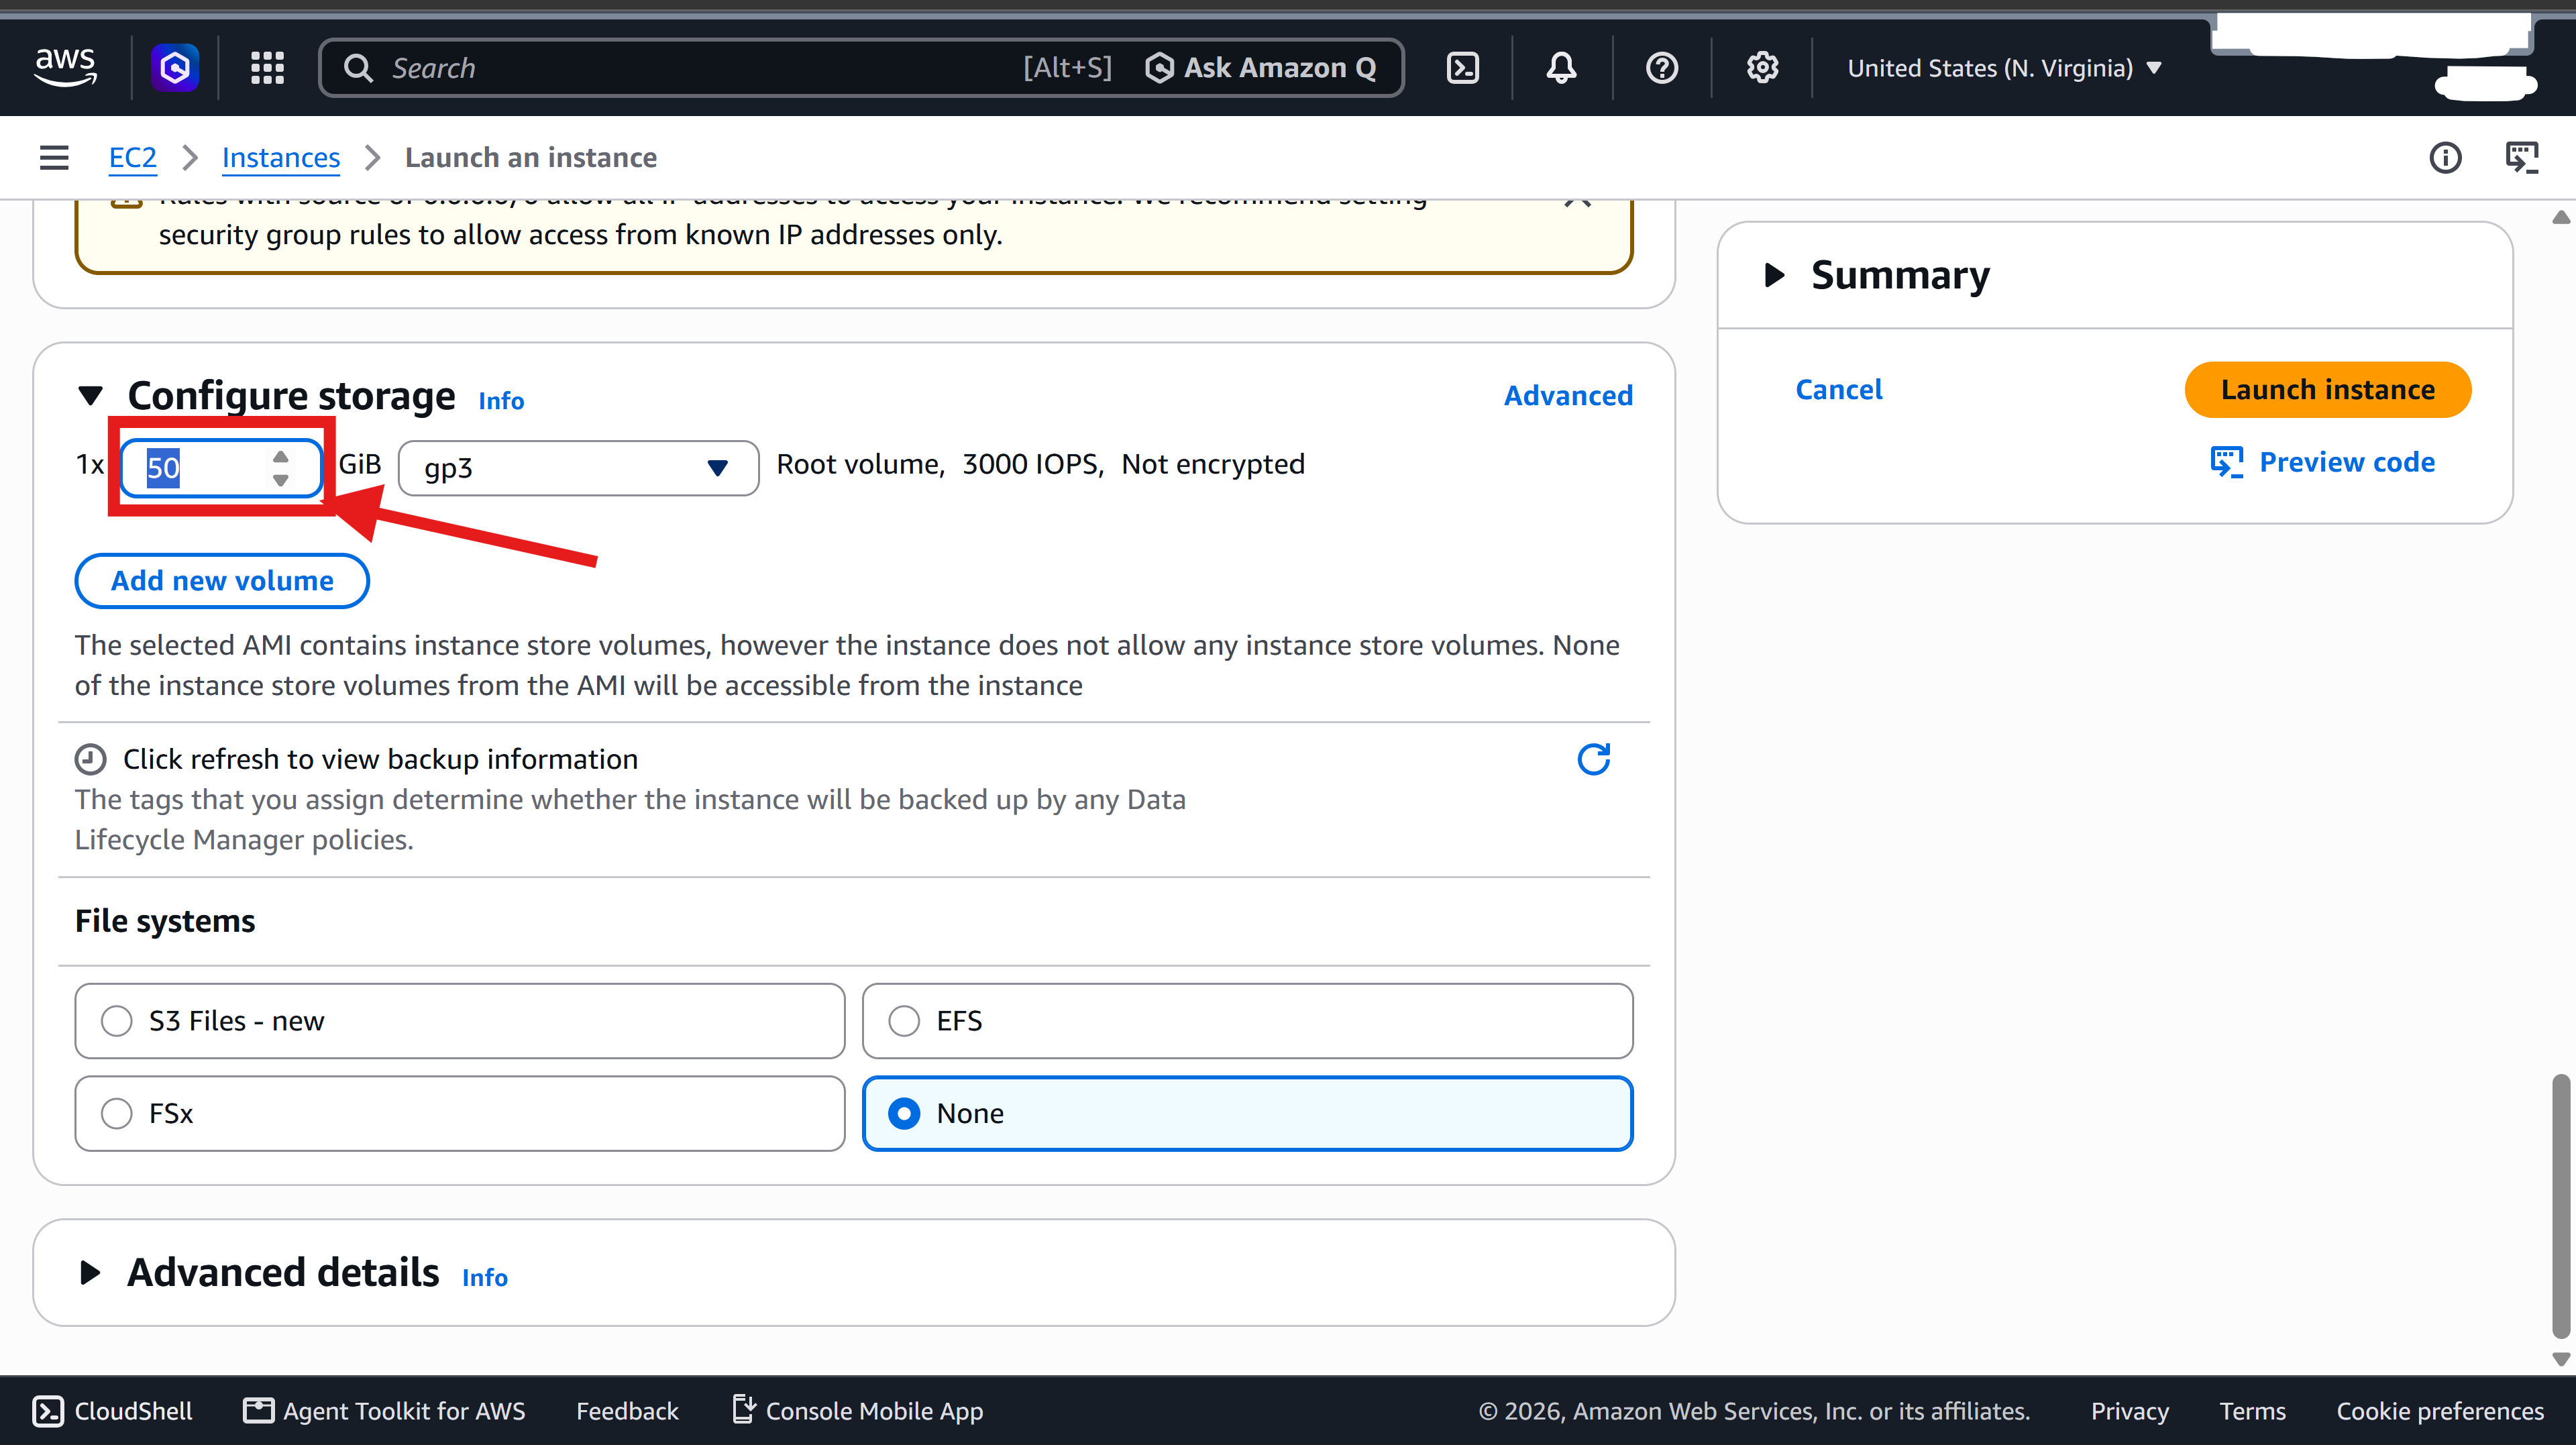
7. Selete the appropriate storage size that is suitable for your simulation. We recommend at least 50 GiB of storage size. (this will allow enough space to download all the required software).
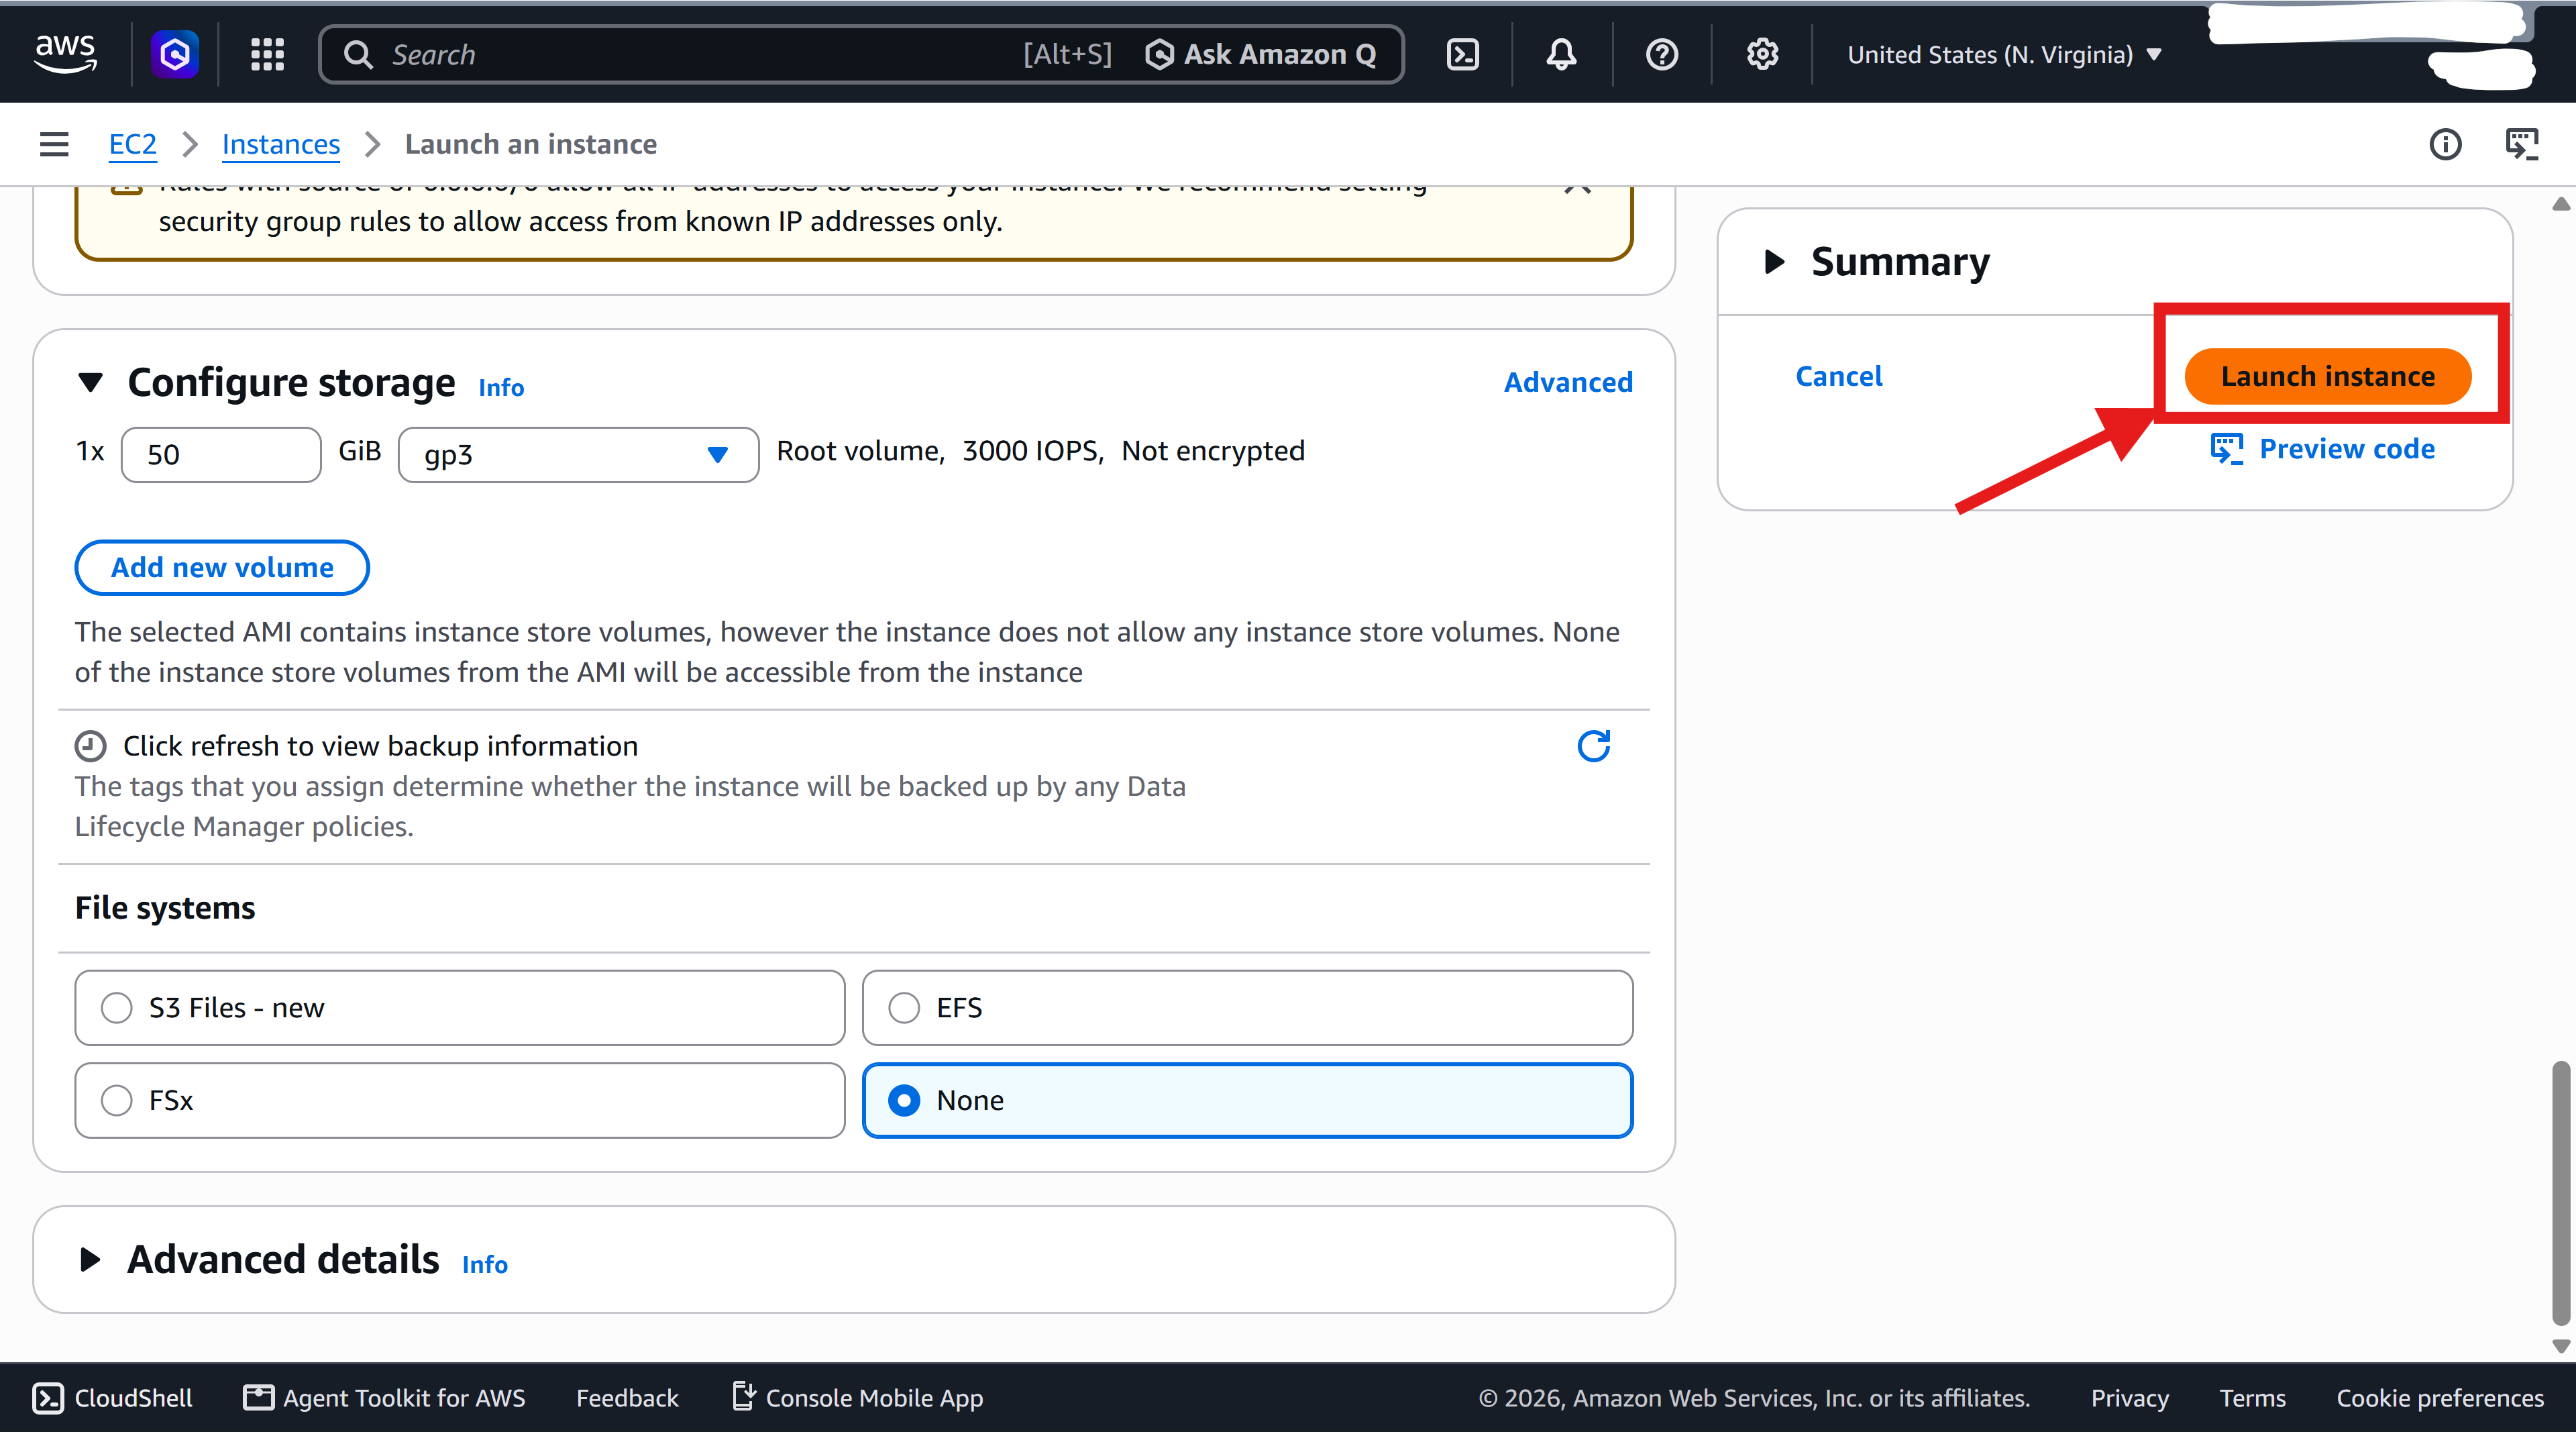
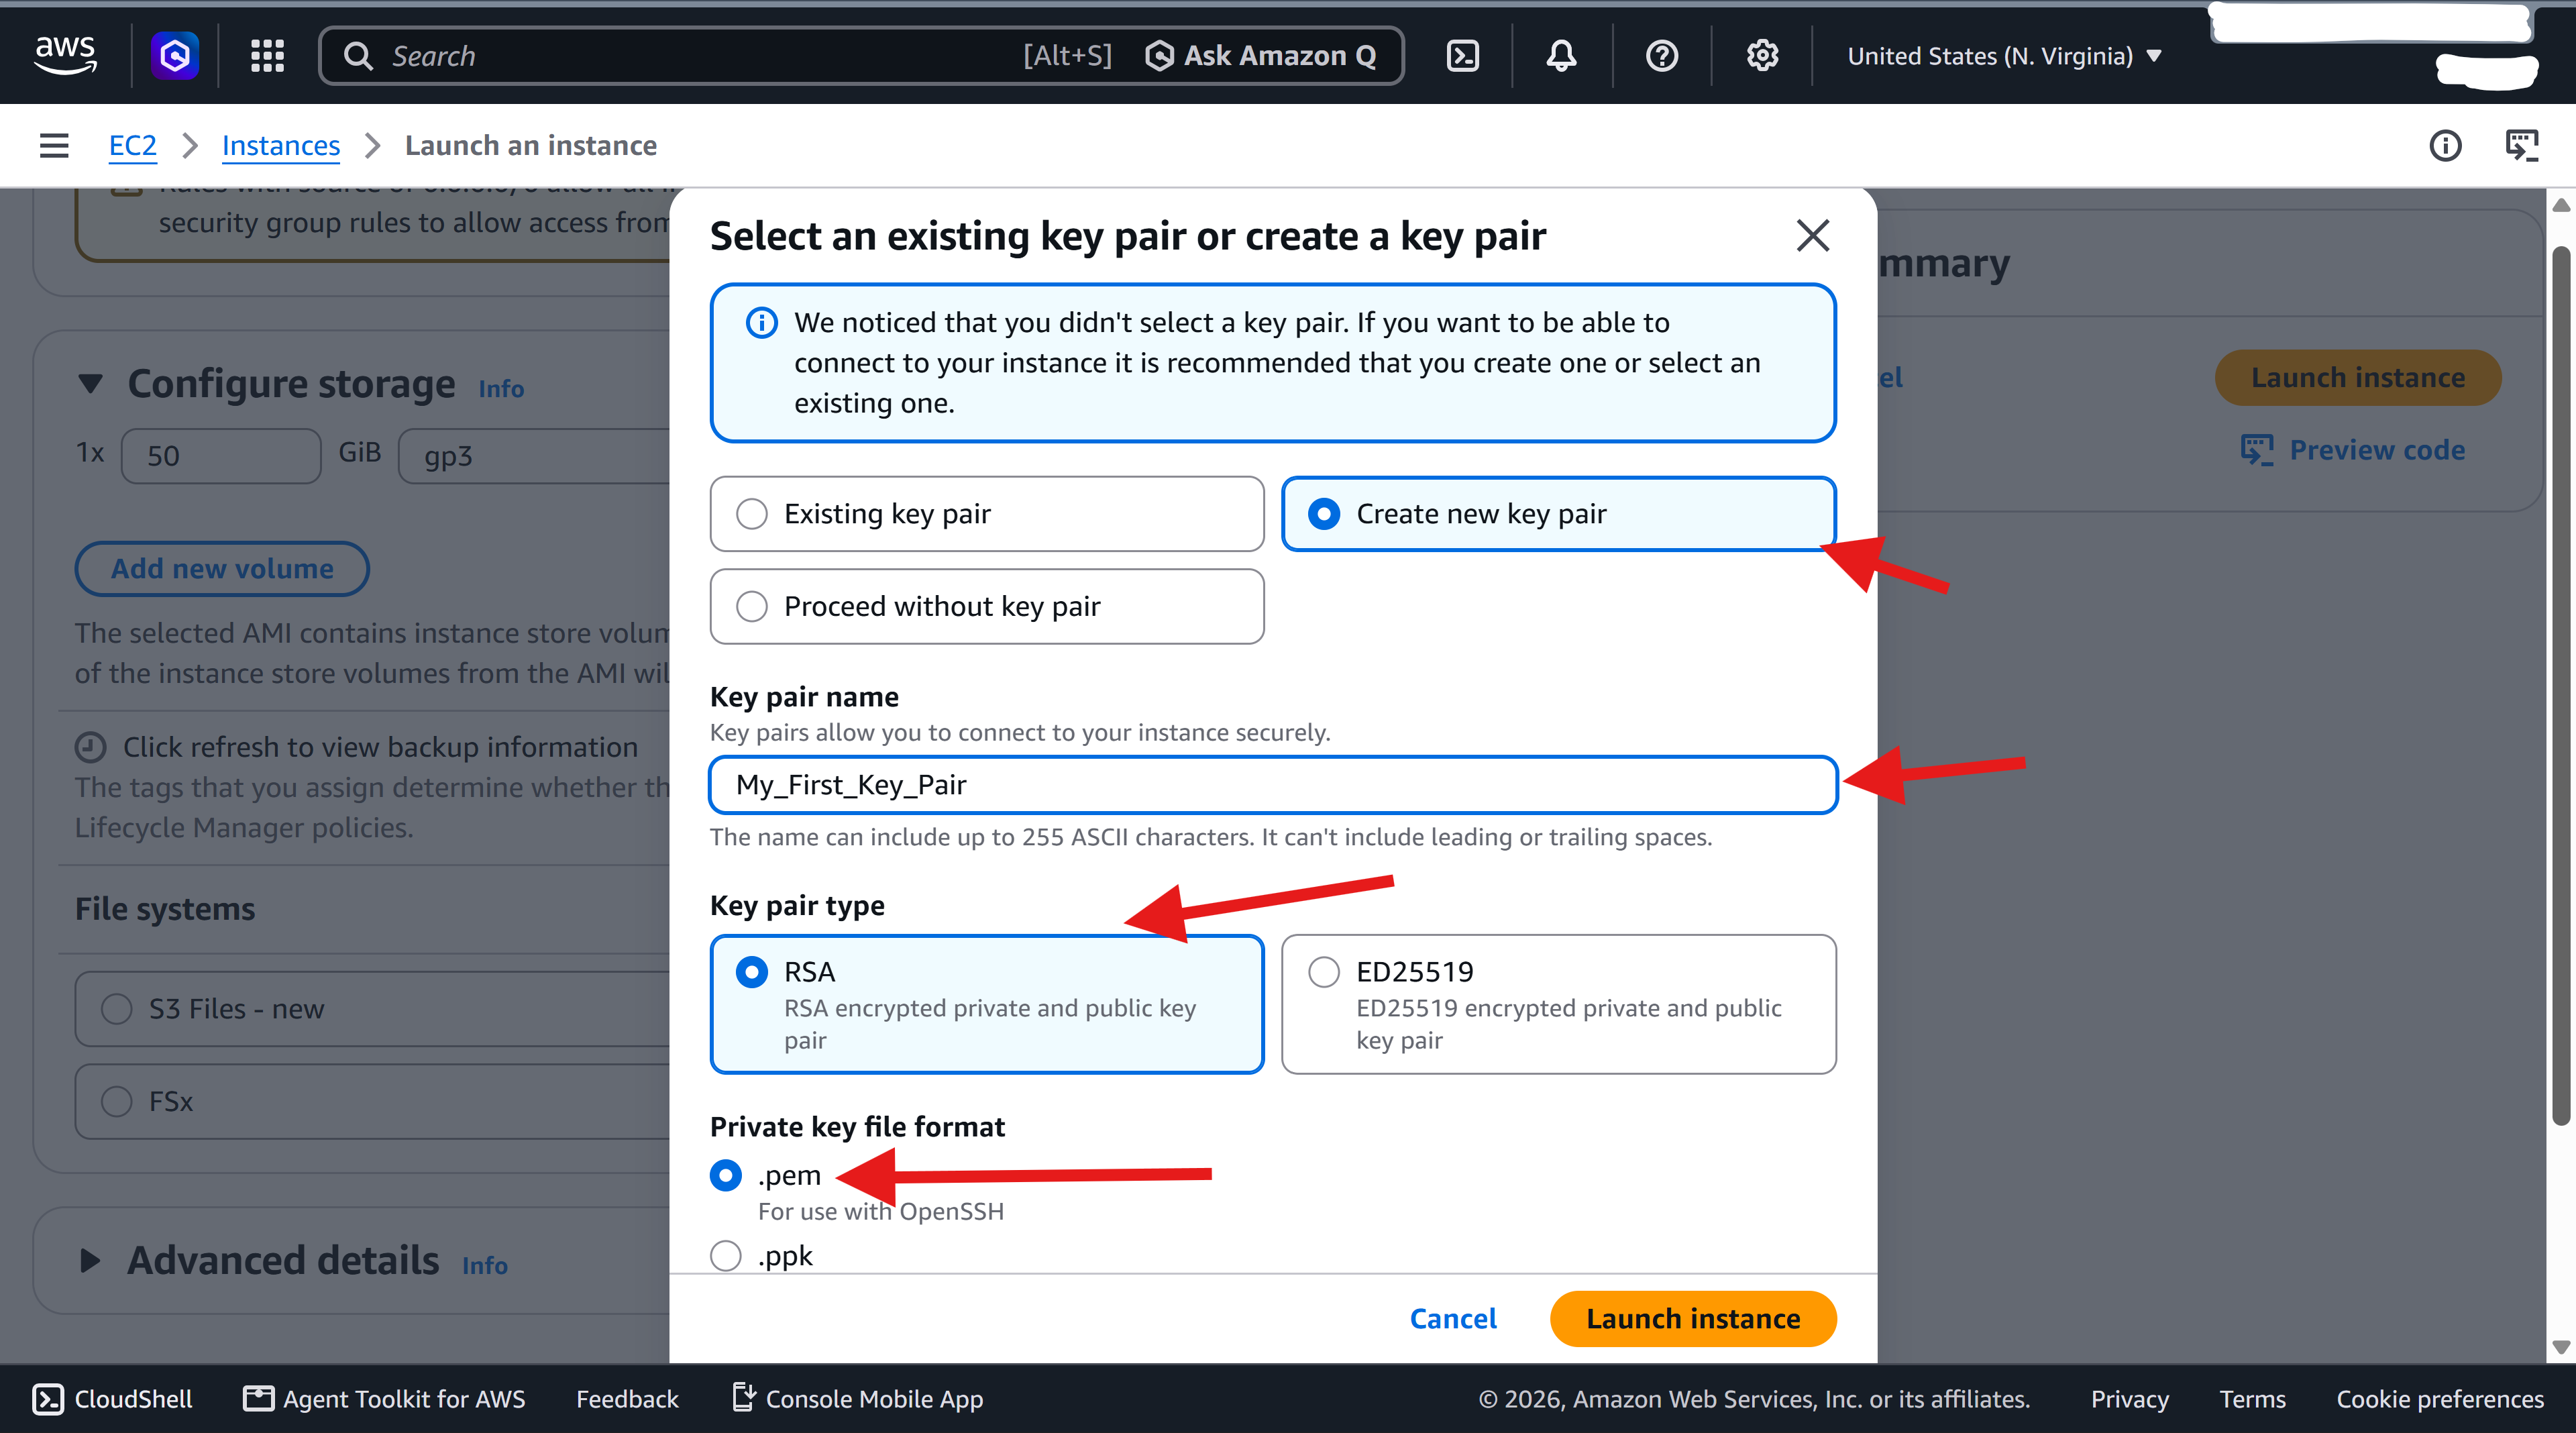
8. Launch the instance on the bottom right corner. Before launching, Amazon Web Services will ask you to create a private Key file, which is used to access your instance. Create an RSA key and download the .pem file. Currently FullMonteWeb only supports RSA key parsing. This is the "Pemfile" that you will be uploading when running the simulation. Please carefully save it somewhere as you will not be able to download the file again.
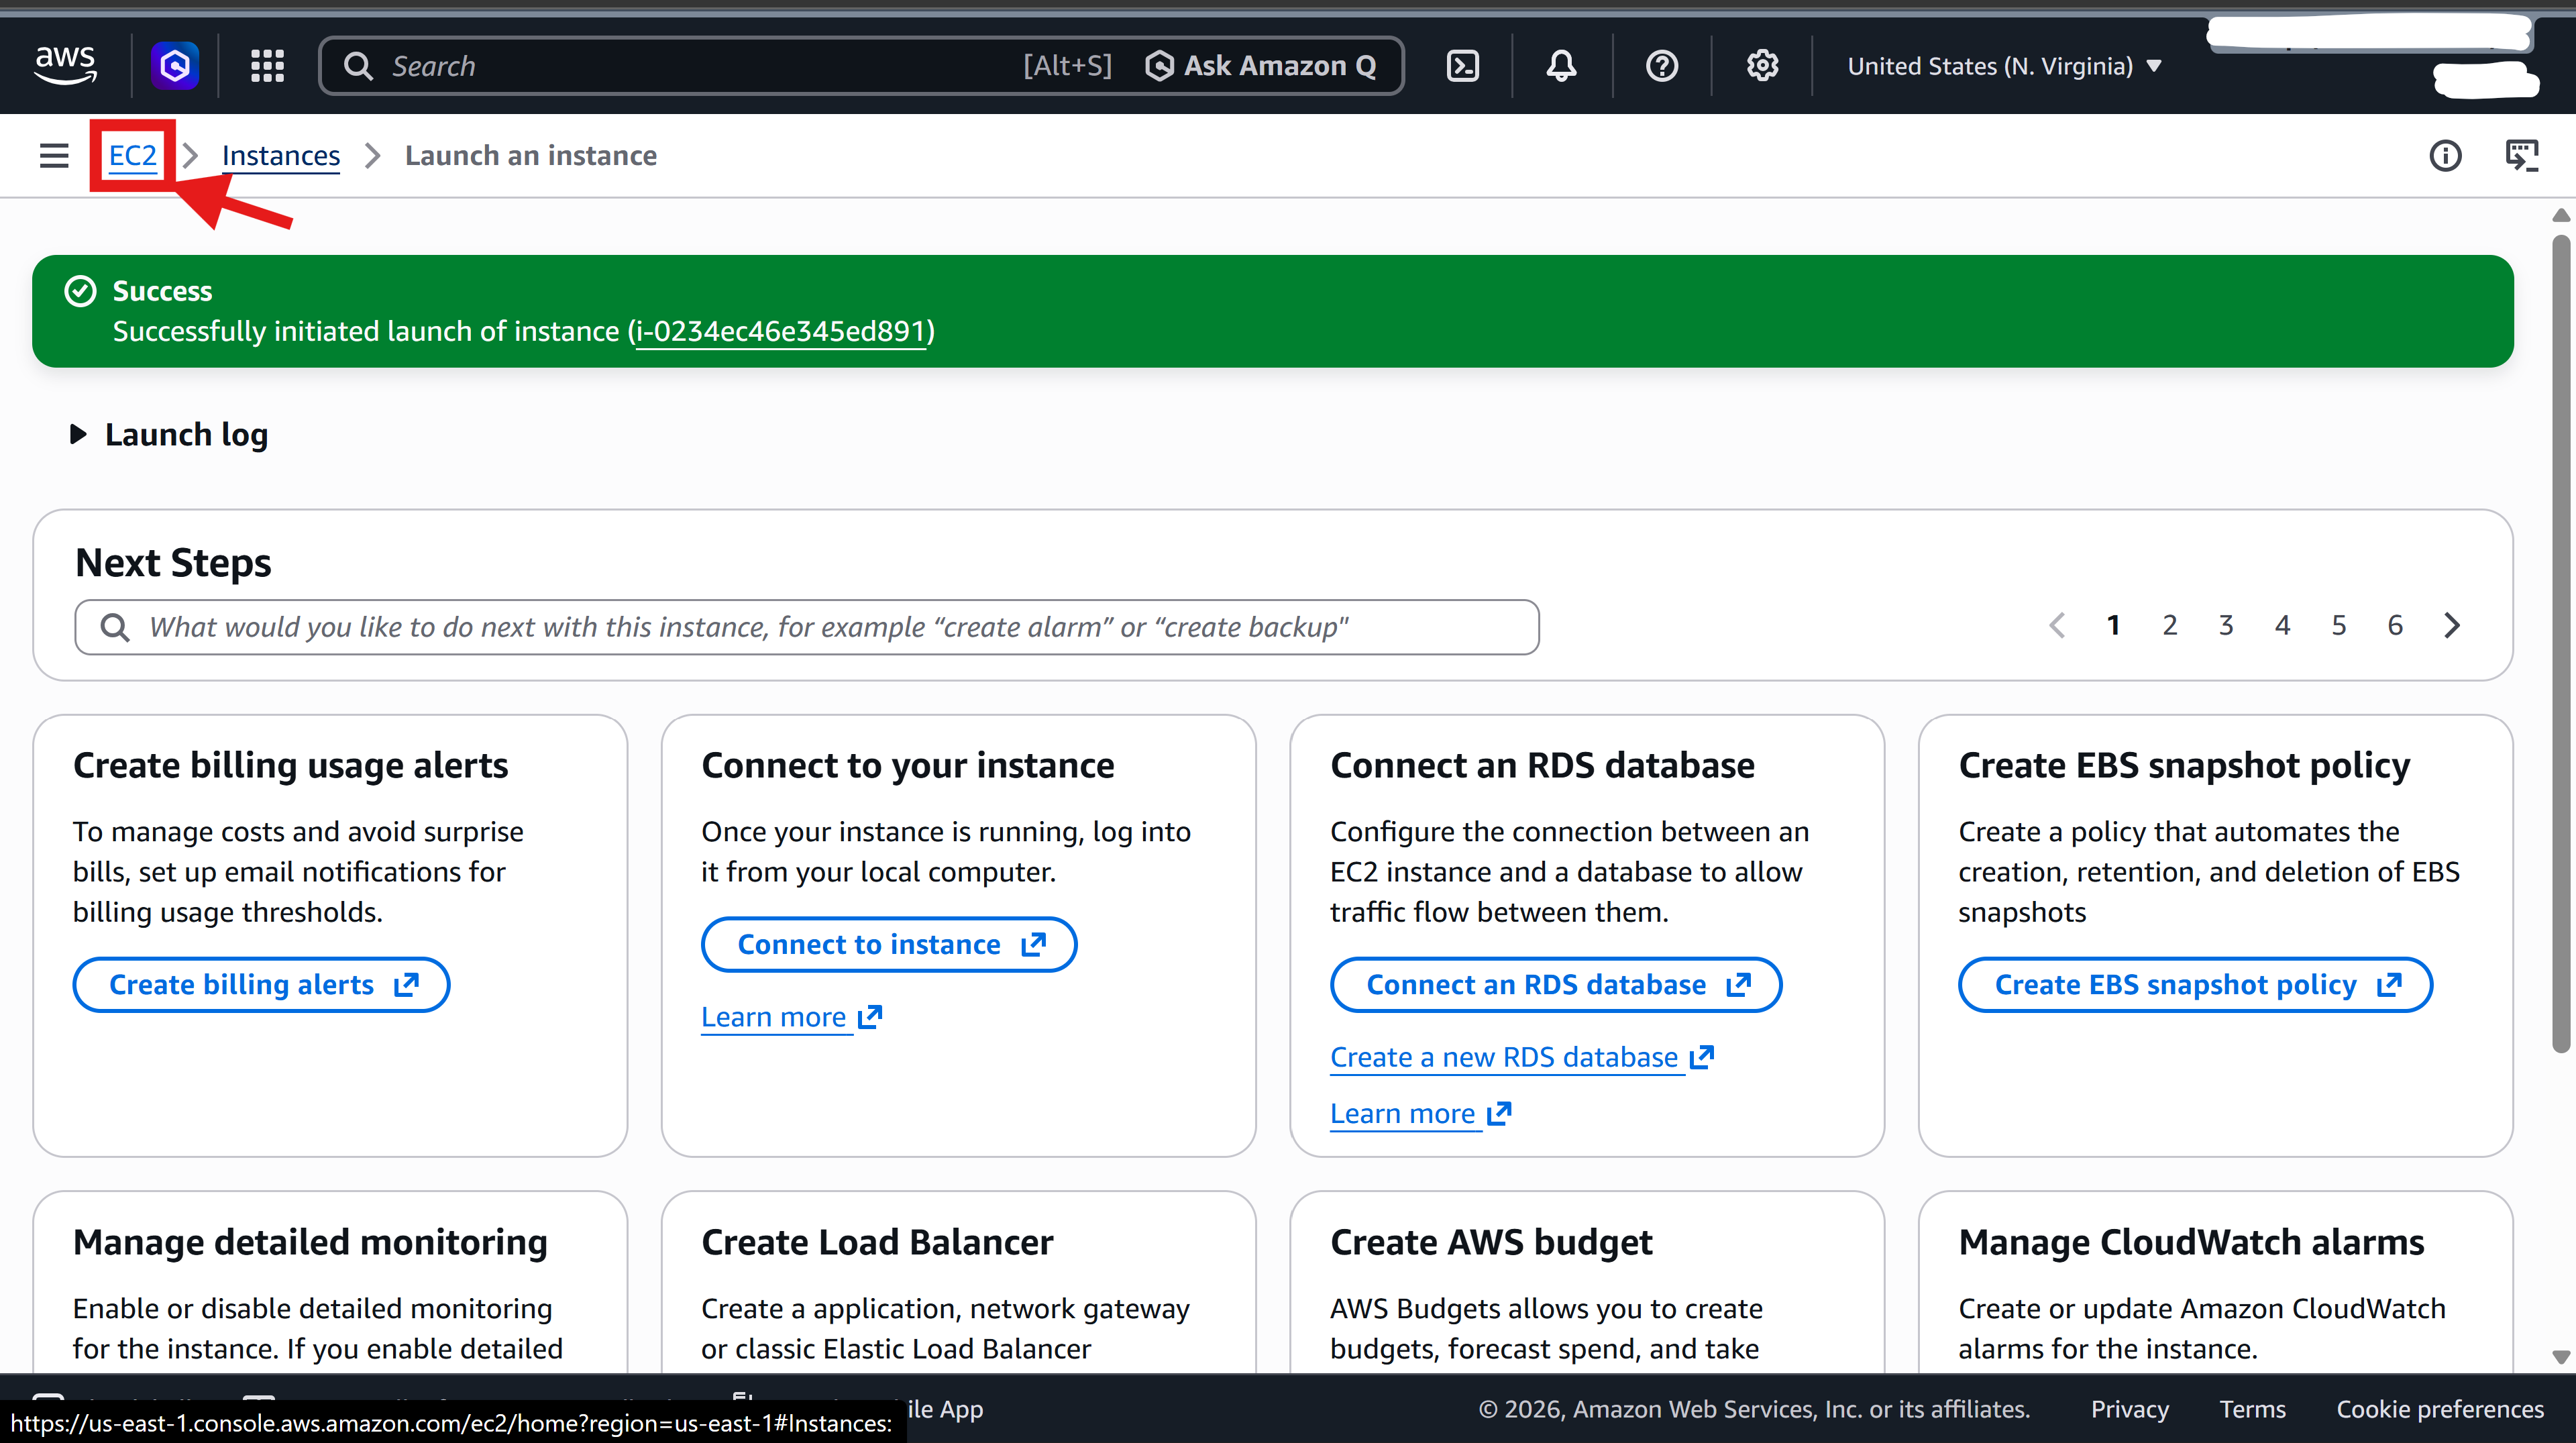
9. After the instance is launched, click on EC2. Then click on "Running Instances". Then click on the instance ID.
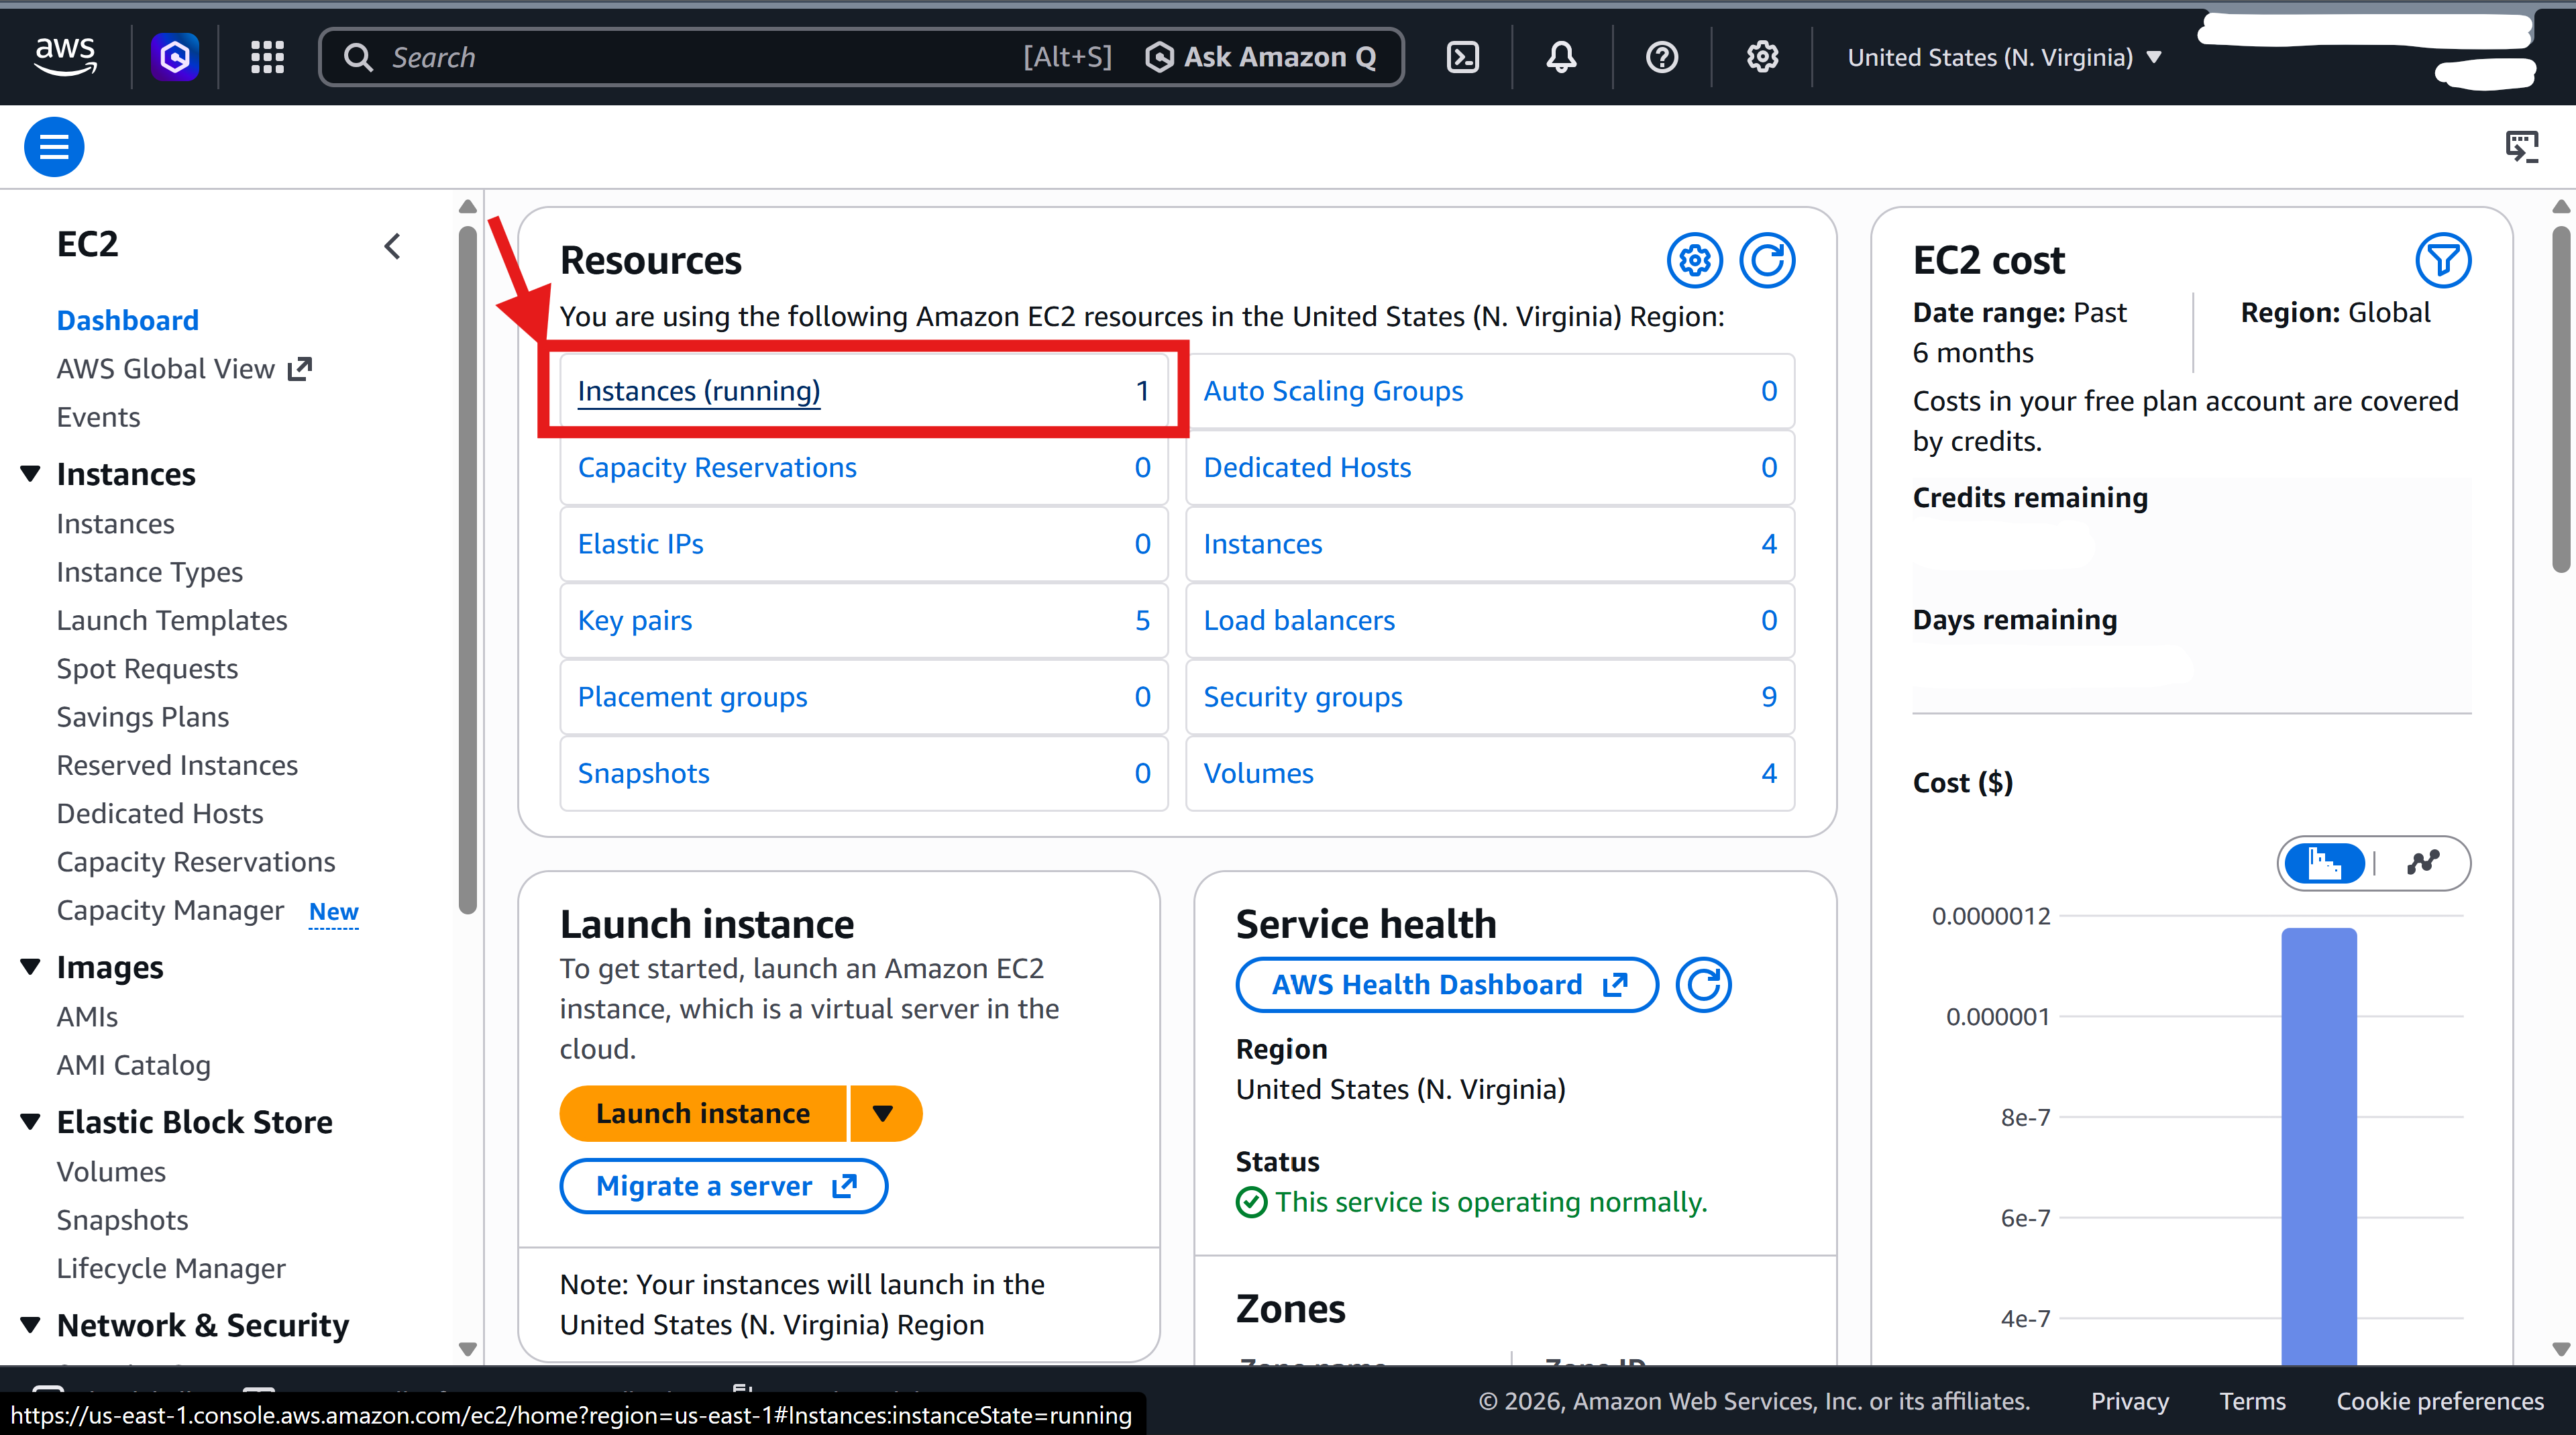
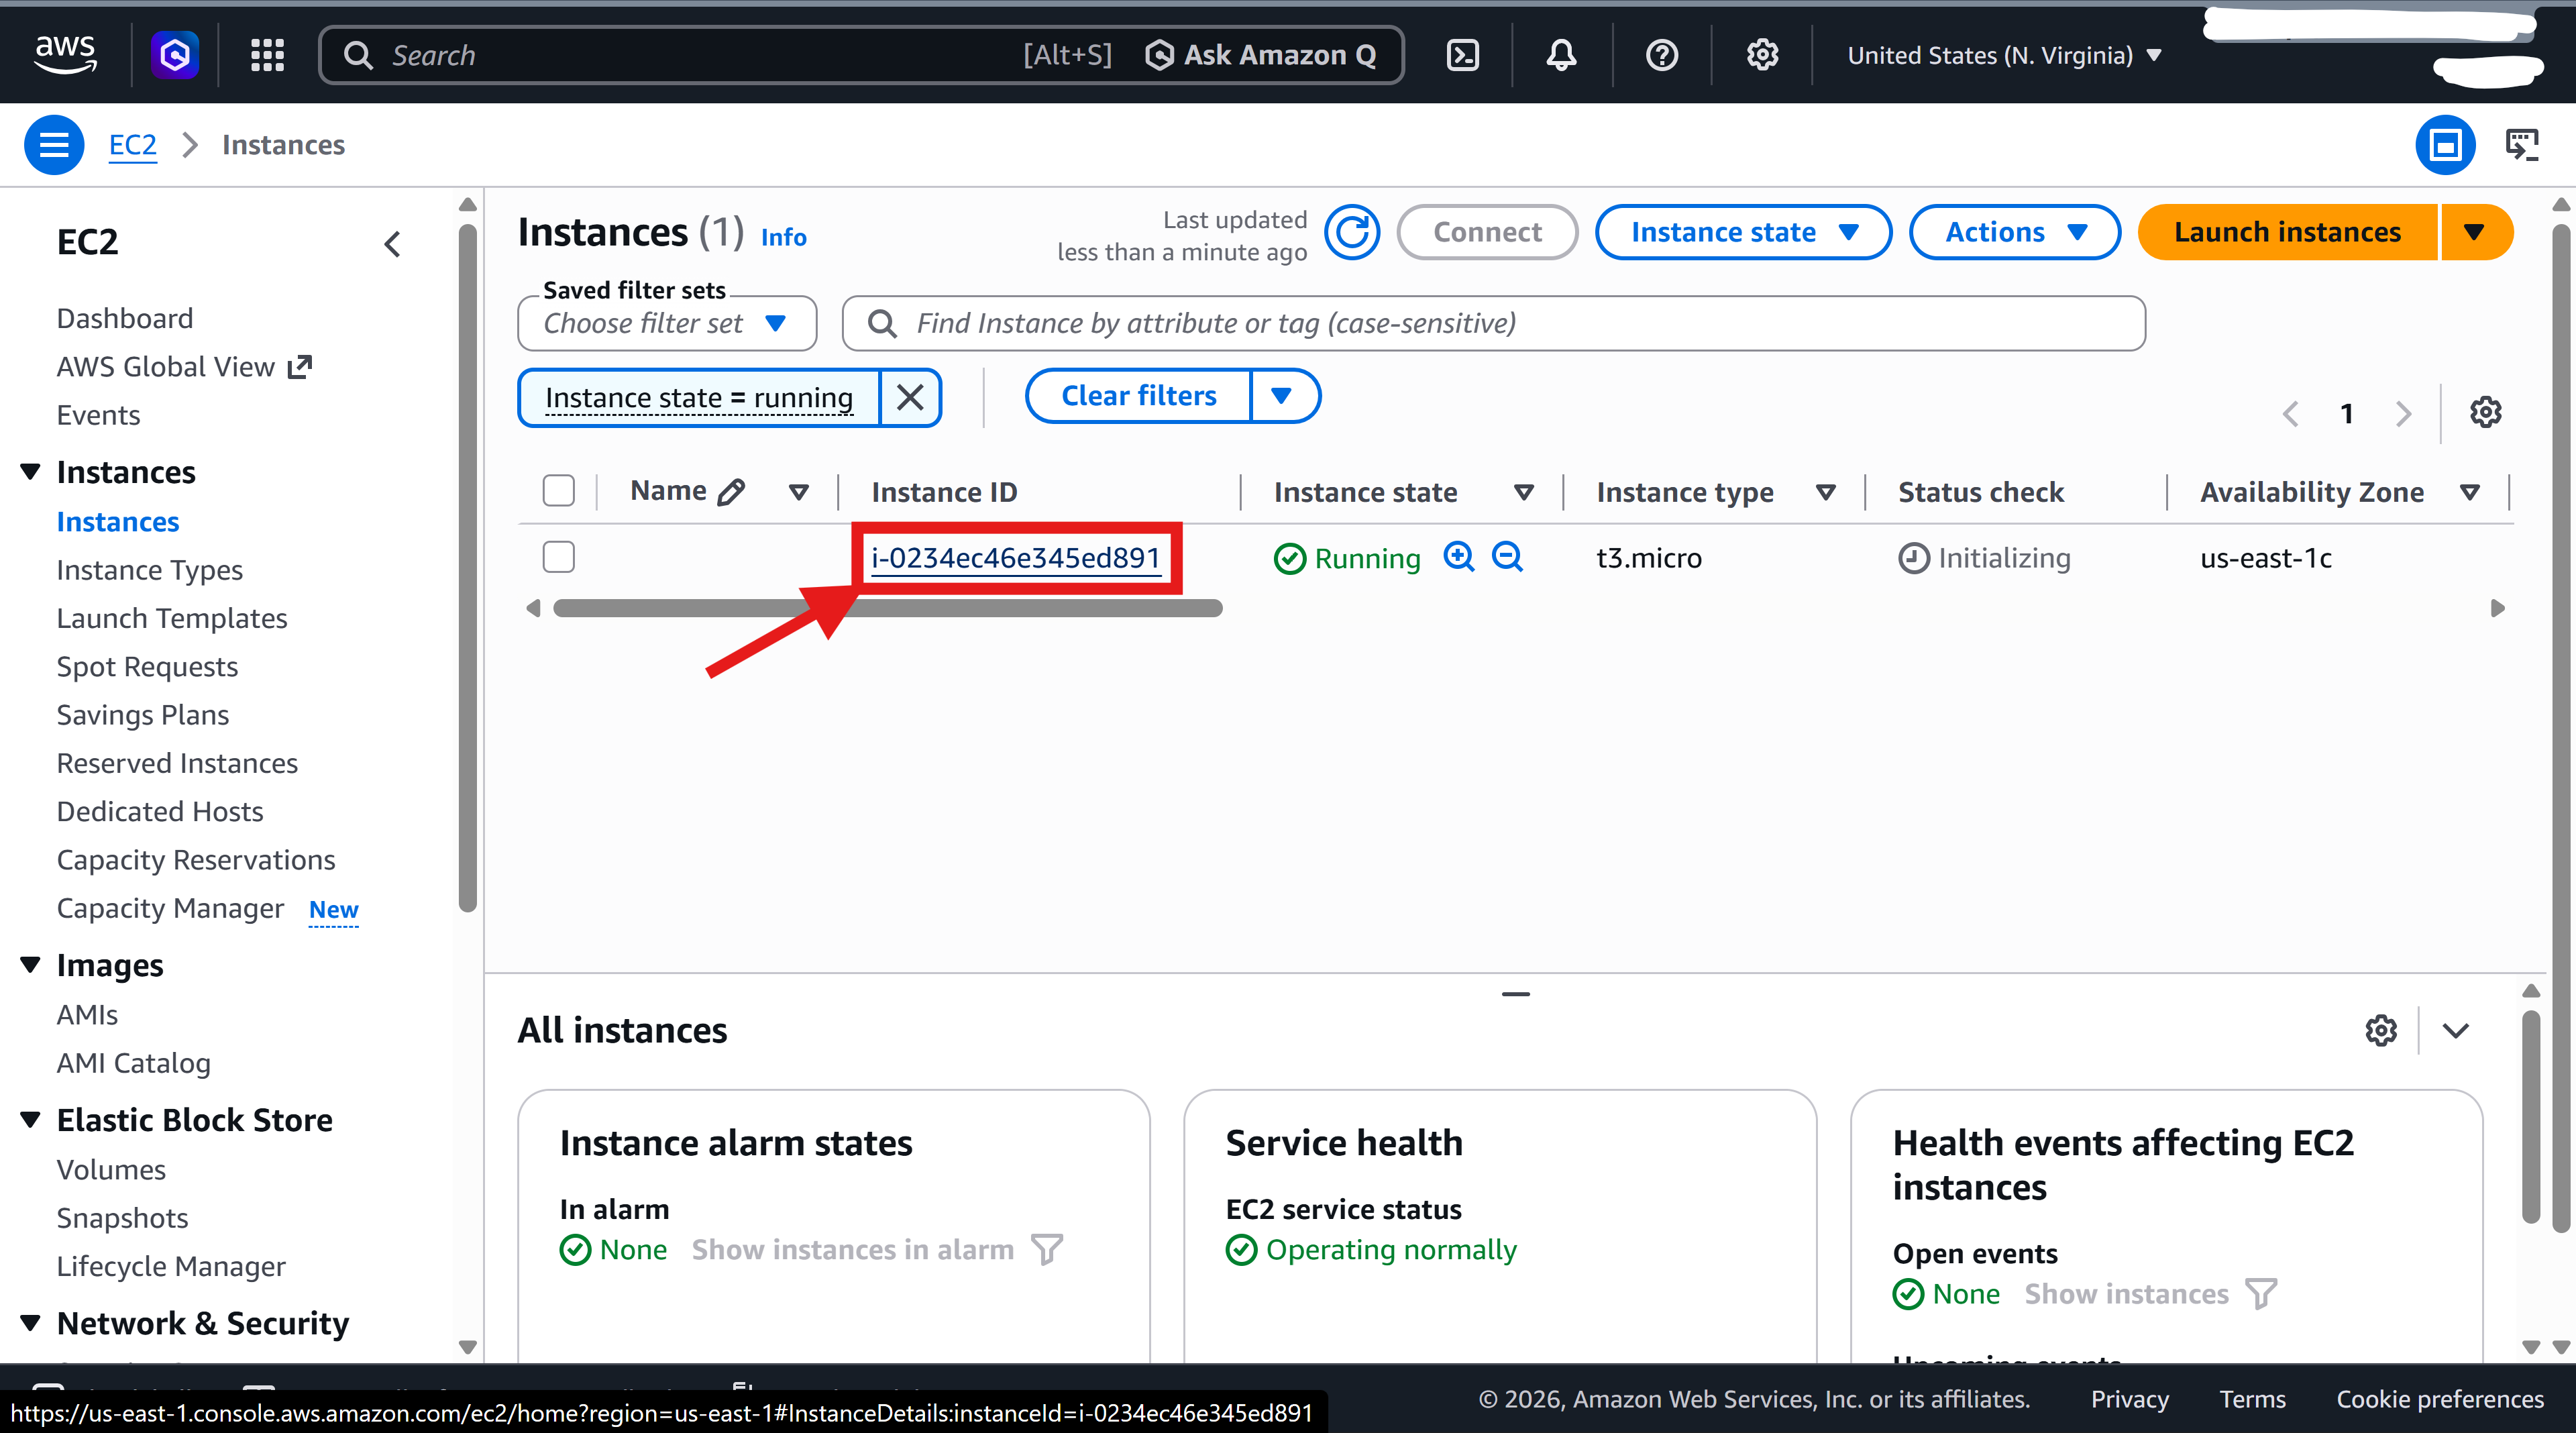
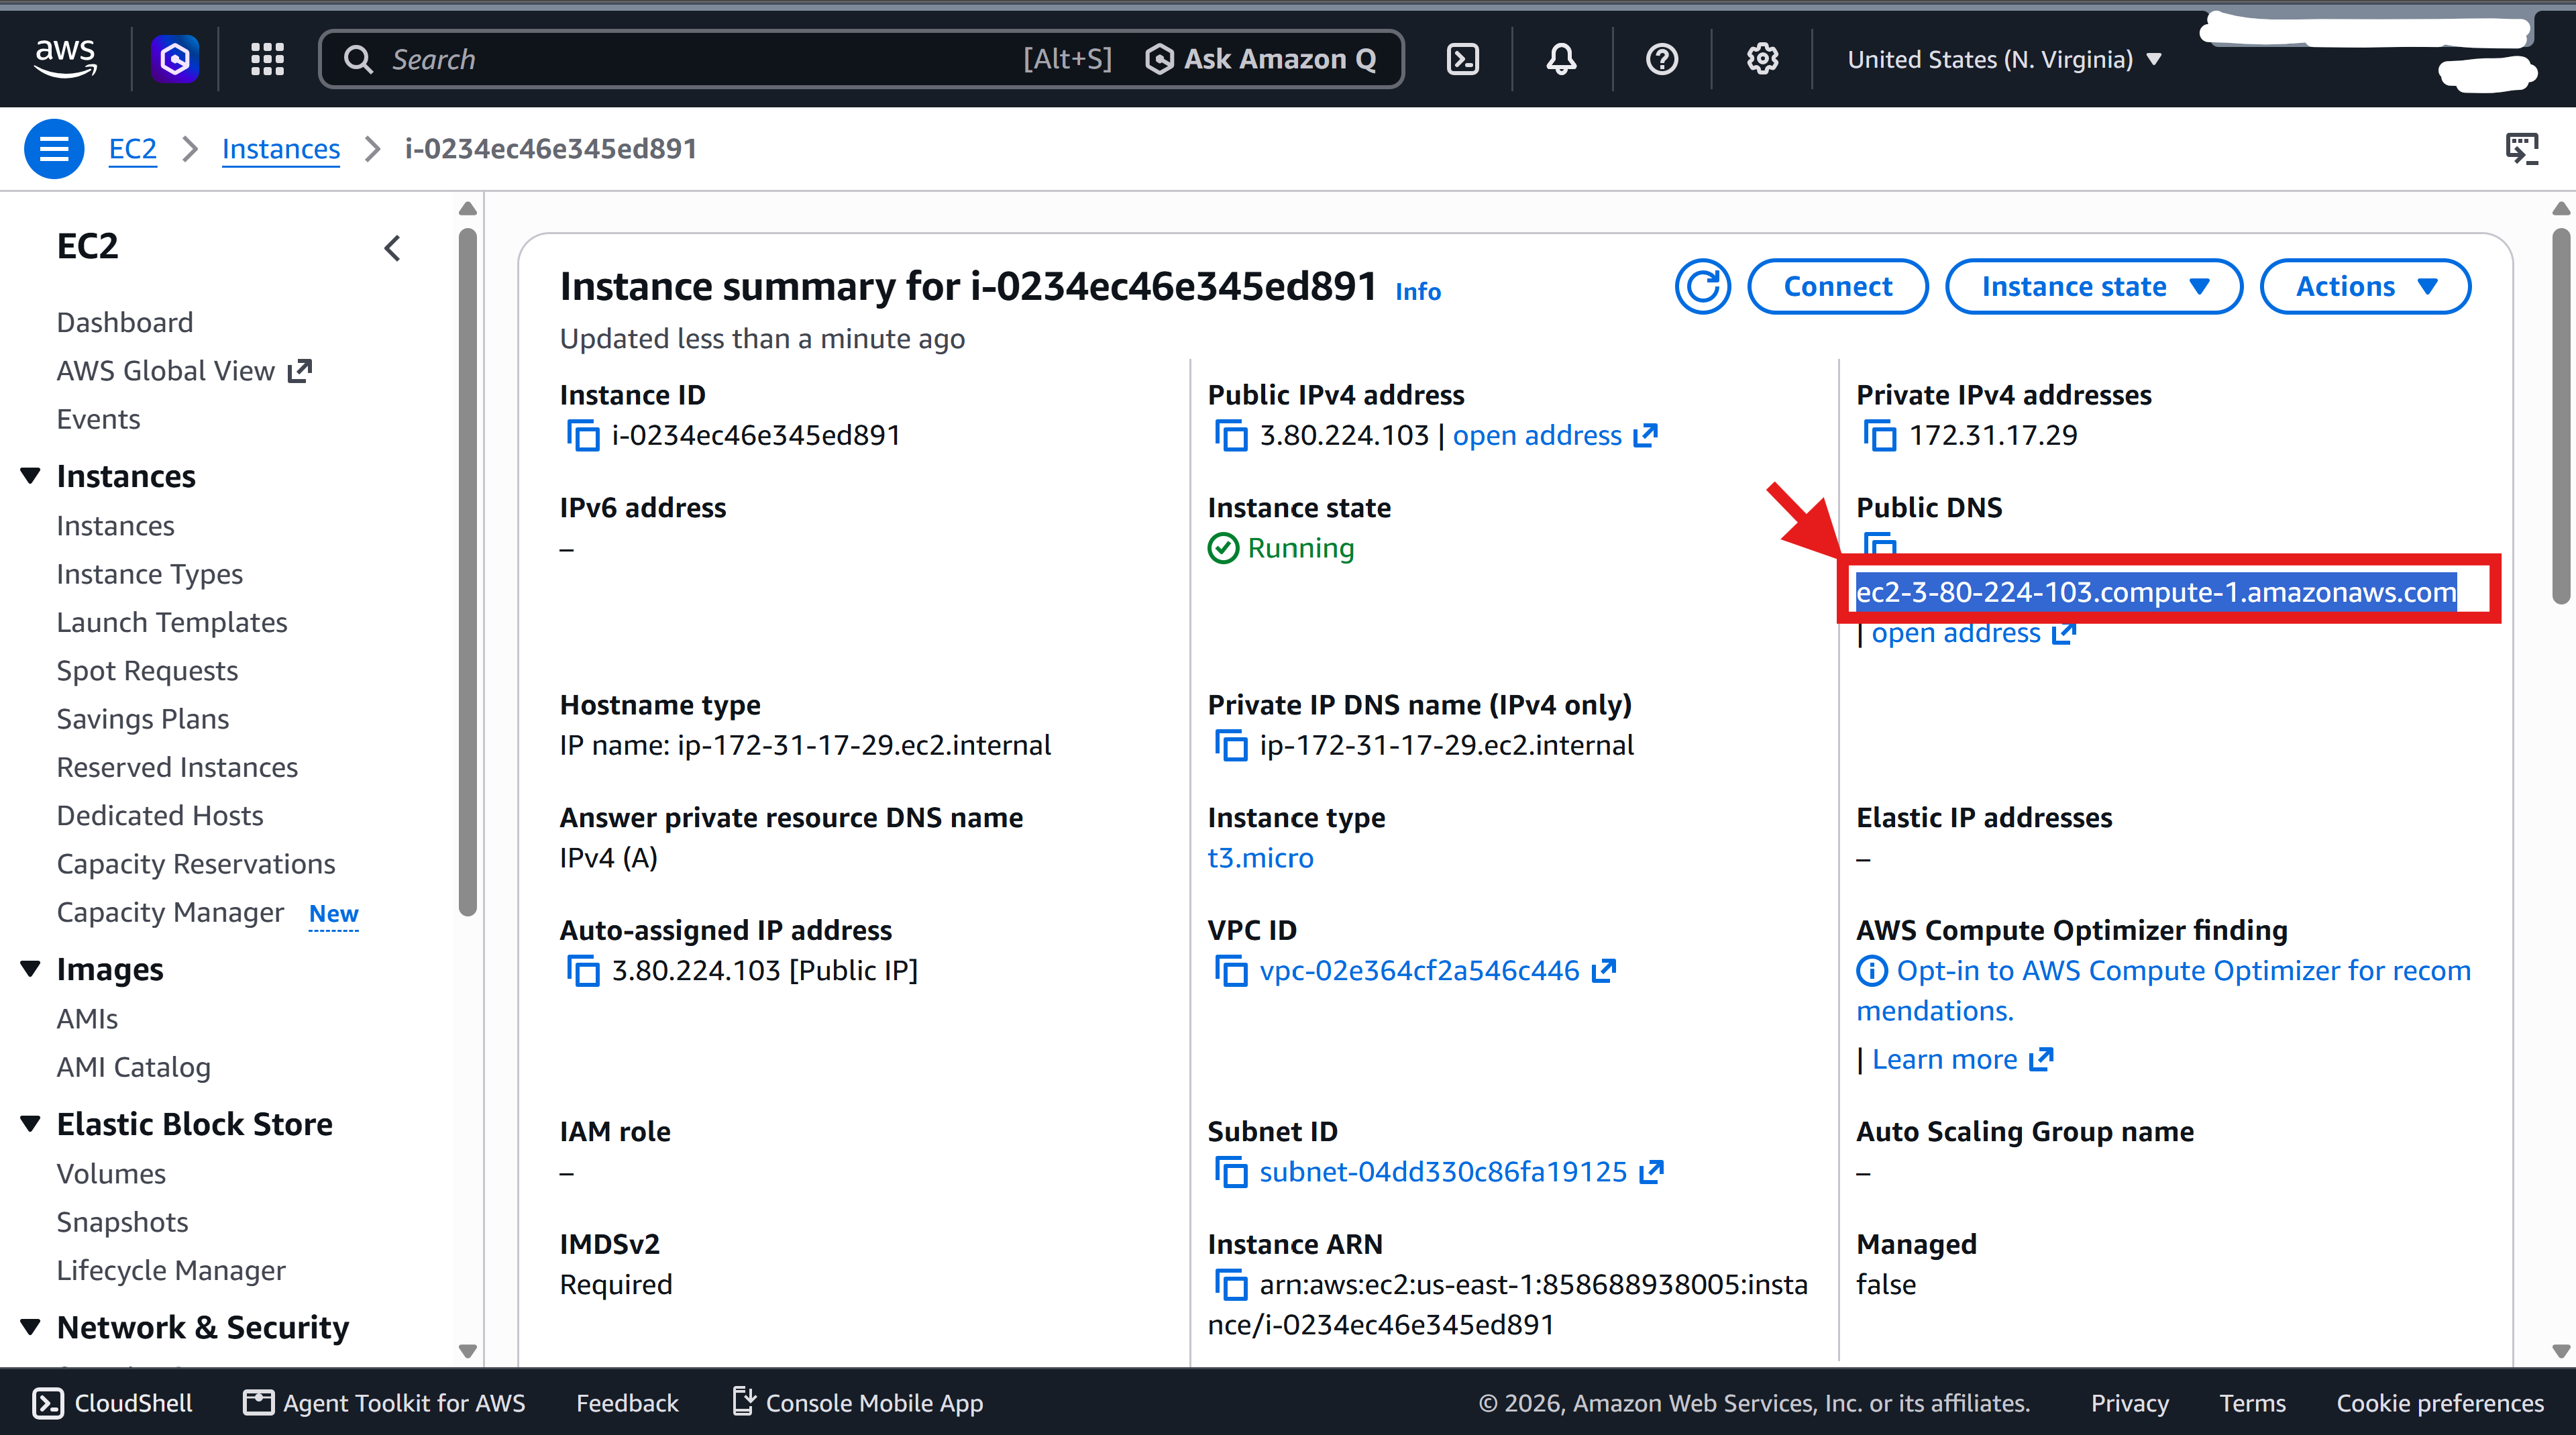
10. Take a note on the Public DNS name, this is the "DNS" field that you will be typing in when running the simulation.
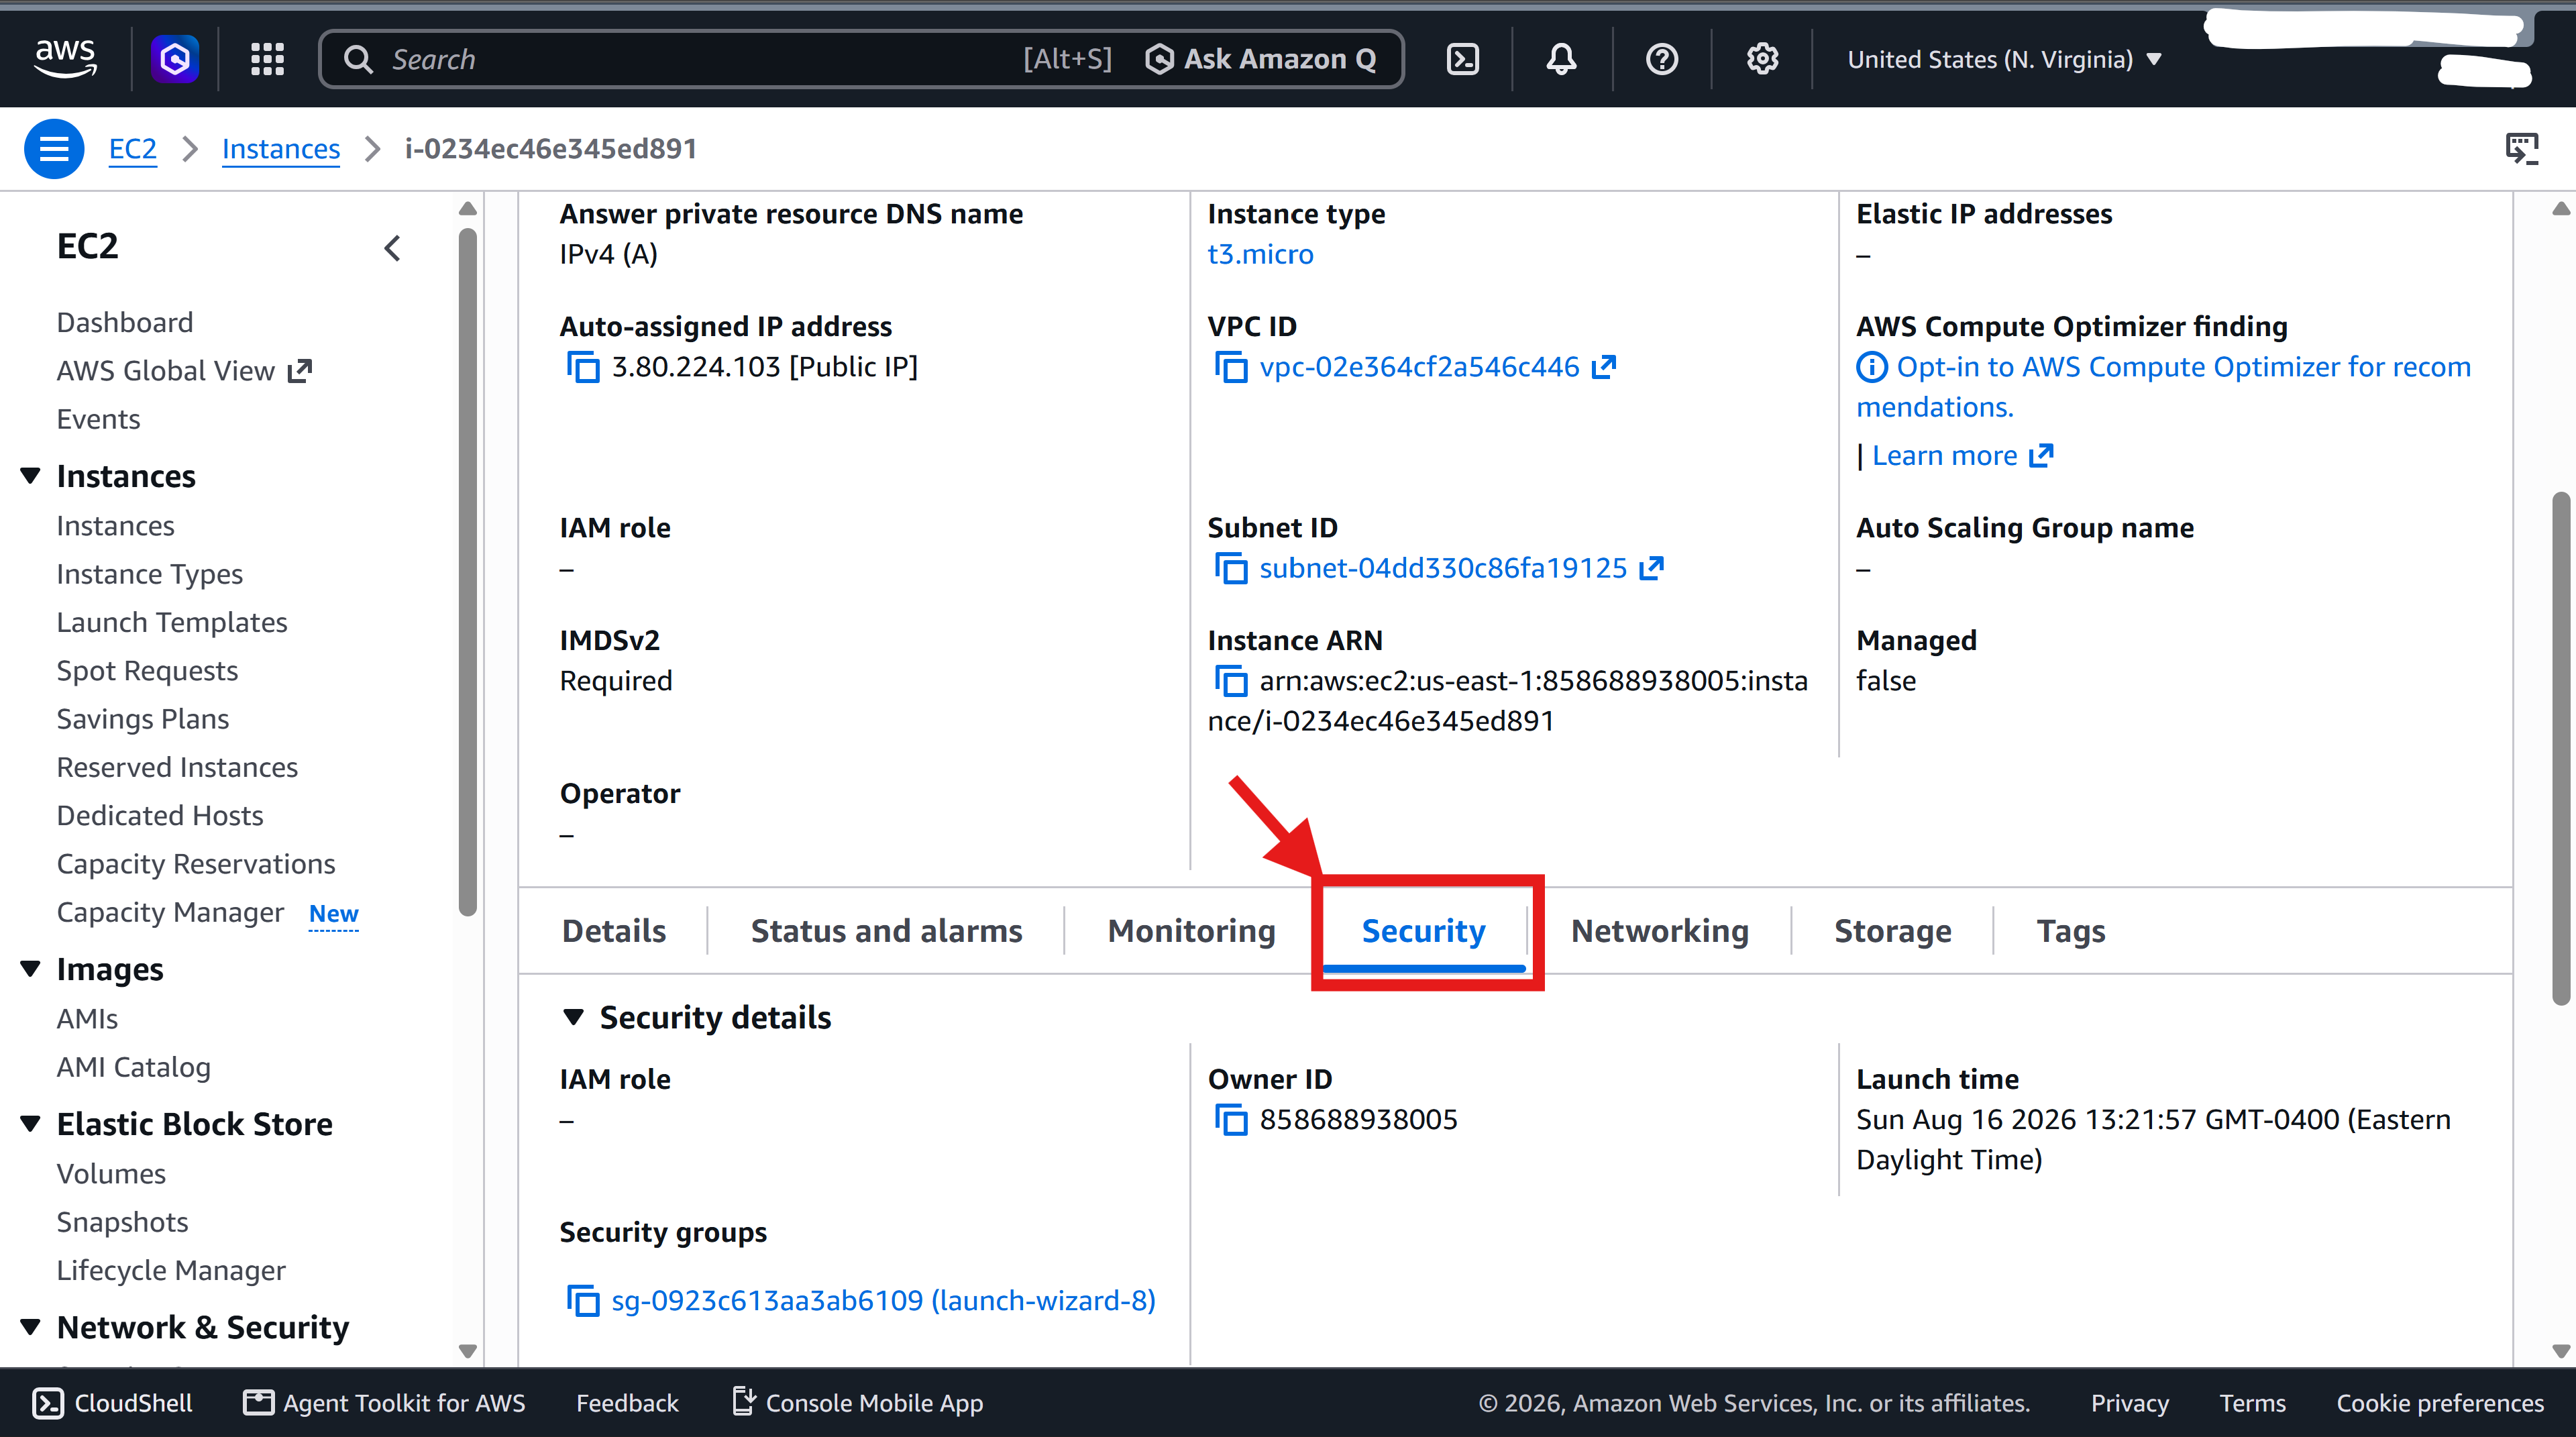
11. Click on "Security". Under this tab, click on the security group.
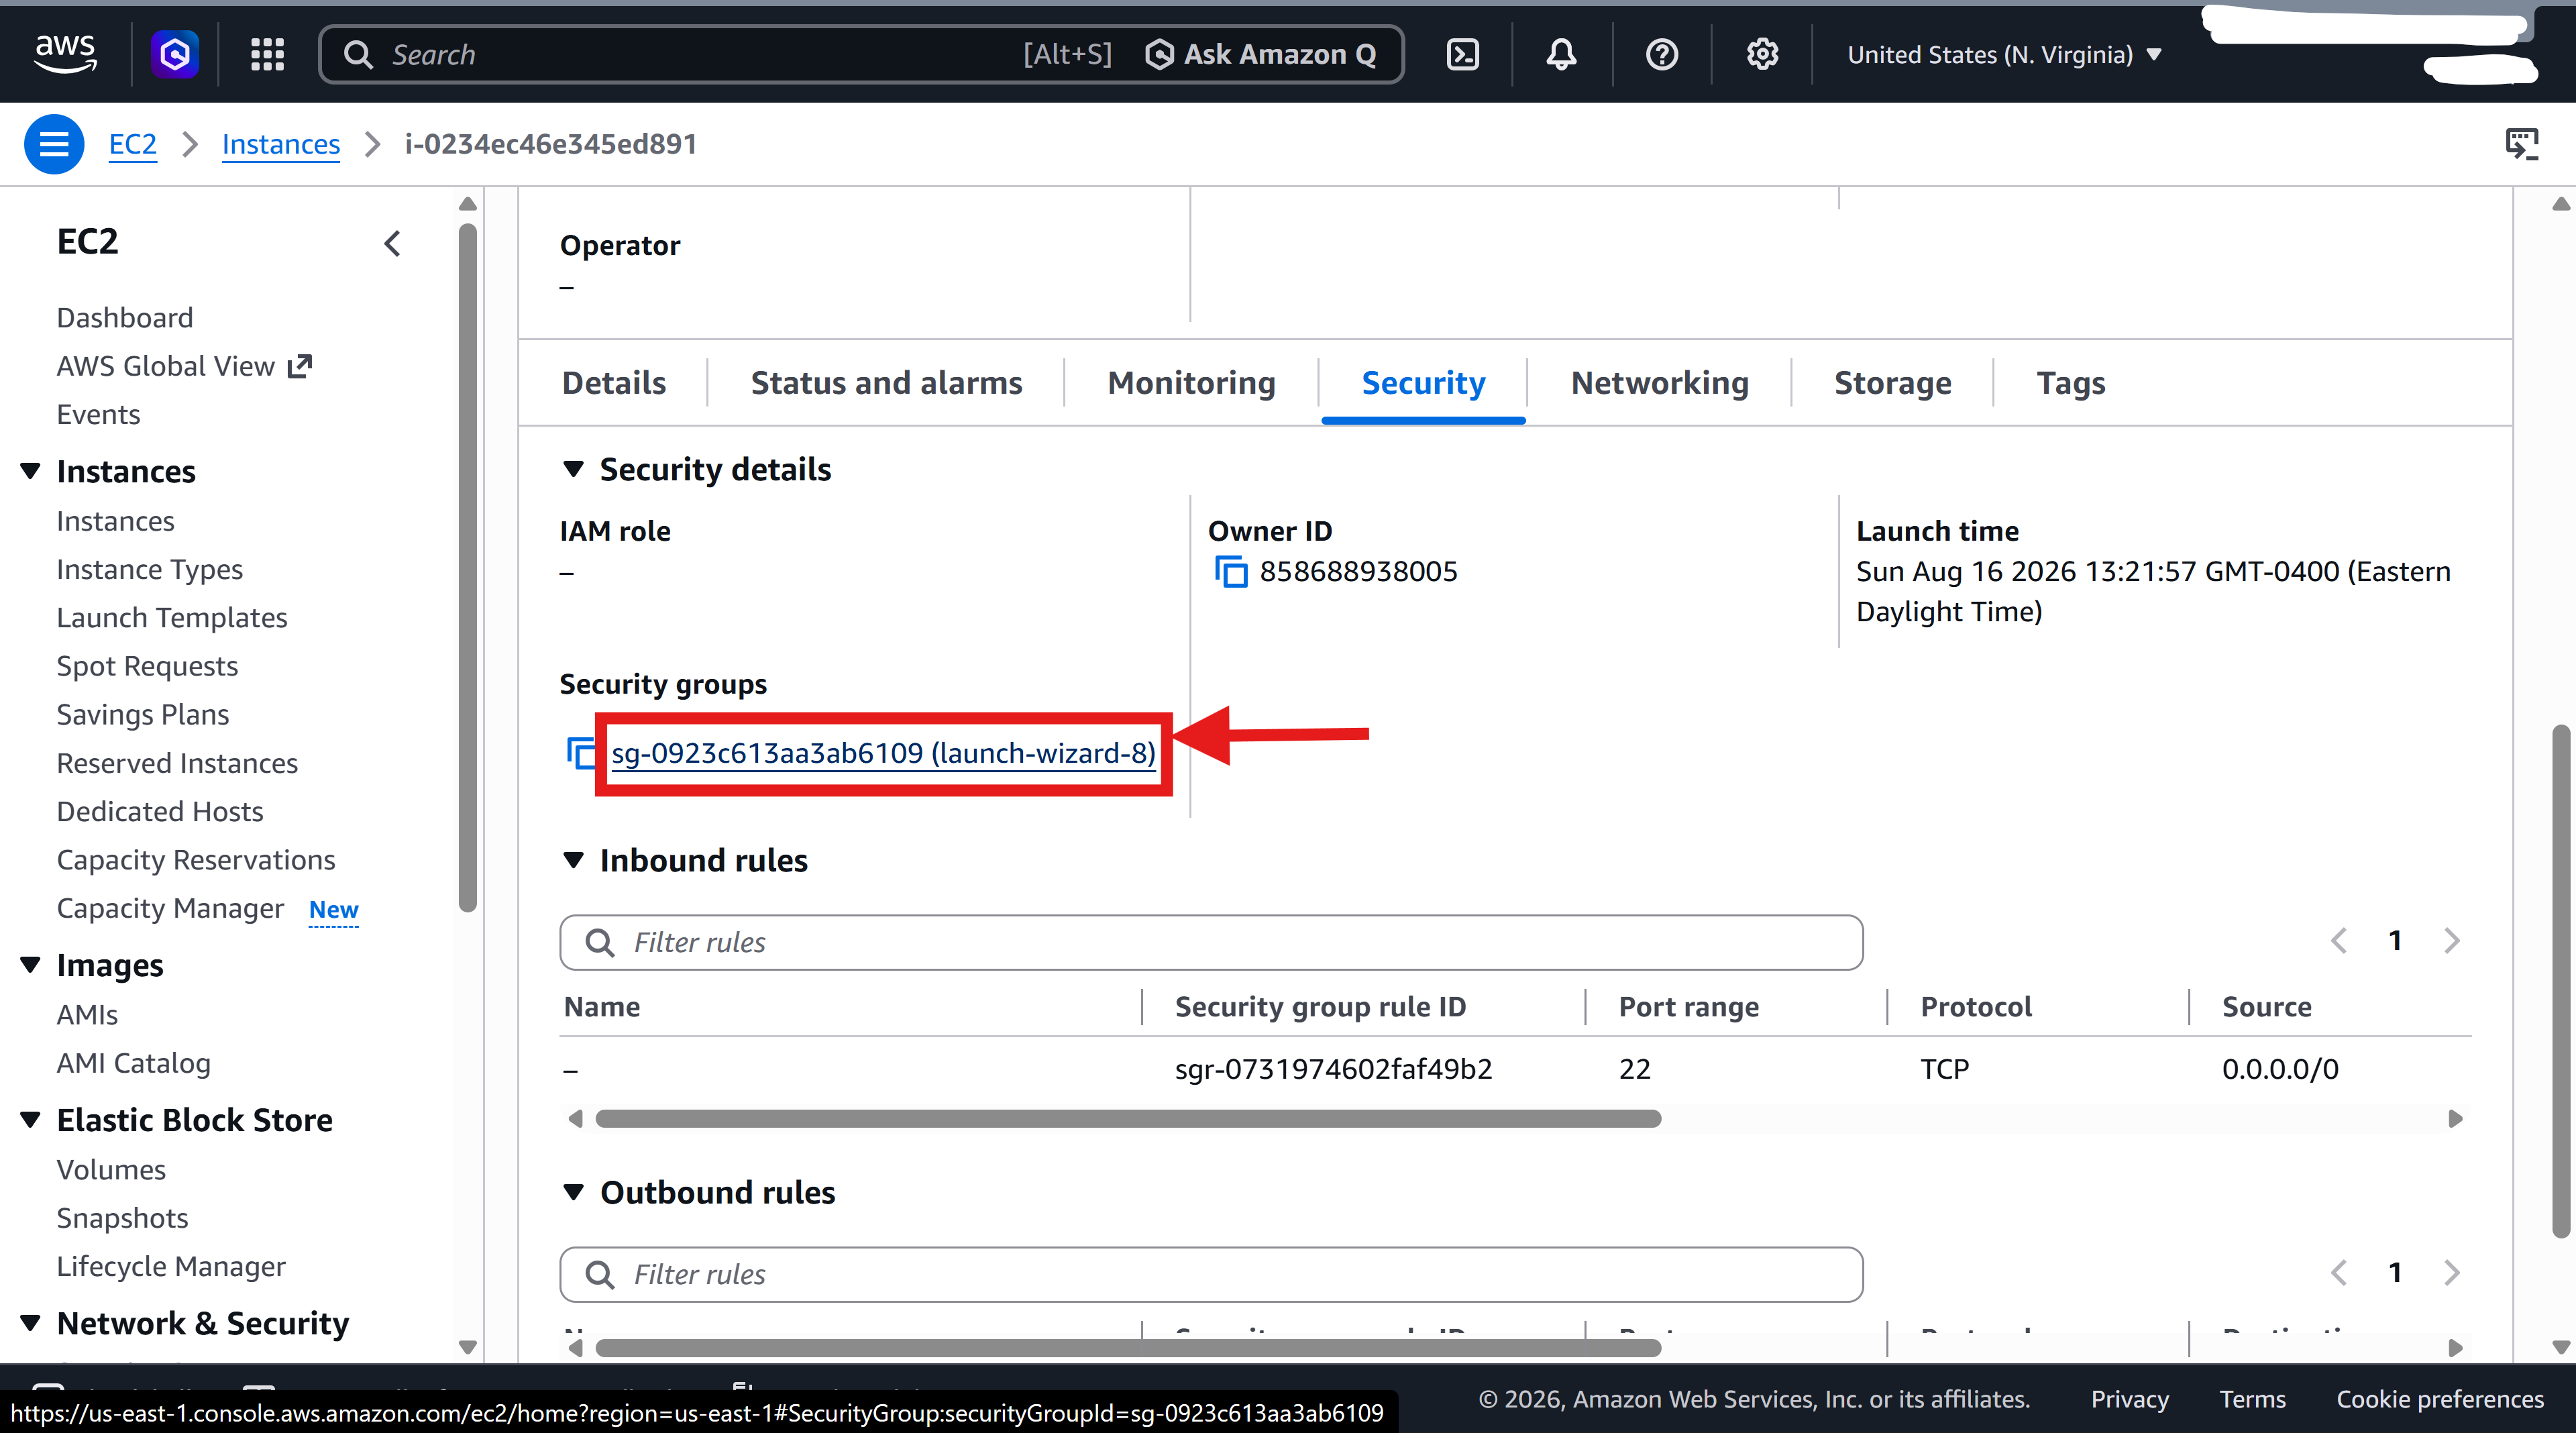
12. Click on "Edit Inbound Rules"
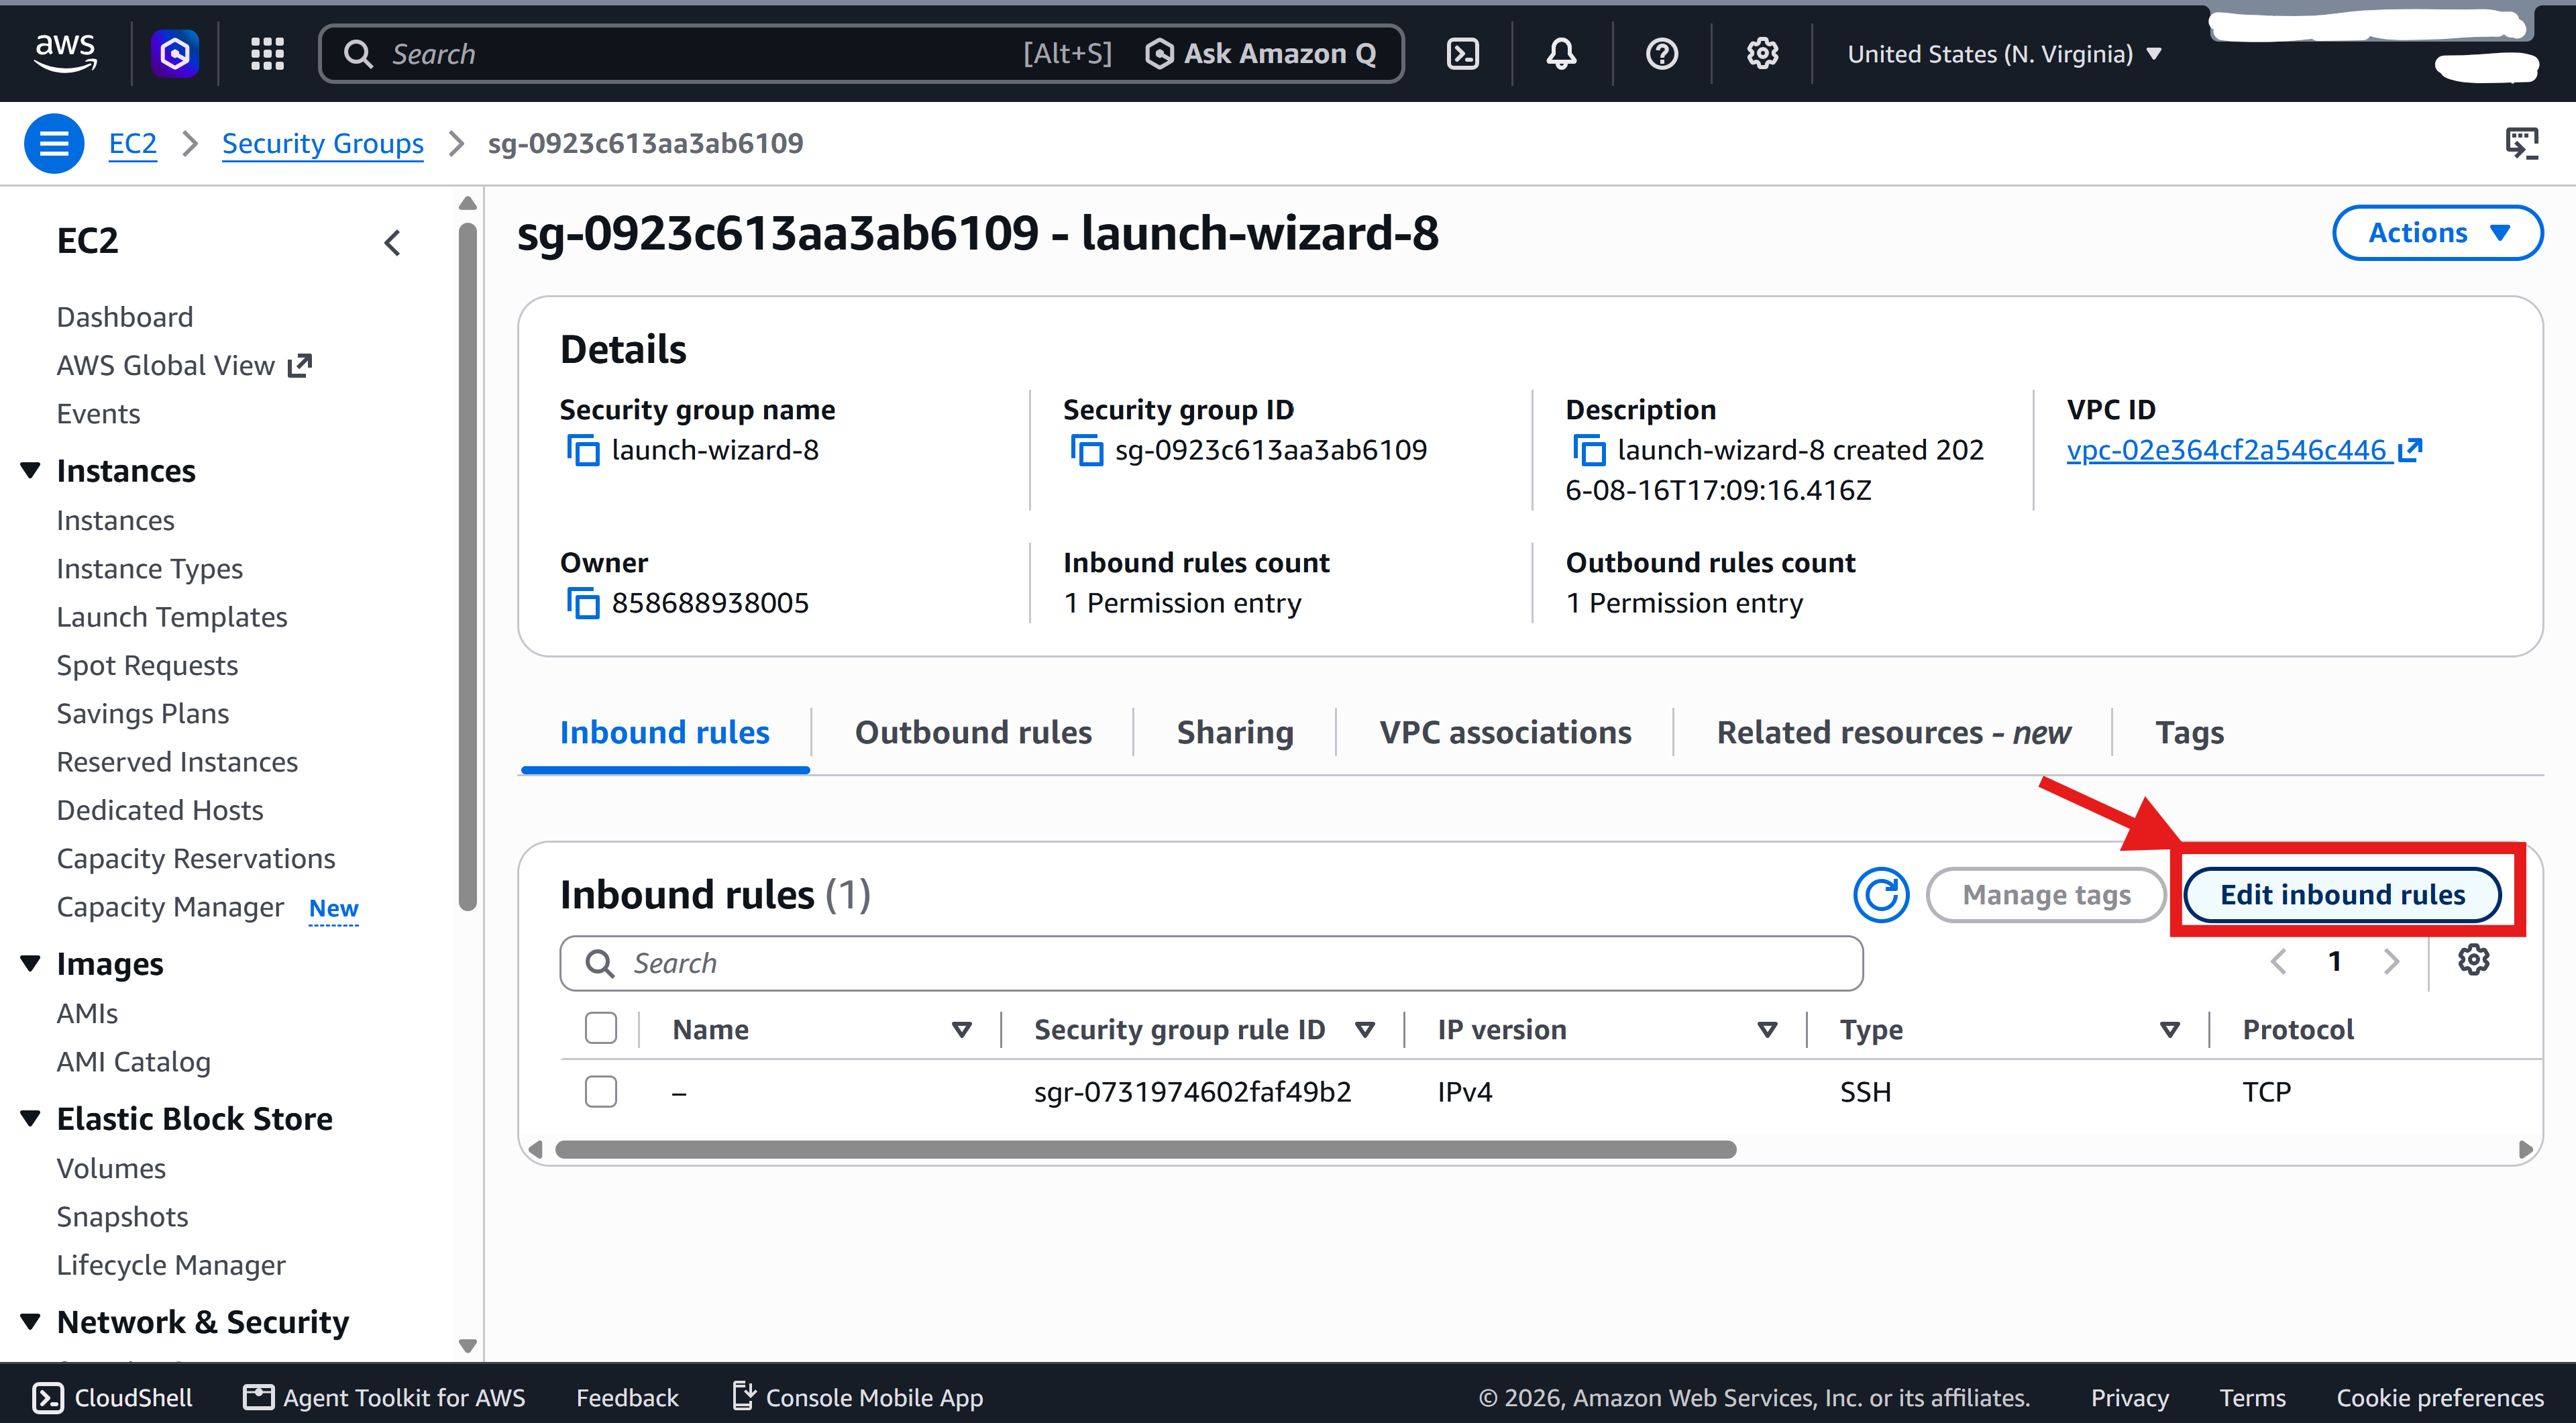
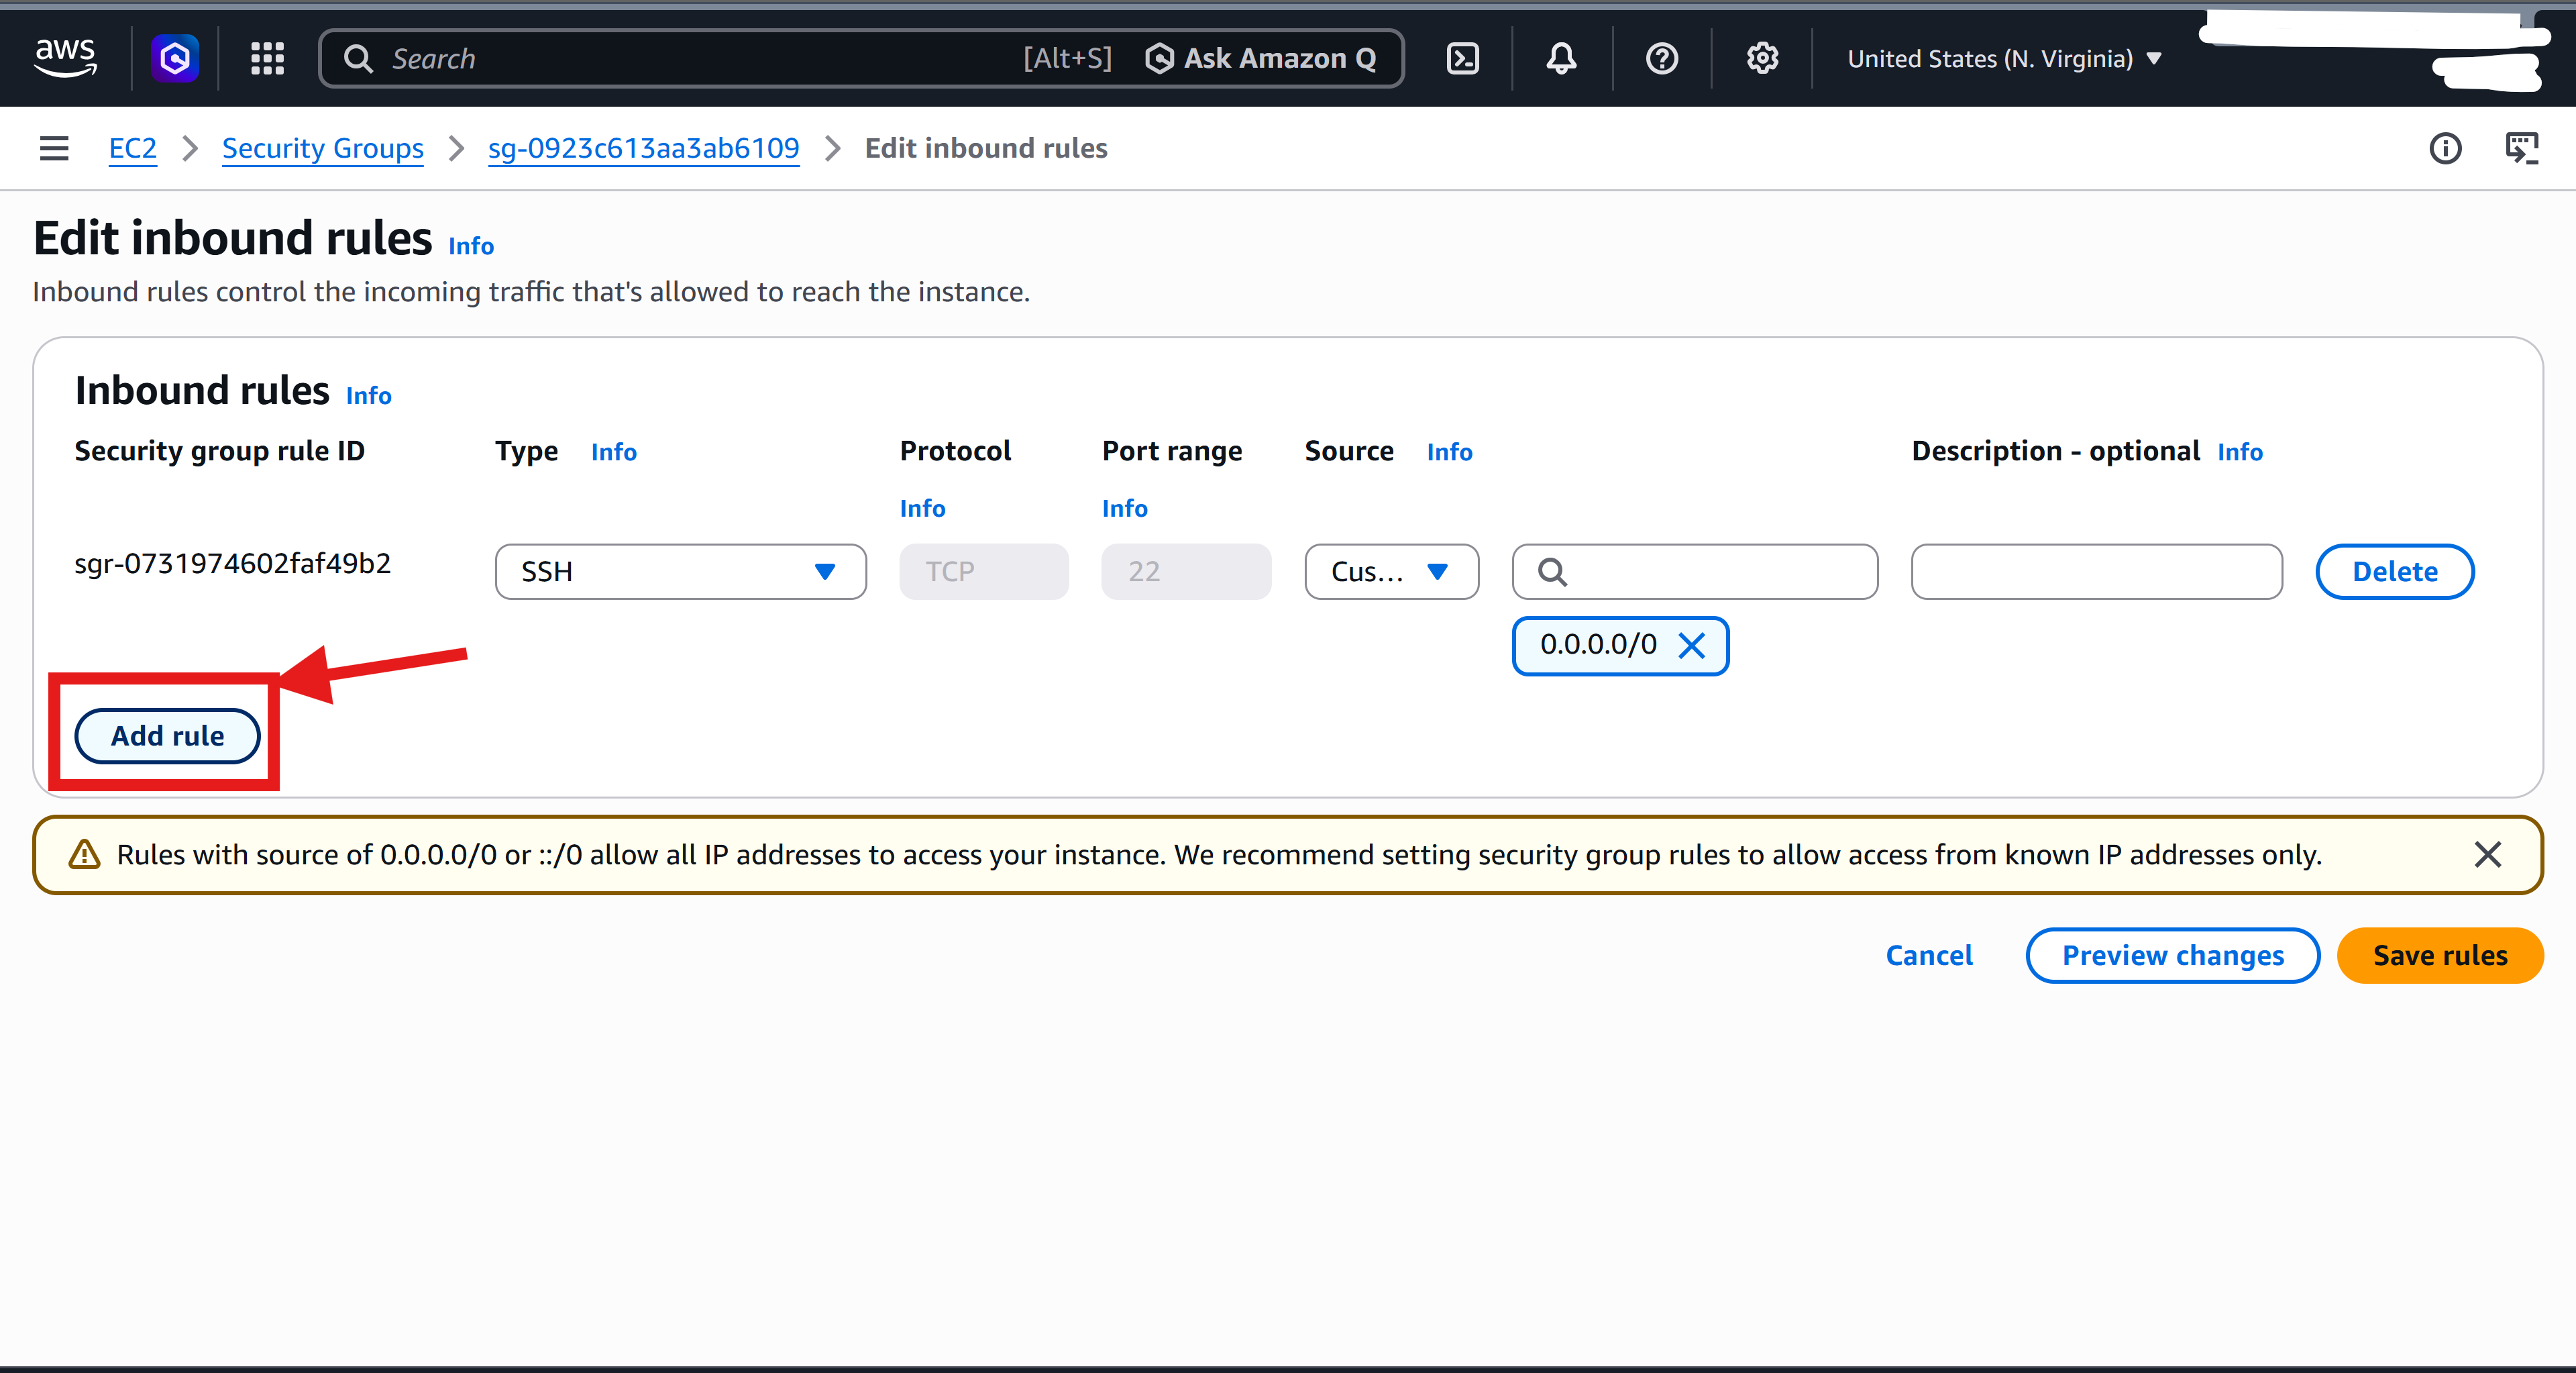
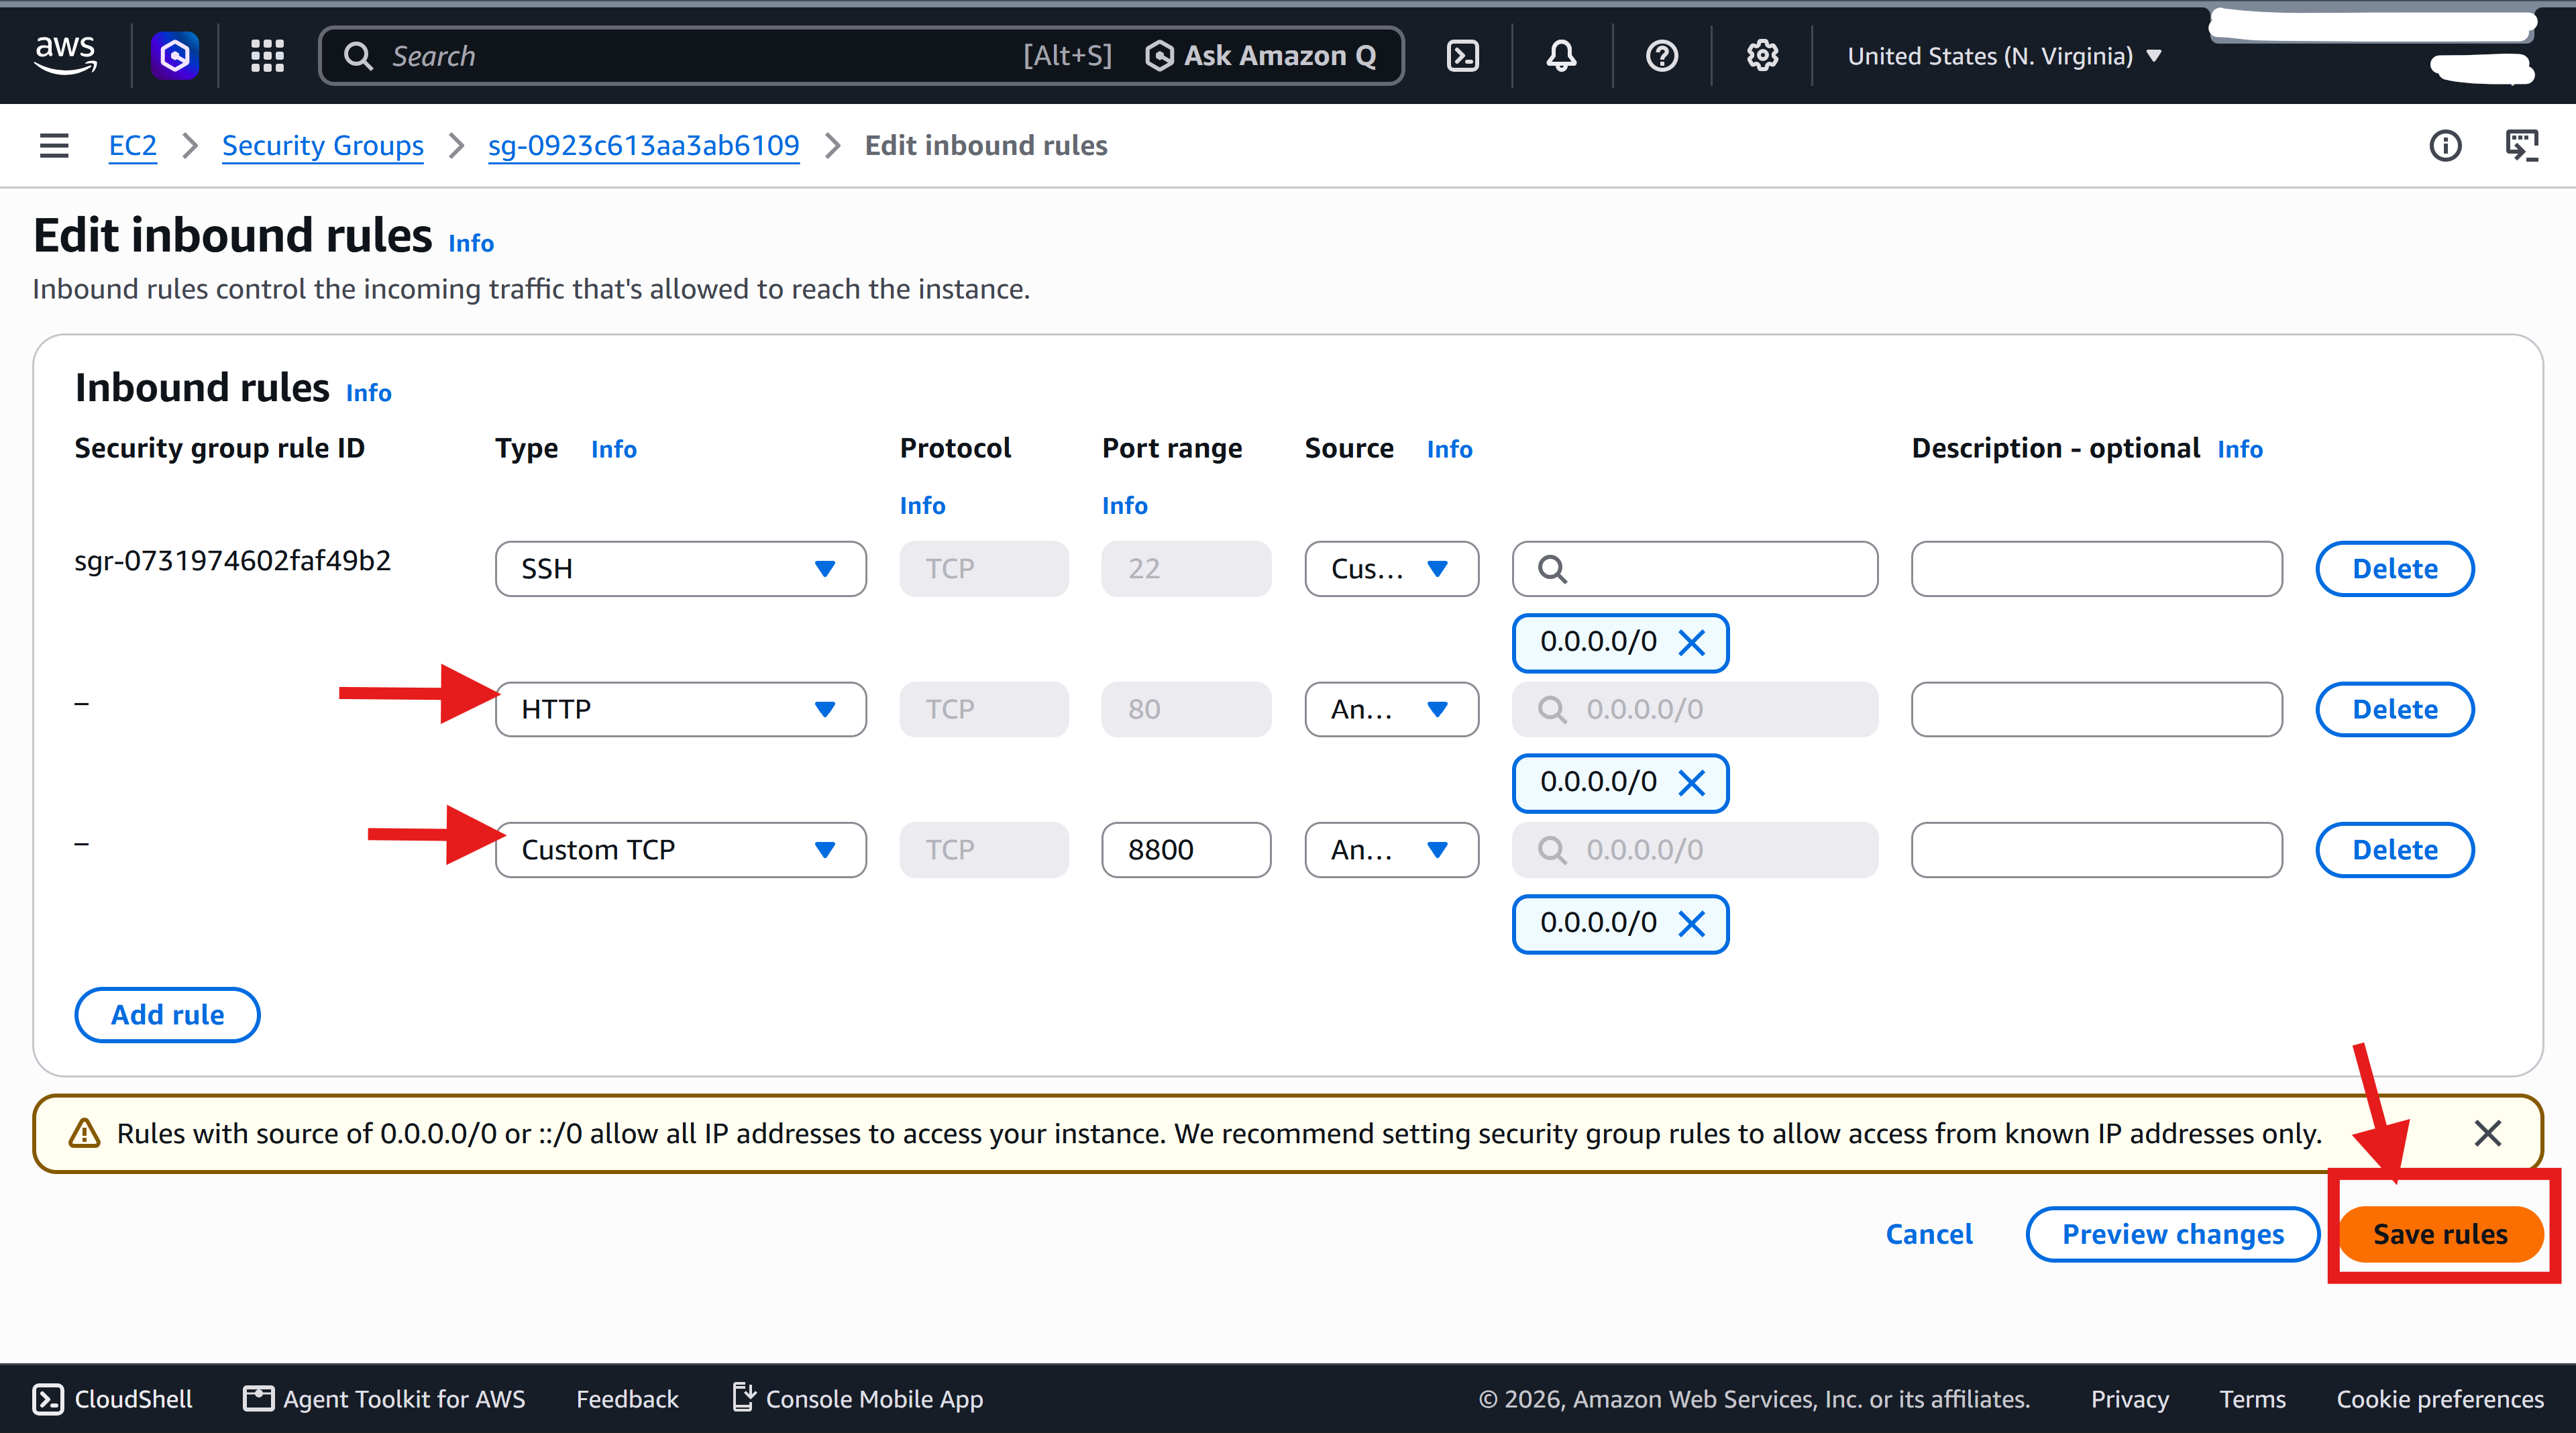
13. Keep the SSH entry as default and add two new rules:
a. Type: HTTP; Port range: 80; Source: 0.0.0.0/0
b. Type: Custom TCP; Port range: a number between 8000 and 8999; Source: 0.0.0.0/0
Take a note on the Custom TCP port range number, this is the "TCP Port" field that you will be typing in when running the simulation.
Getting started - Login and setting up AWS computing instances
How to run a simulation using FullMonteWeb
How to visualize the Dose-Volume-Histogram using FullMonteWeb
How to use the 3D interactive visualizer using FullMonteWeb
Visualization in two other situations using FullMonteWeb
How to run a PDT-SPACE optimization using FullMonteWeb
Next
When you are done with the tutorial, continue to the FullMonte simulator.